Upgrading your kitchen for retirement works best when smart tools and thoughtful layout remodeling move together. Replacing heavy, inefficient gear with ergonomic appliances cuts daily strain while trimming utility and grocery costs.
Most homes lack built-in accessibility features, yet simple counter-ready upgrades immediately improve meal prep safety. You do not need a full gut renovation to gain smoother workflows, cooler cooking zones, and reliable protection against burns.
These twelve retiree-tested gadgets pair directly with practical cabinetry, electrical, and lighting adjustments. Use this manual to select durable tools, avoid recalled hazards, and reshape your cooking space around comfort.
Why Smart Tool Upgrades Start With Your Kitchen Layout
According to AARP, 75% of U.S. adults aged 50 and older want to stay in their current homes as they age. Yet only 10% of U.S. homes currently feature the accessibility upgrades needed to support aging in place.
A 2025 U.S. News & World Report survey reinforces this priority, showing 94% of adults aged 55 and older value staying put. Smart kitchen tools bridge that accessibility gap long before you swing a demolition hammer.
Rising food bills make home cooking even more vital for fixed budgets. An August 2026 AARP and Mathematica analysis of U.S. Bureau of Labor Statistics data revealed monthly grocery prices climbed 33% between 2020 and 2026.
The global kitchenware market reached $73.26 billion in 2025, per Grand View Research. Buying the right tools saves money only when your kitchen layout supports effortless daily use.
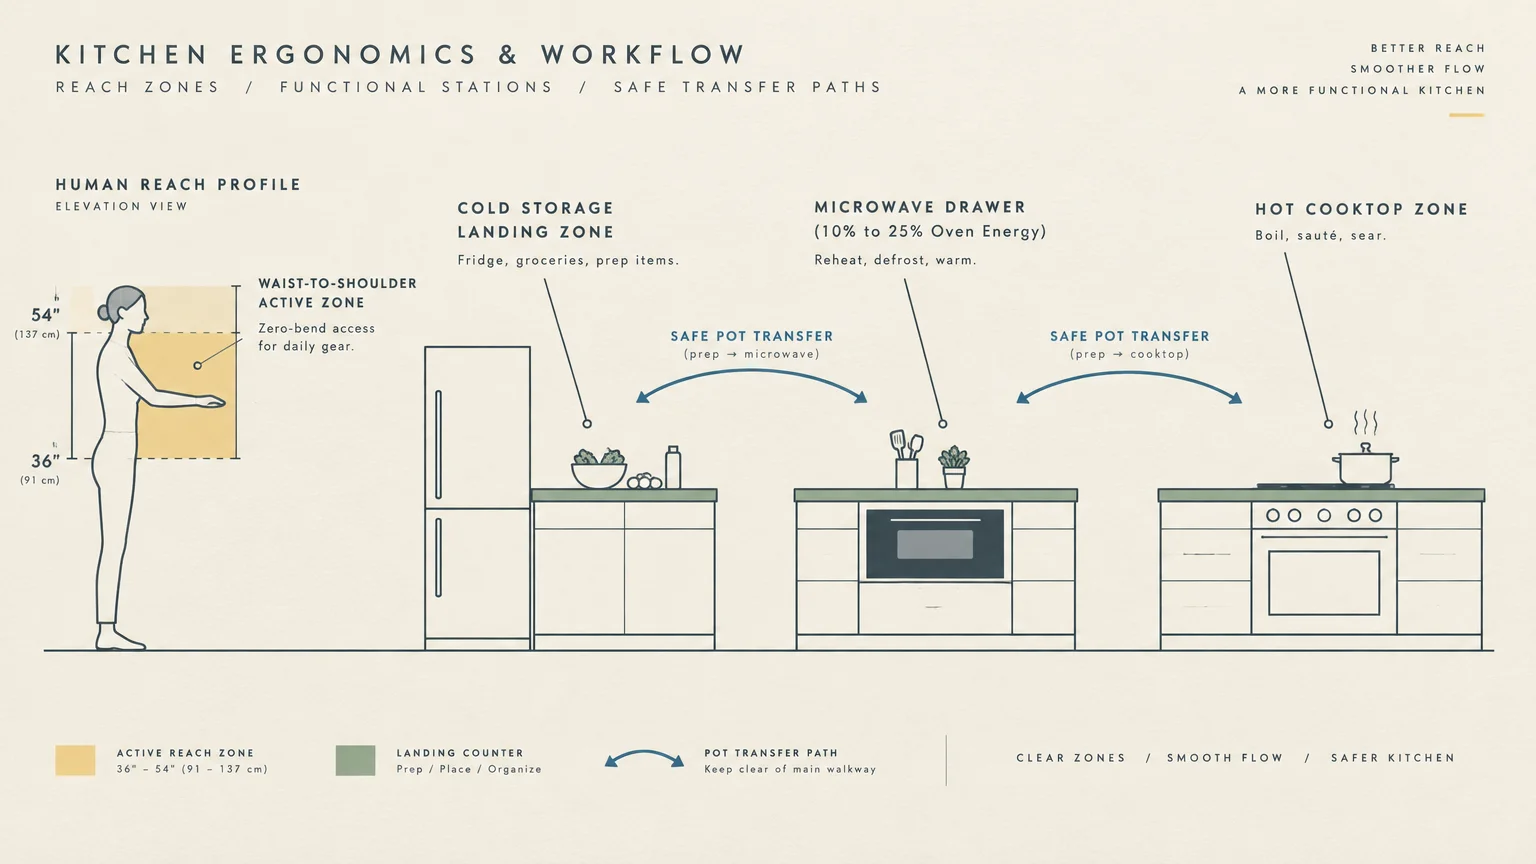
Before purchasing new appliances, map your kitchen around National Kitchen & Bath Association design guidelines for clear traffic lanes and dedicated zones. Separate your cold storage, prep counter, hot cooking surface, and cleanup sink so heavy pots never cross busy walkways.
Traditional work triangles often strain sore knees or shoulders when storage sits too high or too low. Positioning daily tools between waist and shoulder height keeps your posture neutral and eliminates risky step-stool climbs.
Small-portion appliances also reshape how you plan cabinetry and ventilation. Research from Lawrence Berkeley National Laboratory demonstrates that heating small items like potatoes in a microwave uses 10% to 25% of the energy consumed by a conventional oven.
Placing an under-counter microwave drawer or eye-level alcove near your refrigerator keeps quick meals out of your main traffic lane. Pair that zone with a clear landing counter so hot bowls never travel across the room.
12 Kitchen Gadgets Retirees Say Are Worth Every Penny
Selecting reliable gear means looking past flashy infomercials toward durability, safety certifications, and low energy draw. Each gadget below earns its counter space by reducing physical effort and integrating cleanly into a remodeled workflow.
1. Portable Induction Cooktop
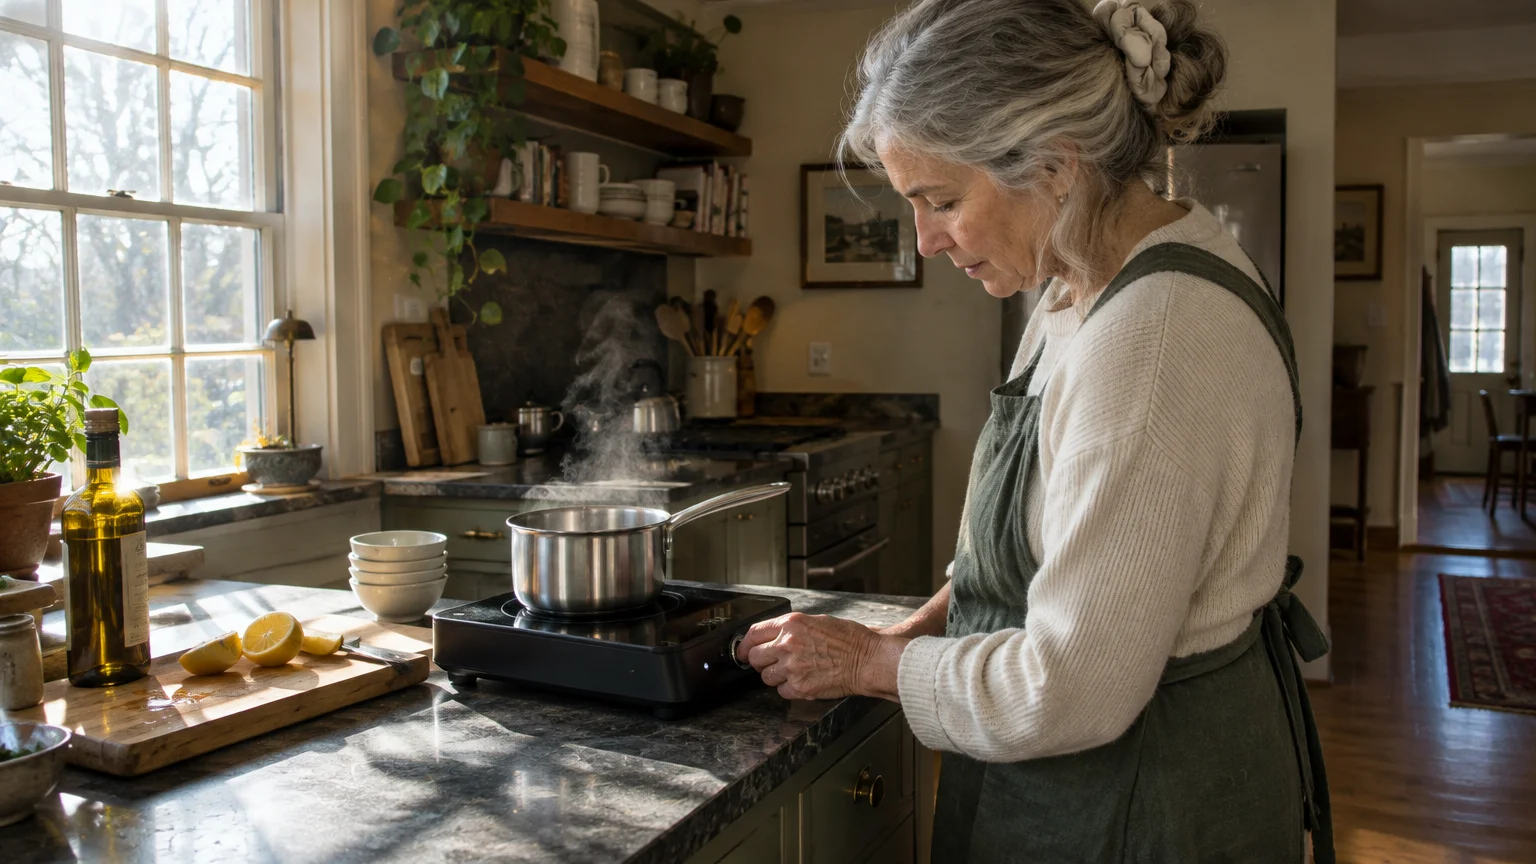
Portable induction units deliver rapid, precise heat without warming up your entire kitchen. Data from ENERGY STAR and the U.S. Department of Energy shows induction transfers roughly 85% of its input energy directly into magnetic cookware.
By comparison, standard electric resistance coils transfer 75% to 80% of energy, while gas burners reach only 30% to 32%. You boil water faster and keep summer cooling bills lower with high-efficiency induction cooking appliances.
Induction also lowers burn and fire hazards compared with open flames or glowing coils. National Fire Protection Association data from 2020 to 2024 links ranges and cooktops to 51% of home cooking fires.
Because induction heats the pan rather than the glass surface, splatters do not bake onto the top and accidental touches cause fewer burns. Plug your portable unit into a dedicated 20-amp outlet near your prep sink for a safe auxiliary burner.
2. Compact 4- to 6-Quart Air Fryer
The U.S. air fryer market is projected around $1.32 billion in 2026, with household adoption reaching 45% to 70% nationwide. Retirees rely on compact models because waist-level basket drawers eliminate bending down to inspect a hot wall oven.
Standard 4- to 6-quart air fryers draw 1,200 to 1,800 watts and consume roughly 0.3 to 0.9 kWh per small meal without lengthy preheating. Full-size electric ovens pull 2,000 to 5,000 watts and burn 1.0 to 2.5 kWh including preheat time.
With U.S. residential electricity averaging around $0.18 per kWh in September 2026, those savings compound weekly. October 2026 testing by Which? confirmed air fryers often use less than half the electricity of conventional ovens for one to three servings.
Expect to pay $65 to $100 for a reliable 4- to 6-quart basket model, or $125 to $160 for larger 10-quart or multi-cooker combos. Before buying, inspect federal consumer product safety recall notices to avoid hazardous designs.
On October 15, 2026, the U.S. Consumer Product Safety Commission urged owners to stop using Kalorik MAXX French-door air fryer ovens. Spring-loaded doors on those models snapped shut on users and caused dozens of burns.
Earlier recalls between 2022 and 2024 also pulled over 2 million air fryers—plus more than 635,000 Insignia units—due to overheating hazards. Always park your air fryer on heat-resistant stone with open clearance beneath your range hood to vent grease vapor.
3. Automatic Battery-Powered Jar Opener
Stubborn vacuum seals turn simple meal prep into a painful chore when joint stiffness sets in. CDC National Center for Health Statistics data shows diagnosed arthritis affects 44.0% of adults aged 65 to 74 and 53.9% of adults 75 and older.
Across all adults 18 and older, that age-adjusted rate sits at just 18.9%. Overall CDC and NIH figures indicate 50.4% of adults over 65 live with arthritis, and 45.4% of that group face daily activity limitations.
An automatic battery-powered jar opener clamps onto lids with motorized jaws and twists them off at the push of a button. Priced around $15 to $20, this compact tool fits inside a shallow top drawer right beside your pantry.
4. Smooth-Edge Electric Can Opener
Manual crank openers force your fingers to pinch tightly while twisting your wrist under load. Switching to a hands-free electric smooth-edge opener lets you open soup, beans, and broth without gripping or wrestling sharp metal rims.
Reliable countertop models typically retail for $25 to $30 and cut cleanly along the outside seam of the rim. Tuck yours into a corner outlet bay or an appliance garage so it stays plugged in without cluttering your main prep counter.
5. Two-Handled Ergonomic Cookware
Lifting a loaded skillet by one long lever puts intense torque on weak wrists and elbows. Two-handled cookware—including braisers, Dutch ovens, and double-loop skillets—splits the load evenly across both hands for balanced transfers.
Products carrying the Arthritis Foundation Ease of Use certification undergo real-world testing by people with joint pain to verify grip comfort. Look for two-handled stainless steel or enameled cast-iron pots that double as magnetic cookware for induction burners.
Store your heaviest two-handled pots in deep lower pull-out drawers rather than stacked inside dark corner cabinets. Sliding a drawer out lets you lift straight up with bent knees instead of reaching awkwardly forward.
6. Instant-Read Digital Meat Thermometer
Guessing doneness by slicing into meat ruins moisture and exposes older households to serious illness. The CDC warns that adults 65 and older—especially those over 75—face heightened vulnerability to severe foodborne pathogens like Listeria monocytogenes.
Keep a backlit digital meat thermometer in a top cutlery divider right beside your stove so checking food takes three seconds. Follow official safe minimum internal cooking temperatures published by the USDA and FoodSafety.gov.
Cook all poultry, leftovers, and casseroles to 165°F, and bring ground beef, pork, veal, lamb, and egg dishes to 160°F. Whole cuts of beef, pork, veal, lamb, raw ham, fish, and shellfish require 145°F, with a three-minute rest for roasts and chops.
Reheat precooked ham packaged in a USDA-inspected plant to 140°F, or 165°F for all other varieties. Large backlit digits ensure you read temperatures accurately under under-cabinet task lighting without hunting for reading glasses.
7. Programmable Slow Cooker With Auto-Warm
Slow cookers stretch affordable cuts of meat into tender, multi-day batches that soften the impact of 33% grocery inflation. Models that shift automatically to a warm setting hold hot meals safely at or above 140°F until dinner.
Stick to USDA and university extension rules whenever you load the ceramic insert. Always thaw meat or poultry in the refrigerator beforehand, and fill the pot between one-half and two-thirds full for even heating.
Resist lifting the glass lid during cooking, because peeking drops internal temperatures by 10°F to 15°F and adds roughly 20 minutes of recovery time. Choose simple slow cookers over risky pressurized multi-cookers when safety is your top priority.
In February 2026, the CPSC warned owners to stop using about 43,500 Gourmia pressure cookers because pressurized lids could open unexpectedly. An October 2026 CPSC warning also flagged roughly 393,000 Tristar 6-quart Power Quick Pot units after 24 reports of scalding contents expelling.
Traditional unpressurized slow cookers eliminate lid-lock hazards while delivering dependable set-and-forget convenience. Park your slow cooker under an exterior-vented hood or on a heat-safe peninsula counter away from overhanging wood cabinets.
8. Suction-Base Rotary Grater and Rolling Garlic Chopper
Flat box graters slip easily on smooth counters and threaten knuckles with every downward stroke. Both suction-base rotary graters and rolling garlic choppers earn direct recommendations from the Arthritis Foundation for reducing painful pinching.
Turning a broad crank handle shreds blocks of cheddar or Parmesan cleanly while keeping your fingers safely outside the drum. Rolling garlic choppers mince cloves in seconds simply by pushing the wheeled housing back and forth across your cutting board.
Suction bases lock tightest onto smooth, non-porous surfaces such as polished quartz, granite, or solid-surface acrylic. If your remodel features textured soapstone or butcher block, reserve a smooth pastry slab near your prep sink for suction tools.
9. Magnetic Nested Measuring Cups
Fumbling with plastic rings and tangled measuring cups slows down baking and frustrates stiff fingers. Magnetic nested measuring cups—also recommended by the Arthritis Foundation—snap neatly together without clasps and release individually with zero prying.
Choose stainless steel sets with wide, cushioned handles and permanently stamped measurements that never fade in the dishwasher. Store them flat inside a shallow drawer insert beneath your baking counter so every size stays visible at a glance.
10. Lightweight Cushioned-Grip Spin Scrubber
Scrubbing baked-on casserole dishes by hand flares up wrist and thumb pain long after dinner ends. Ergonomic power scrubbers let a motorized head handle the friction while your hand simply guides the tool.
Look for arthritis-friendly designs featuring cushioned thermoplastic rubber or silicone grips with a 1.5- to 2-inch handle diameter that prevents tight pinching. Keep total tool weight between 0.5 and 1 pound, powered by a motor spinning at 200 to 300 RPM.
Pair your scrubber with a deep single-bowl undermount sink and a pull-down high-arc faucet. That combination gives bulky baking sheets plenty of clearance without forcing you to twist your back over a shallow divider.
11. Spring-Loaded Bagel and Bread Slicer
Holding a round bagel steady with one hand while sawing through the crust with a serrated knife invites kitchen cuts. The Arthritis Foundation recommends bagel slicers for arthritic hands.
You drop the bagel into the transparent cradle and press the enclosed guillotine handle straight down in one smooth motion. Because the blade stays shielded inside the housing, your fingers never approach the cutting edge.
12. Dual Fridge and Freezer Appliance Thermometers
Built-in refrigerator dials often drift out of calibration, silently spoiling expensive groceries before their expiration dates. Hanging dedicated appliance thermometers inside both compartments protects your food budget and keeps leftovers safe.
USDA, FDA, and CDC guidelines instruct keeping refrigerators at 40°F or below and freezers at 0°F or below. Bacteria multiply fastest between 40°F and 140°F—a danger zone where populations can double in just 20 minutes.
Never leave perishable food at room temperature for more than two hours, or one hour if indoor temperatures exceed 90°F. Eat or freeze refrigerated leftovers within three to four days to avoid waste and foodborne illness.
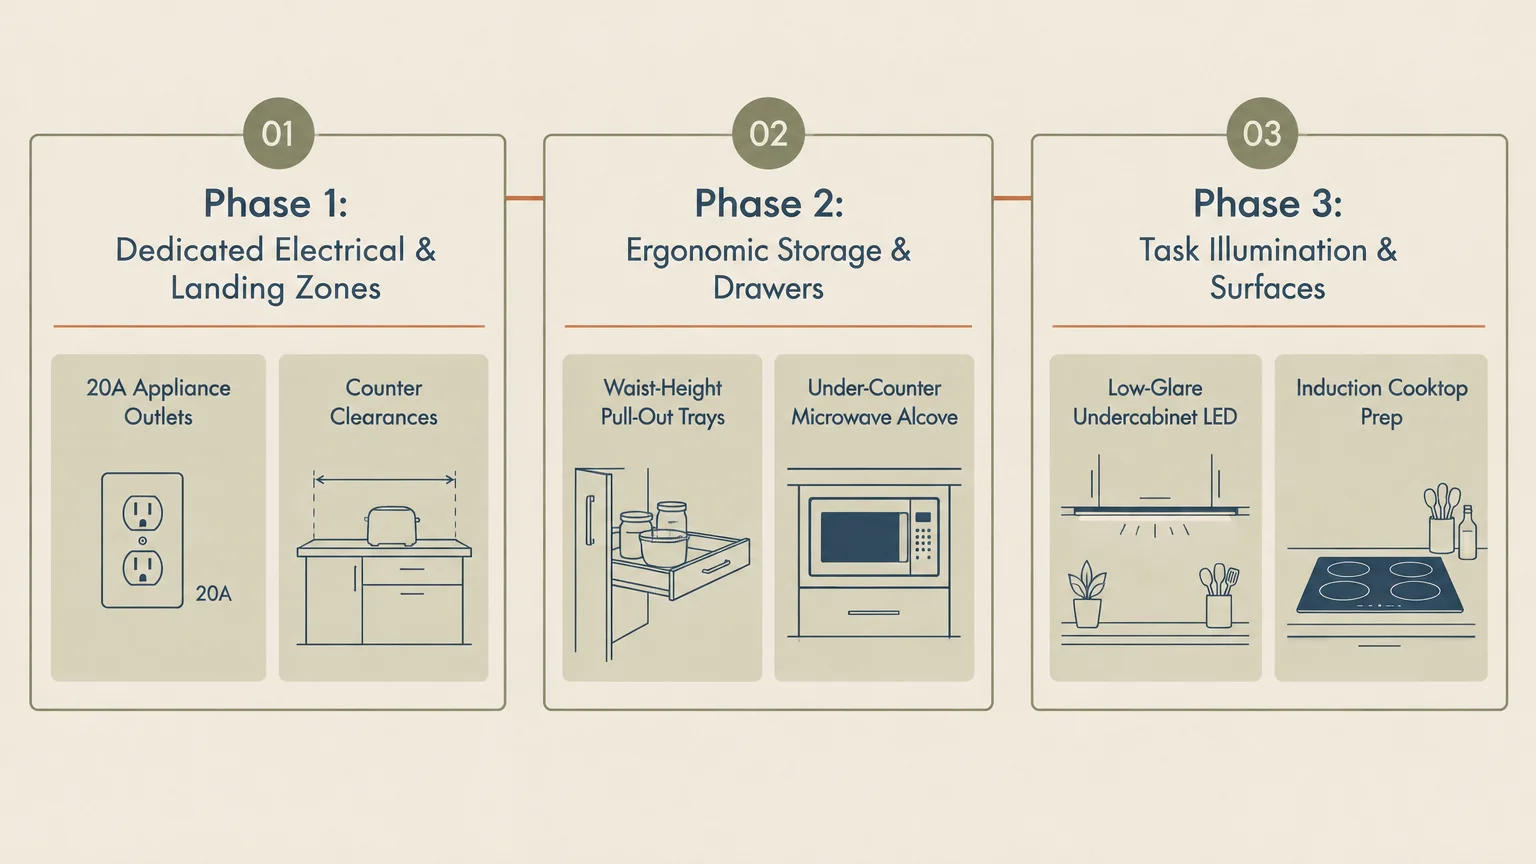
Planning Your Remodel Phases Around Daily Tools
Integrating countertop gadgets cleanly requires sequencing your remodel from rough infrastructure down to surface finishes. Start your demolition phase by clearing out cramped upper soffits and outdated peninsula overhangs that choke traffic lanes.
Rough electrical work is the single highest-impact upgrade for gadget-heavy kitchens. Running multiple dedicated 20-amp GFCI-protected countertop circuits ensures a 1,800-watt air fryer and portable induction burner never trip a breaker together.
Fire prevention belongs in your infrastructure blueprint right alongside circuit capacity. According to the National Fire Protection Association, cooking equipment factored into 48% of reported home structure fires, 35% of fire injuries, and 16% of fire deaths between 2020 and 2024.
U.S. Fire Administration estimates count 160,300 residential cooking fires in 2024 alone, resulting in 120 deaths, 2,175 injuries, and $481.2 million in property loss. Unattended equipment drives 25% of cooking fires and 50% of cooking fire fatalities.
Older adults carry the heaviest burden from kitchen fire hazards. NFPA analysis shows 58% of home cooking fire fatalities were aged 55 or older, with the 65-to-74 bracket suffering the largest share of deaths.
By age 85 and older, cooking becomes the leading cause of home fire deaths, carrying 5.5 times the general population’s fatality risk. Installing automatic range shutoffs, loud smoke alarms, and ducted exterior exhaust hoods protects your household around the clock.
Once electrical and ventilation rough-ins pass inspection, move into cabinetry and finish work. Swap standard lower cabinet shelves for heavy-duty full-extension drawers rated for slow cookers and two-handled Dutch ovens.
Finish with matte-honed quartz or solid-surface countertops that resist thermal shock from warm air fryer baskets while avoiding harsh glare. Add wide D-shaped cabinet pulls so every door opens easily with hooked fingers.
Smart Storage and Layered Lighting for Effortless Prep
Even the best kitchen tools feel clumsy when crammed into dark, overflowing cabinets. Organize storage by zone so every gadget lives within one step of where you plug it in or wash it.
Keep your air fryer, slow cooker, and smooth-edge can opener on pull-out appliance shelves or inside tambour-door garages wired with interior outlets. Slide the shelf out to vent heat during use, then push everything neatly out of sight afterward.
Store lightweight accessories like magnetic measuring cups, rolling garlic choppers, and meat thermometers inside tiered bamboo drawer dividers. Keeping daily items out of high overhead cabinets prevents shoulder strain and eliminates hazardous reaching.
Good lighting transforms accuracy for aging eyes just as much as ergonomic handles do. Layer warm overhead ambient fixtures with bright, continuous LED strip lighting mounted beneath every wall cabinet.
Task lighting directly illuminates knife blades, bagel slicers, and backlit thermometer screens without casting your own shadow across the cutting board. Add motion-activated interior pantry lights so reading expiration dates and appliance thermometers takes zero squinting.
Keep counter styling calm by dedicating a single heat-safe silicone or stone landing mat beside your cooking zone. Leaving empty breathing room next to your induction burner makes transferring heavy two-handled pans steady and predictable.
Maintenance, Cleaning, and Appliance Care
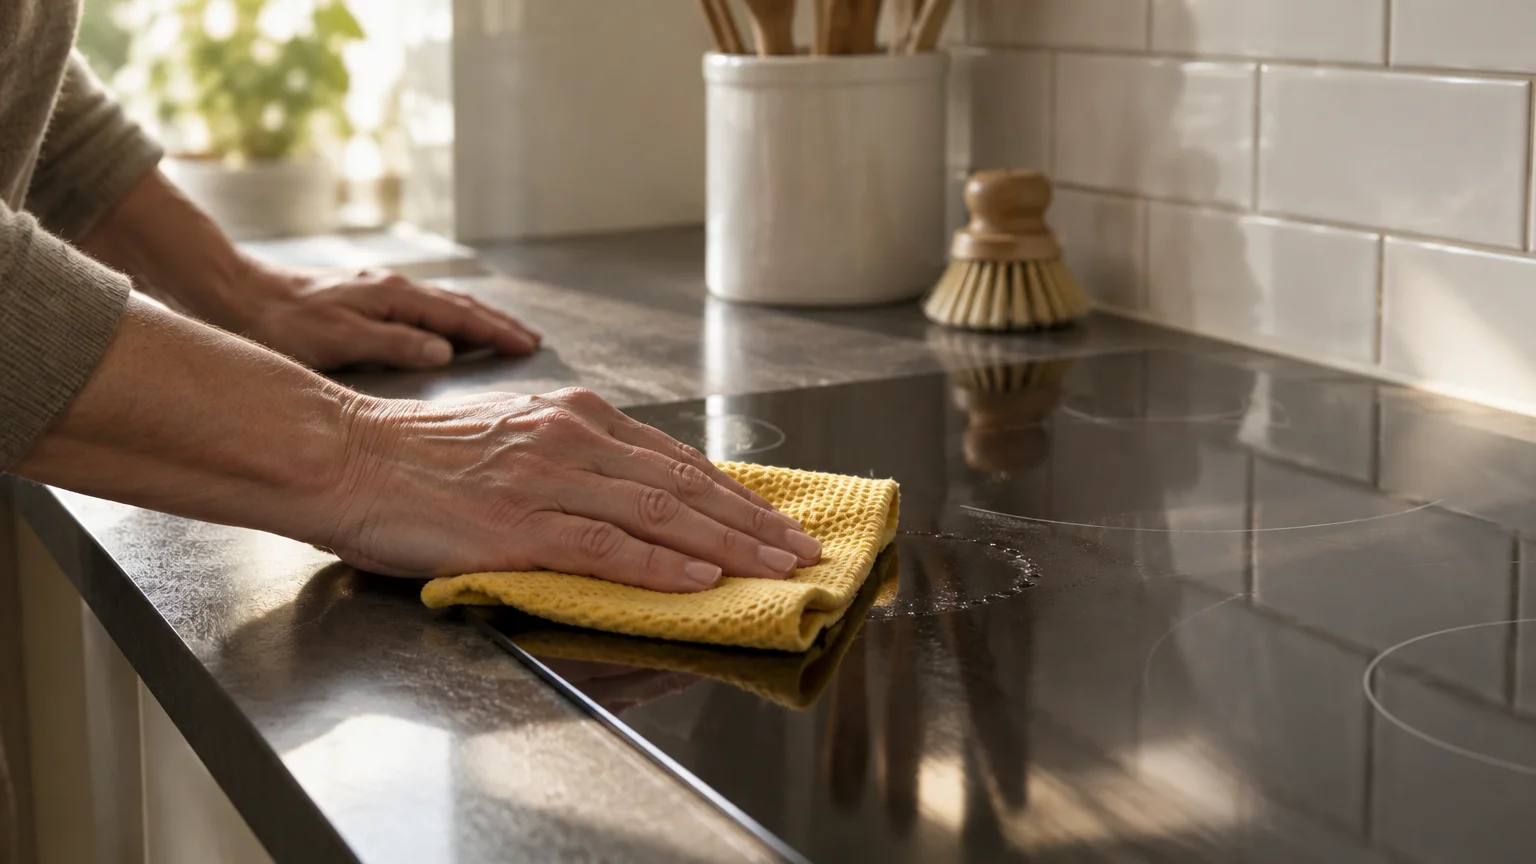
Protecting your investment in tools and finishes takes consistent, low-effort maintenance. Wipe down portable induction glass after the cooktop cools so mineral rings and oil film never etch the ceramic surface.
Empty and wash air fryer baskets with warm soapy water after every batch to prevent sticky grease buildup that triggers smoke alarms. Once a month, degunk range hood baffle filters in the dishwasher so your kitchen ventilation stays strong.
If you rely on suction-base rotary graters over natural granite counters, reseal the stone according to manufacturer schedules. A tight, non-porous seal keeps suction cups anchored firmly and stops lemon juice or olive oil from staining.
Check power cords on countertop cookers quarterly for fraying, loose plugs, or heat discoloration. Register every new appliance with its manufacturer immediately so you receive prompt alerts if a safety recall affects your model.
Test digital meat thermometers in a glass of ice water twice a year to verify they read 32°F accurately. Replace weak batteries in automatic jar openers and fridge thermometers promptly so grip strength and temperature tracking never falter.
Frequently Asked Questions
How much should I budget for retiree-friendly kitchen gadgets and layout updates?
Buying all twelve ergonomic gadgets—from a $15 jar opener to a $100 air fryer—typically totals a few hundred dollars. That modest outlay immediately upgrades daily comfort without requiring structural remodeling.
Adding dedicated electrical circuits, under-cabinet LED strips, and pull-out base cabinet drawers costs more and varies by local labor rates. Prioritizing gadgets and lighting first delivers quick wins while you budget for custom millwork.
Do countertop appliance and lighting upgrades require building permits?
Plugging in portable induction cooktops, air fryers, or slow cookers requires no permits whatsoever. However, adding new 20-amp electrical circuits, hardwiring under-cabinet lighting, or venting a range hood through an exterior wall generally requires local permits.
Always verify municipal building codes before opening drywall or altering plumbing lines. Permitted work protects your homeowner insurance coverage and preserves resale value if you ever sell.
Which remodel tasks can I DIY, and when should I hire a pro?
You can easily tackle drawer organizer inserts, plug-in under-cabinet light bars, refrigerator thermometers, and countertop zoning yourself. Swapping sharp cabinet knobs for wide D-shaped pulls takes only a screwdriver and an afternoon.
Hire licensed electricians and contractors for new breaker circuits, GFCI outlet installations, exterior hood ducting, and stone countertop cutting. Professional tradespeople ensure heavy appliances and high-wattage circuits meet current safety codes.
How long does a gadget-centered kitchen refresh usually take?
Ordering ergonomic tools, clearing upper-cabinet clutter, and reorganizing prep zones takes a single relaxed weekend. You will feel the difference in wrist strain and energy efficiency on your very first week of cooking.
A light remodel adding pull-out drawers, electrical circuits, and layered task lighting typically wraps up in one to three weeks. Planning deliveries before demolition starts prevents stalled workspaces and takeout fatigue.
Test Your New Workflow Today
You do not need to tear out your kitchen walls to cook with less pain, lower utility bills, and stronger fire safety. Start this afternoon by clearing one waist-high landing zone near a bright outlet and swapping out your hardest-to-grip hand tools.
Live with a portable induction burner, a digital thermometer, and a cushioned jar opener for two weeks to see how your movement patterns shift. Those real-world lessons will guide every cabinet, lighting, and electrical upgrade you choose next.