A well-designed kitchen island with seating transforms your cooking zone into an inviting social hub for family dinners and casual conversations. Adding counter seating gives everyone a natural place to gather while you prepare daily meals.
Smart planning ensures your island balances dining comfort with seamless kitchen workflow and proper walkway clearances. You can create a functional centerpiece that matches your home whether you build from scratch or upgrade existing cabinetry.
Explore practical configurations, critical dimensions, and real-world construction steps to design an island that brings people together comfortably every single day.
Planning Snapshot: Budget, Timelines, and Skill Requirements
According to the 2026 U.S. Houzz Kitchen Trends Study, 58% of renovating homeowners add or upgrade an island during a kitchen remodel. Upgrading your central workspace creates a functional dining spot while raising overall home value.
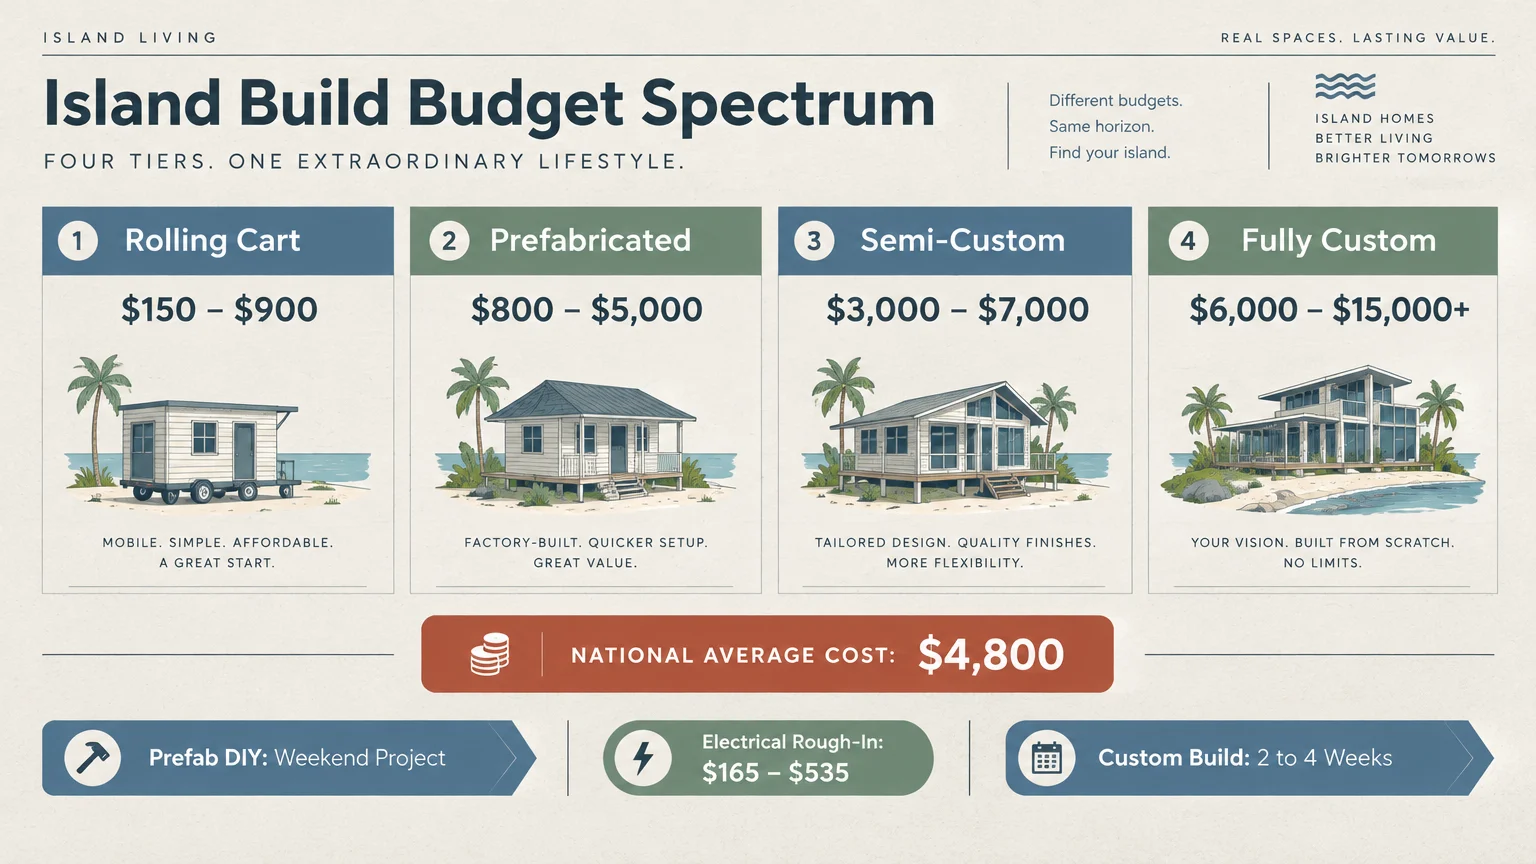
The national average cost to install a kitchen island sits at $4,800; most homeowners spend between $900 and $6,500 depending on materials. Simple rolling carts cost between $150 and $900, making them ideal for budget-focused updates.
Prefabricated stationary islands run between $800 and $5,000, while semi-custom ready-to-assemble options average $3,000 to $7,000. Fully custom islands featuring stone counters and built-in amenities range from $6,000 to over $15,000.
For context, the median spend for a major kitchen remodel is $55,000, though larger kitchens reach $75,000 and smaller spaces average $46,000. Minor kitchen remodels require a median investment of $20,000.
Hiring an electrician to run rough-in wiring to your island typically adds $165 to $535 to your total budget. Professional electrical work guarantees code compliance and long-term household safety.
DIY builders can assemble and anchor a prefabricated island over a single weekend. Custom framing, countertop fabrication, and electrical rough-ins generally require two to four weeks of coordinated effort.
10 Inspiring Kitchen Island Designs with Seating
Choosing the right configuration depends on your room layout and daily household routines. These ten proven designs balance ergonomic seating with durable food prep surfaces.
1. The Classic Extended Quartz Breakfast Bar
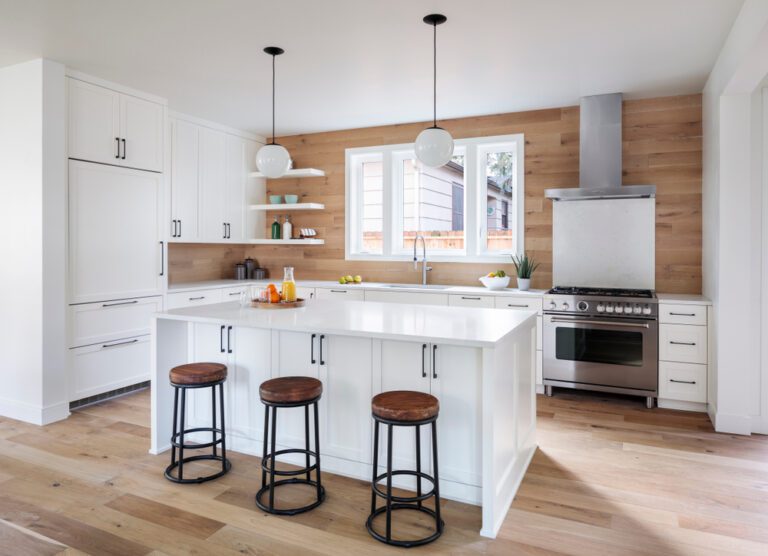
The single-level extended quartz island remains an industry favorite because it delivers an expansive, uninterrupted surface. Standard single-level islands account for 82% of upgraded kitchen designs nationwide.
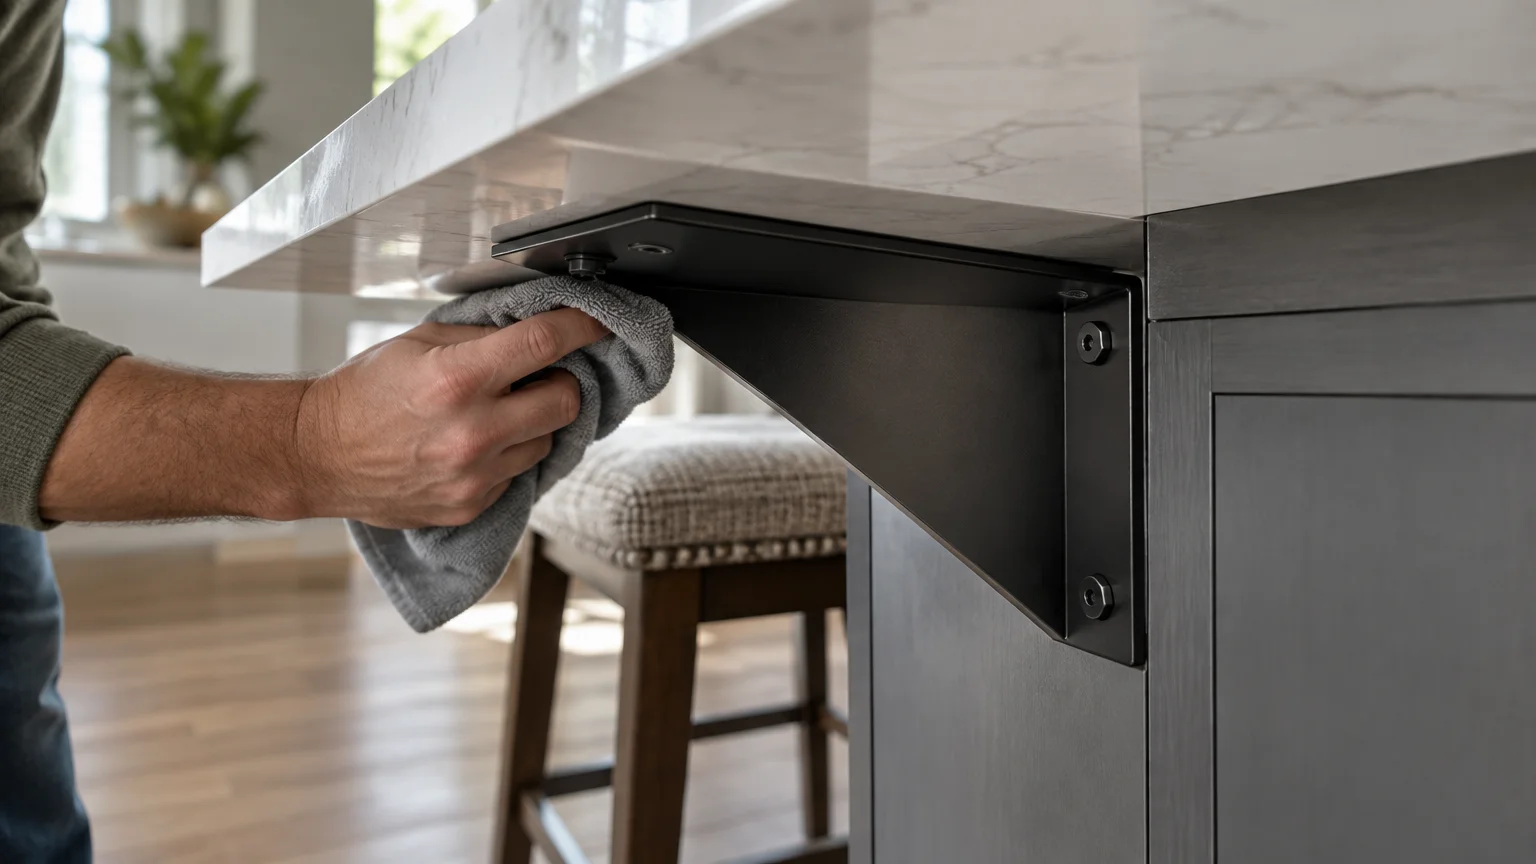
Engineered quartz resists heat, staining, and scratches while providing a sleek dining ledge. Hidden steel support brackets reinforce the cantilevered overhang to eliminate the need for obstructive support posts.
This layout accommodates three to four counter-height stools in a neat, straight row. It allows guests to converse easily with the cook without crowding prep stations.
Select a 15-inch overhang depth to ensure comfortable knee clearance during casual morning meals. Pair the counter with low-profile, backless stools that slide completely underneath when not in use.
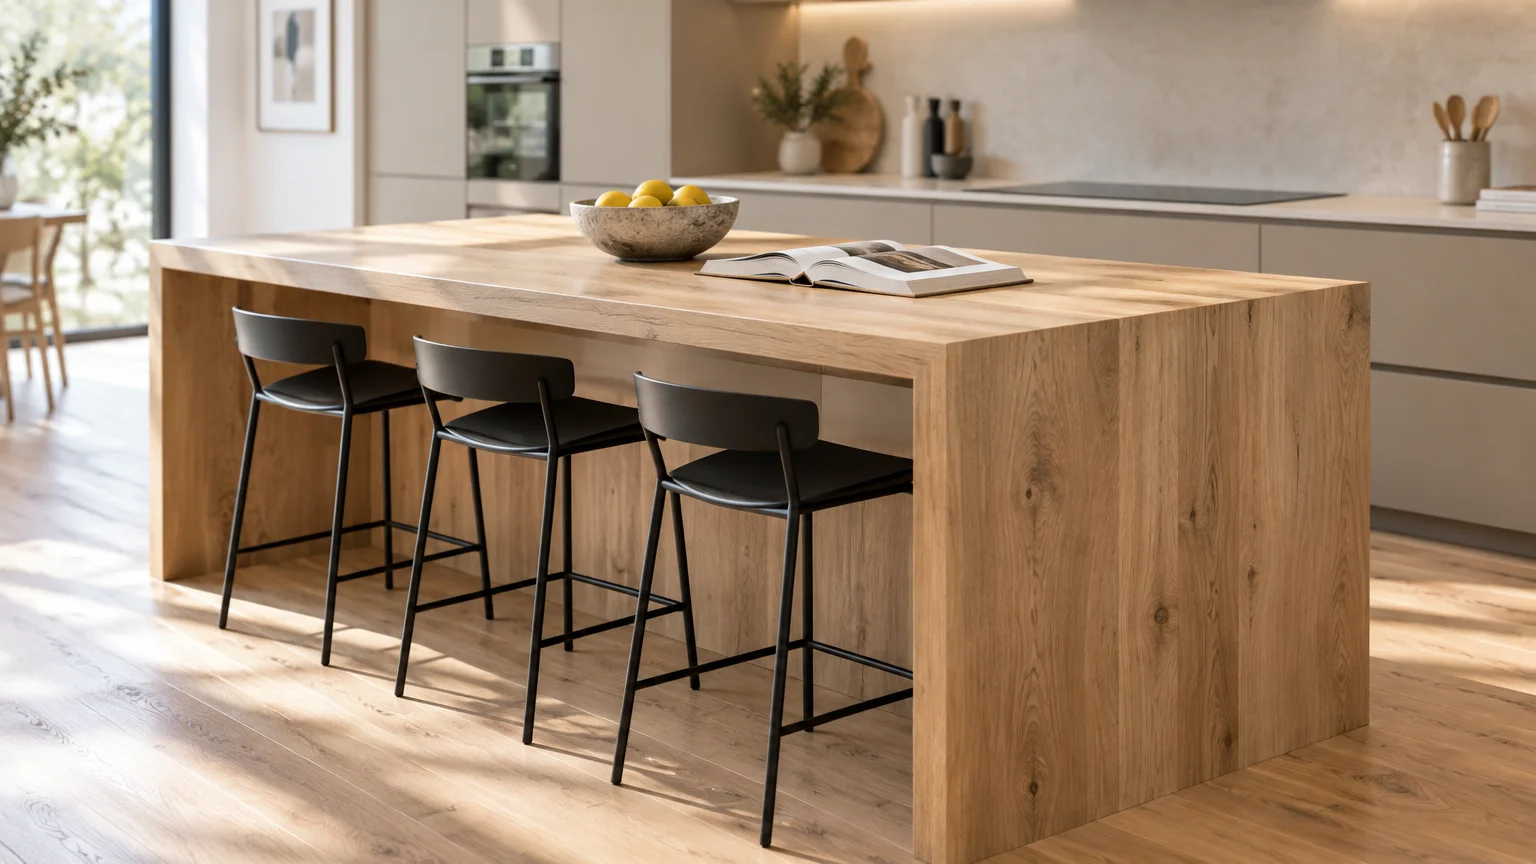
2. The Natural Wood Waterfall Island
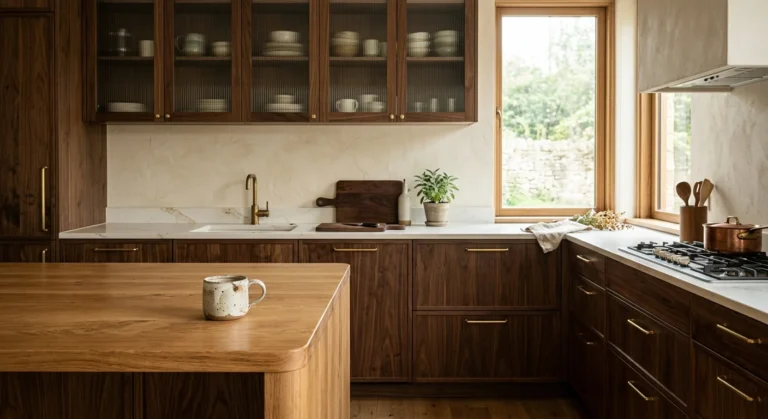
Wood finishes have surged in popularity, overtaking painted white cabinetry as the leading kitchen choice at 29%. Medium wood tones account for 15% of installations, while light wood tones claim 11%.
A natural wood waterfall design cascades down both island flanks to frame your seating area. This dynamic architectural detail introduces organic warmth and rich grain texture into modern kitchens.
You can review striking layout combinations in the Architectural Digest design archives to visualize different natural lumber finishes. Butcher block or white oak slabs create inviting surfaces that feel warm to the touch.
Protect natural timber surfaces using food-safe hardwax oils or durable polyurethane finishes. Routine oiling repels liquid spills and preserves the wood grain against daily wear.
3. The Double-Sided Gathering Island
Arranging seating along two adjacent sides turns your island into an intimate social table. Diners make natural eye contact rather than sitting side-by-side like patrons at a diner counter.
Rectangular islands represent 80% of remodeling projects, making them the standard platform for corner seating layouts. Extending the overhang along one short end creates comfortable L-shaped seating.
This configuration excels during casual weeknight dinners and homework sessions with children. It keeps guests engaged while preserving dedicated space for chopping and stovetop cooking.
Ensure you provide adequate linear counter width on both sides so diners never bump elbows. Plan your layout carefully to preserve wide walkways around the active corner zone.
4. The Multilevel Culinary and Dining Station
Multilevel islands feature a standard 36-inch food preparation surface paired with a distinct dining tier. These split-level designs represent 7% of island upgrades in contemporary homes.
You can raise the dining counter to 42 inches for a classic pub-style breakfast bar. Alternatively, drop the dining section down to 30 inches to accept standard dining chairs.
The raised bar ledge effectively conceals dirty prep dishes from open-concept living rooms. It also creates a physical safety barrier that keeps seated children away from hot cooktops.
A lowered 30-inch surface provides accessible seating for family members of all physical abilities. Use distinct countertop materials on each level to define the transition between cooking and dining zones.
5. The Compact Rolling Cart with Drop-Leaf Seating
Rolling islands represent 3% of kitchen projects and provide maximum flexibility for space-constrained homes. They allow renters and small-space dwellers to enjoy counter dining without sacrificing floor area.
A sturdy drop-leaf mechanism lifts on heavy-duty hinges to support two bar stools during mealtime. Fold the leaf down after eating to regain valuable walkway space instantly.
Commercial-grade locking casters keep the island firmly anchored while you chop vegetables or dine. High-quality rubber wheels prevent scuffing on delicate hardwood and tile floors.
Look for compact models that include integrated towel bars and spice storage along the cabinet sides. These all-in-one units deliver exceptional functionality on a modest budget.
6. The Furniture-Style Turned-Leg Island
Carved wooden posts and turned legs transform standard cabinetry into a classic, freestanding piece of furniture. This aesthetic suits traditional, transitional, and modern farmhouse kitchen environments.
Installing decorative support legs under the overhang eliminates the need for bulky steel corbels. The legs frame your seating bay, giving stools a dedicated storage alcove when tucked away.
Browse inspirational photo galleries through HGTV kitchen planning resources to see how decorative millwork enhances kitchen islands. Adding base molding and beadboard paneling further elevates stock cabinetry.
Fasten the structural posts securely to your subfloor using heavy-duty lag bolts and mounting blocks. Solid connections prevent wobbling when people lean against the dining ledge.
7. The Wrap-Around Corner Seating Island
L-shaped and square islands account for 5% and 4% of renovated kitchens, respectively. These wider footprints provide ideal dimensions for three-sided, wrap-around counter seating.
Positioning counter seating around three sides mimics the welcoming intimacy of a traditional kitchen table. Your family can comfortably share complete meals around the island without needing a separate dining room.
Large square islands require substantial kitchen floor plans to prevent pinched perimeter traffic. Verify your room measurements before committing to an expansive, multi-sided overhang layout.
Remember that deep island surfaces can be challenging to reach across during cleaning. Keep your central work zone accessible by limiting overall island depth to manageable proportions.
8. The Integrated Banquette Bench Island
Attaching a built-in banquette bench to the back of your island creates a space-saving breakfast nook. This hybrid approach delivers comfortable, upholstered booth seating without consuming excess floor area.
A low-profile dining bench pairs perfectly with a freestanding casual table and supplementary dining chairs. It pulls your eat-in dining space directly into the central kitchen hub.
Incorporate lift-up bench lids to access hidden storage compartments inside the hollow seat base. Store seasonal cookware, oversized serving platters, or bulky table linens out of sight.
Select durable, stain-resistant performance upholstery fabric for your bench cushions. High-performance textiles wipe clean easily after messy family dinners.
9. The Contrasting Dark Base Statement Island
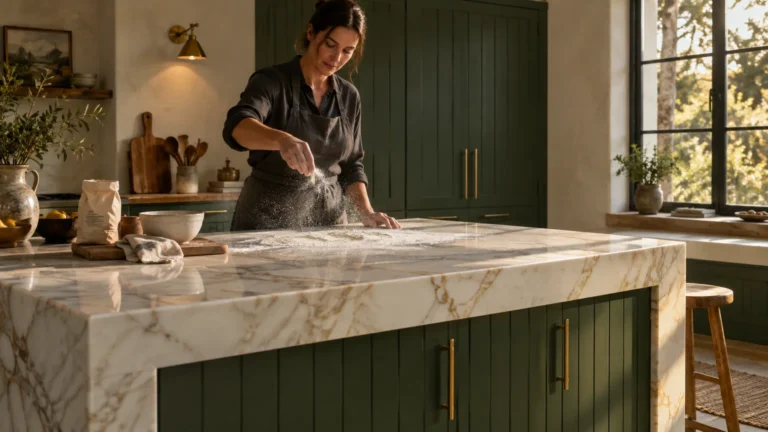
Painting your island base in a contrasting color creates a dramatic visual anchor for your kitchen. Pair rich charcoal, deep navy, or dark walnut cabinetry with crisp white perimeter counters.
While white cabinets represent 28% of installations, contrasting island hues break up monotonous color schemes. Dark finishes also conceal scuffs and shoe marks left behind by seated guests.
Contrast your dark island base with pale marble or white quartz countertops to maximize light reflection. The light stone provides an inviting surface for morning coffee and casual meals.
Coordinate cabinet pulls and stool metal finishes to tie the overall kitchen aesthetic together. Matte black, brushed brass, or polished nickel accents add refined visual harmony.
10. The Open-Shelving Galley Island
Galley-style kitchen islands maximize functional length across narrow kitchen floor plans. Over 52% of upgraded kitchen islands exceed 7 feet in length to accommodate multi-seat dining.
Another 30% measure between 6 and 7 feet, while only 18% measure under 6 feet long. Long galley profiles provide room for extensive drawer storage alongside multiple comfortable counter seats.
Integrating open display cubbies on the island ends breaks up long stretches of solid paneling. Use these accessible shelves to display cherished cookbooks, decorative pottery, or storage baskets.
Generous 7-foot runs easily support three to four diners seated comfortably side-by-side. Ensure your overhang framing contains adequate structural steel to support heavy stone along extended spans.
Essential Clearance Guidelines and Seating Ergonomics
Comfortable island seating demands strict adherence to professional spacing guidelines. Ignoring standard clearance rules leads to cramped seating and frustrating kitchen bottlenecks.
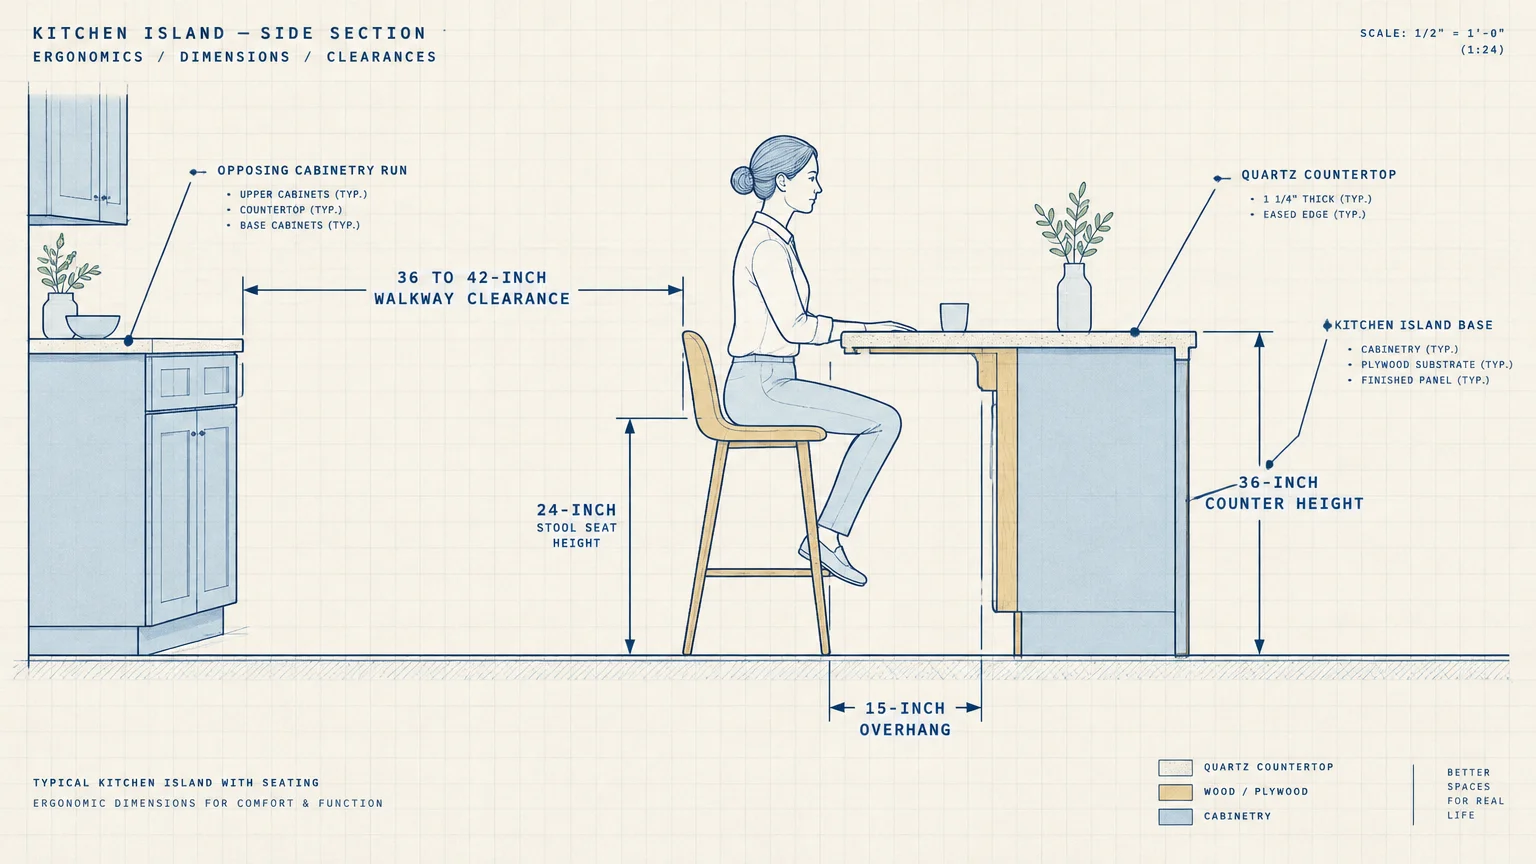
The National Kitchen and Bath Association guidelines define clear minimum spatial standards for island dining. You must allocate at least 24 inches of linear counter width for every seated diner.
This 24-inch width gives each guest ample elbow room to eat meals without bumping their neighbors. For counter-height surfaces, maintain a minimum overhang depth of 15 inches for clear knee space.
Standard 36-inch-high counters require that 15-inch knee depth to prevent diners from striking the island cabinets. Table-height counters set at 30 inches demand 18 inches of knee depth.
Raised 42-inch bar counters require only 12 inches of overhang depth because legs hang straighter on taller stools. Match your stool heights carefully to your counter elevation to preserve ergonomic comfort.
Maintain at least 32 inches of clear walkway behind seated diners when no foot traffic passes behind them. This clearance lets a guest push their stool back and stand up comfortably.
Provide 36 inches of clearance to allow family members to edge past someone seated at the counter. For primary thoroughfares, preserve at least 44 inches of clear space so people can walk comfortably past diners.
Keep your primary cooking work aisles between 42 inches wide for single-cook homes and 48 inches for multiple cooks. Proper aisle widths prevent open appliance doors from blocking critical circulation paths.

Step-by-Step Island Installation Framework
Constructing a sturdy island with seating requires methodical preparation and careful execution. Follow these four practical construction phases to ensure safety, durability, and code compliance.
Phase 1: Layout Verification and Electrical Rough-In
Mark your proposed island footprint onto the subfloor using bright painter’s tape before purchasing materials. Walk through your daily meal prep routines to confirm aisles feel open and comfortable.
Under both the 2023 and 2026 National Electrical Code (NEC Section 210.52(C)(2)), mounting outlets on cabinet sides below countertop overhangs is strictly prohibited. This rule prevents children from pulling appliance cords over the counter edge and causing severe burn injuries.
Consult safety updates from the Electrical Safety Foundation International to understand current residential kitchen standards. Fixed receptacles on islands are no longer mandatory under updated code guidelines.
However, if you omit an island outlet, code mandates installing accessible electrical provisions such as capped conduit inside the base. Run rough-in wiring through your floor framing now to simplify future electrical additions.
Phase 2: Anchoring Base Cabinets and Reinforcing Framing
Construct a level 2×4 lumber sleeper base and fasten it securely through your flooring into floor joists. A rock-solid structural footing prevents the island from shifting when people lean against the counter.
Set your base cabinets onto the sleeper platform, shimming them until the top frames are perfectly level. Fasten adjacent cabinet face frames together using dedicated 2-1/2-inch cabinet installation screws.
Secure the rear cabinet panels to your 2×4 floor framing using heavy-duty framing screws. Double-check your levels across all diagonal axes before tightening the final fasteners.
Clad the back and exposed sides of your cabinet assembly with 3/4-inch furniture-grade plywood. This reinforcing skin strengthens your cabinet carcass to handle the substantial weight of cantilevered stone tops.
Phase 3: Supporting Countertop Overhangs
Heavy stone countertops made from granite or engineered quartz require hidden structural steel supports to prevent cracking. Any overhang exceeding 10 inches requires dedicated mechanical bracing.
Learn proper bracket mounting methods through This Old House structural tutorials before installing heavy stone surfaces. Route shallow recesses into the top edge of your cabinet framing to seat flat steel brackets flush.
Fasten heavy 3/16-inch-thick steel support brackets directly into structural cabinet framing using robust lag bolts. Space support brackets every 16 to 24 inches along the entire length of your seating overhang.
The brackets must extend to within 3 to 4 inches of your countertop outer edge. Concealing brackets inside the cabinet framing preserves clean knee clearance beneath the finished overhang.
Phase 4: Surface Installation and Power Provisions
Apply generous beads of structural silicone adhesive along the top perimeter of your leveled cabinet frames. Carefully set your countertop slab in place, pressing down firmly to establish a permanent bond.
Under NEC Section 210.52(C)(3), island outlets must sit on or above the counter, or directly in the surface. Install UL-listed pop-up countertop receptacle assemblies equipped with integrated GFCI protection.
These specialized pop-up units sit flush with the counter surface and seal securely against accidental liquid spills. Pressing the top mechanism pops the outlet upward whenever you need power for appliances.
Seal all joints between your countertop and decorative end panels using color-matched kitchen silicone. Install your finished kickboards and base trim to complete a clean, professional build.
Styling and Personalization Strategies
Styling your island creates visual balance and turns a functional workspace into a warm social setting. Select finishes that complement your surrounding cabinetry while adding subtle tactile contrast.
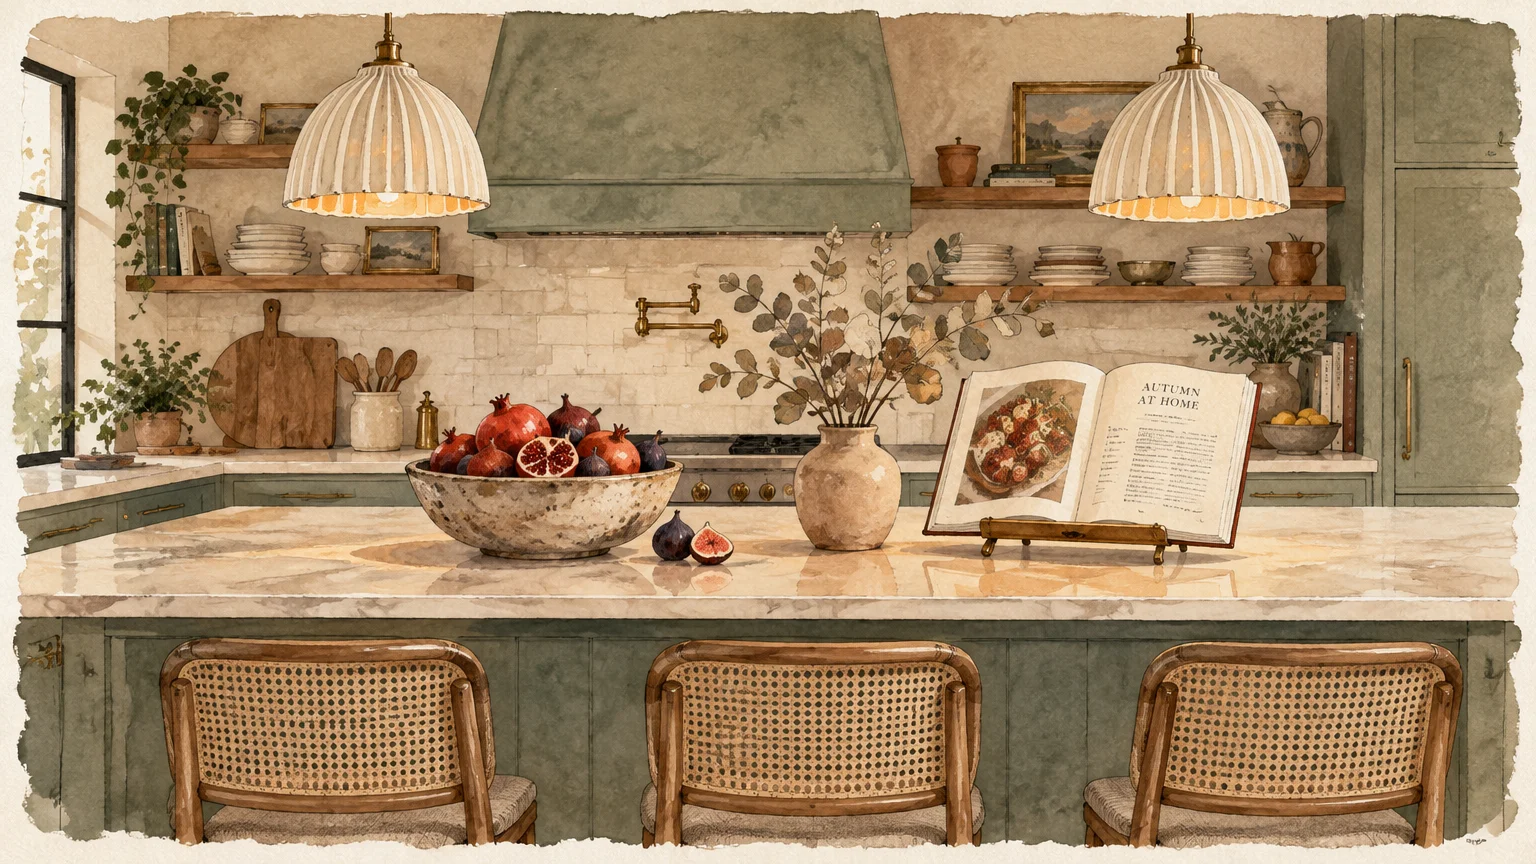
Pairing natural wood islands with white perimeter cabinetry creates an inviting modern transitional style. Alternatively, paint your island base in deep sage or moody charcoal to establish an eye-catching focal anchor.
Choose bar stools that balance aesthetic charm with easy maintenance and everyday comfort. Stools with supportive backrests encourage guests to linger longer during evening dinner parties.
Select wipeable leather or treated wood stool seats if you have young children in your home. Metal stool frames introduce an attractive industrial edge that withstands everyday kicks and scuffs.
Hang two or three pendant lights approximately 30 to 36 inches above your finished island countertop surface. Proper pendant spacing provides clear task lighting without obstructing sightlines across the room.
Install dimmer switches on your island pendant fixtures to alter room ambiance instantly. Bright light aids culinary prep, while softened lighting establishes an intimate dinner environment.
Style your island counter with purposeful, clutter-free accessories that enhance daily living. A wide wooden fruit bowl or potted herb container adds fresh color without crowding dining space.
Keep the central seating zone open so family members can spread out laptops or school projects. Functional versatility makes your kitchen island the most valued gathering point in the house.
Troubleshooting Pitfalls and Long-Term Island Maintenance
Improper planning often leads to structural sagging, surface staining, or electrical code violations. Anticipating these common pitfalls preserves the beauty and functionality of your investment.
Never rely on cabinet tops alone to support stone overhangs exceeding 10 inches without hidden steel brackets. Unsupported stone can snap under downward pressure, risking severe personal injury and expensive property damage.
Avoid mounting standard electrical boxes horizontally beneath an overhang to skirt current code requirements. Inspectors will fail non-compliant side outlets because dangling appliance cords create dangerous snag hazards for children.
Seal natural stone surfaces annually using high-grade penetrating fluoropolymer sealers to block oil and grease stains. Wipe quartz and laminate surfaces with mild dish soap and warm water daily.
Place protective felt pads on the feet of all bar stools to safeguard your kitchen flooring. Replace worn pads regularly to prevent grit from scratching hardwood, vinyl plank, or tile surfaces.
Check the fasteners on your bar stools and structural support brackets every six months. Tightening loose hardware eliminates annoying squeaks and maintains rock-solid structural stability over years of use.
Inspect your pop-up electrical assemblies periodically to confirm their water-resistant gaskets remain pliable and clean. Wipe away crumbs and liquid splashes immediately to protect sensitive electrical connections.
Refinish butcher block dining ledges with food-grade mineral oil whenever the timber begins looking dry or faded. Routine maintenance preserves natural wood grain luster and repels moisture effectively.
Frequently Asked Questions
What is the ideal overhang depth for a standard counter-height kitchen island?
A standard 36-inch-high counter requires a minimum overhang depth of 15 inches for comfortable dining. This clearance gives adult diners ample knee room without forcing them to lean forward awkwardly.
Can I install an electrical outlet on the side of my kitchen island?
No, the 2023 and 2026 National Electrical Code prohibits installing outlets below countertop overhangs. You must install UL-listed pop-up countertop receptacles or mount outlets up to 20 inches above the surface.
How many stools can I comfortably fit along an 8-foot kitchen island?
An 8-foot island measures 96 inches long and accommodates four stools comfortably based on standard clearance rules. The National Kitchen and Bath Association recommends allocating 24 inches of linear counter width per diner.
Do I need to anchor a small kitchen island to the floor?
Building codes require stationary islands with electrical connections or plumbing lines to be permanently fastened to the floor. Only portable rolling carts on locking casters may remain unanchored to your subfloor.
Start Building Your Dream Kitchen Island
A thoughtfully planned kitchen island with seating enriches your daily routines and brings your household closer together. Measuring your clearances accurately and choosing durable materials guarantees years of reliable service.
Map your room dimensions, select your favorite design style, and build an island that serves as your home’s vibrant social anchor.