You can transform a lifeless front door arrangement into a dynamic, designer-grade statement piece with a few intentional styling adjustments. Crafting an eye-catching autumn focal point requires understanding spatial depth rather than simply piling on materials.
Most store-bought creations and amateur DIY attempts look two-dimensional because they compress foliage against a rigid backing. You can fix this immediately by adjusting how you layer your stems, branches, and accents.
Exploring the most common floral design oversights will help you build rich autumn front door decor that commands attention from the curb.
Planning Your Dimensional Fall Wreath Project
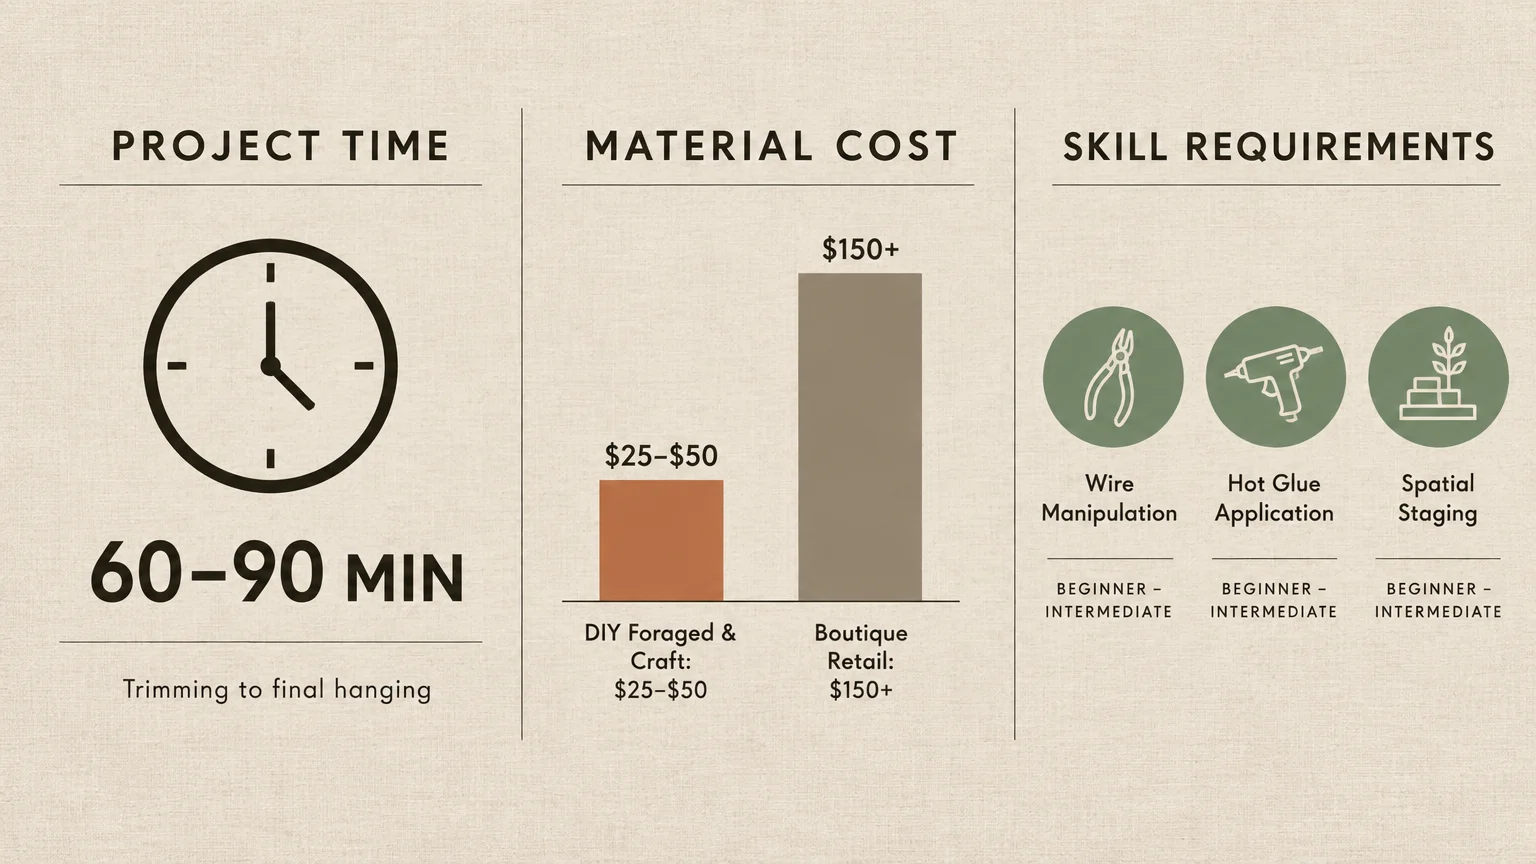
Before purchasing supplies, evaluate your project scope to ensure seamless execution. A custom wreath takes roughly sixty to ninety minutes from initial trimming to final hanging.
You can complete a professional-looking project for twenty-five to fifty dollars by combining foraged organics with selective craft store purchases. Commercial boutique wreaths often retail for over one hundred and fifty dollars.
This project requires beginner to intermediate floral assembly skills. If you can manipulate wire and use a hot glue gun safely, you can master dimensional wreath construction easily.
Working on a wide, clear table gives you the necessary room to step back and evaluate balance. Proper prep work keeps your materials organized and prevents premature fatigue during assembly.
1. Choosing a Flat Wire Frame Over a Textured Base
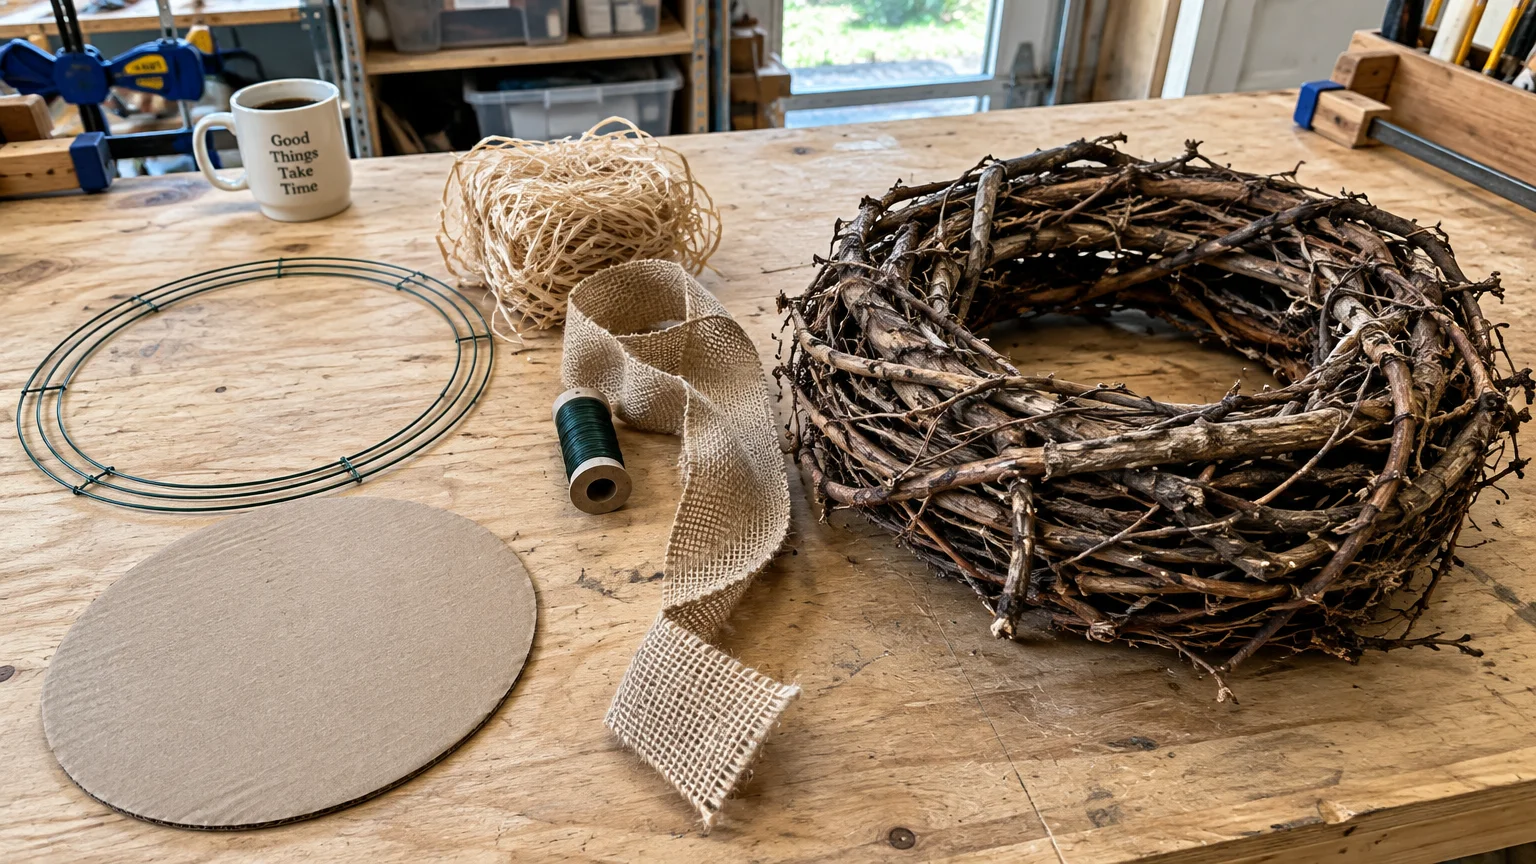
Starting with a skinny metal ring or a flat pressed-cardboard wreath form sabotages your design before you attach a single leaf. These thin foundations force every botanical element to lie in the exact same horizontal plane.
Instead, choose a thick, woven grapevine base to establish instant foundational height. The irregular wooden vines create natural gaps and crevices that hold stems at diverse outward angles, producing immediate three-dimensional presence.
Grapevine forms also provide structural grip, letting you wedge thick branches securely without drowning the arrangement in glue. This natural wooden texture remains attractive even if small sections peek through your foliage.
If you must use a wire ring, wrap it thoroughly with natural excelsior or wide burlap ribbon. This extra padding elevates your stems well above the door surface.
2. Leaving Faux Stems Straight and Unfluffed
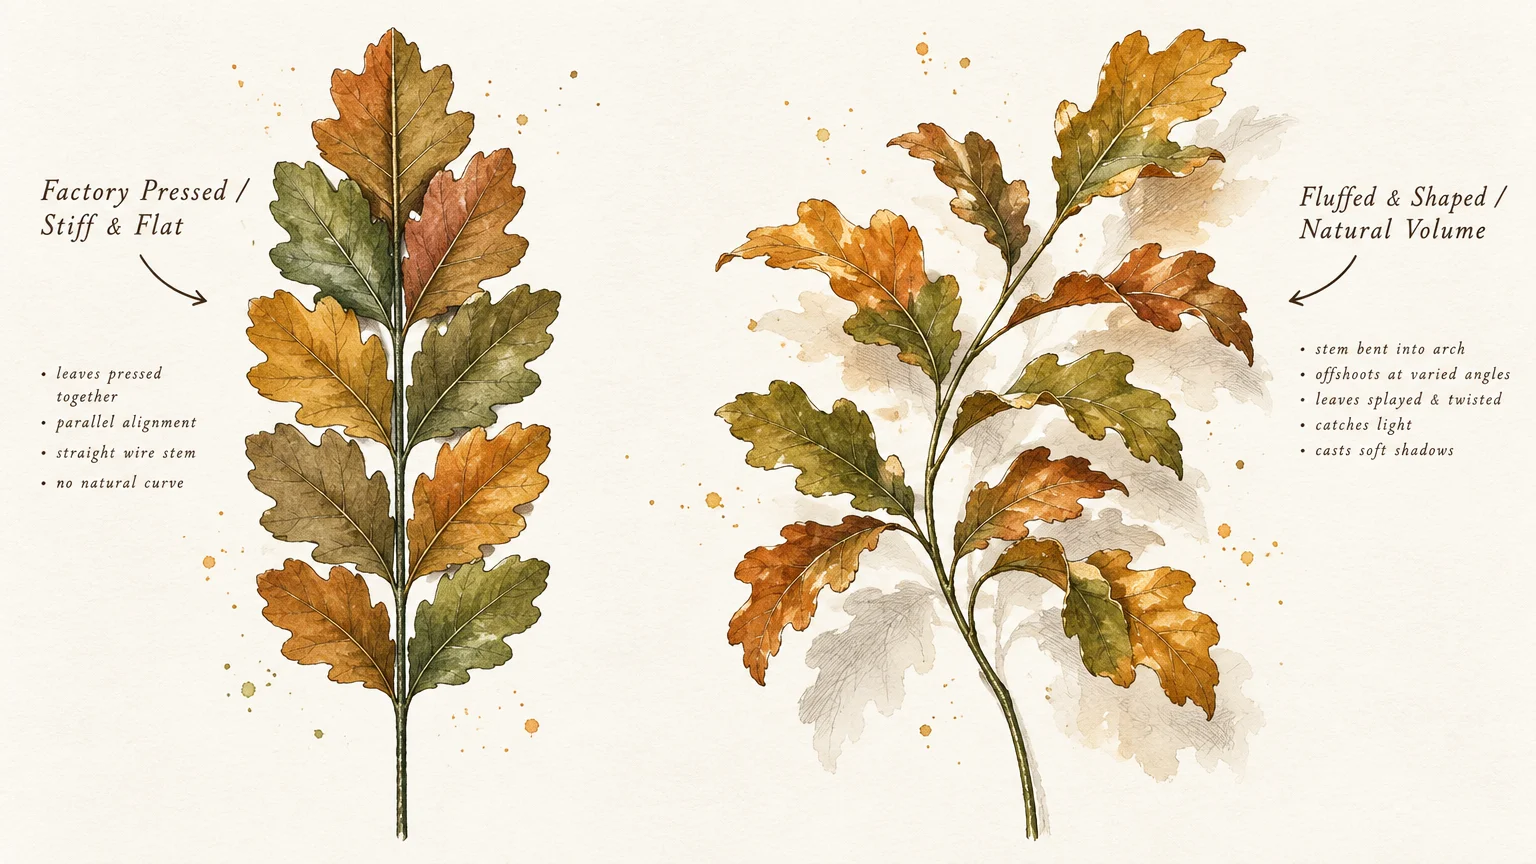
Craft stores pack artificial botanicals tightly inside shipping cartons, flattening leaves and pressing wire stems into unnatural, rigid sticks. Sticking these factory-pressed sprigs directly into your wreath yields a stiff, synthetic display.
Take time to massage every individual stem with your fingers before securing it to the frame. Bend the main wire into an organic arch, and fan out the offshoot leaves to catch the light.
Nature rarely produces straight lines or perfectly symmetrical foliage. Curling stem tips outward creates dynamic shadows and invites viewers to inspect your craftsmanship from multiple vantage points.
Gently separate paired leaves so they face different directions rather than resting flush together. This simple fluffing technique doubles the visual volume of inexpensive faux greenery.
3. Cutting Every Botanical Stem to the Same Length
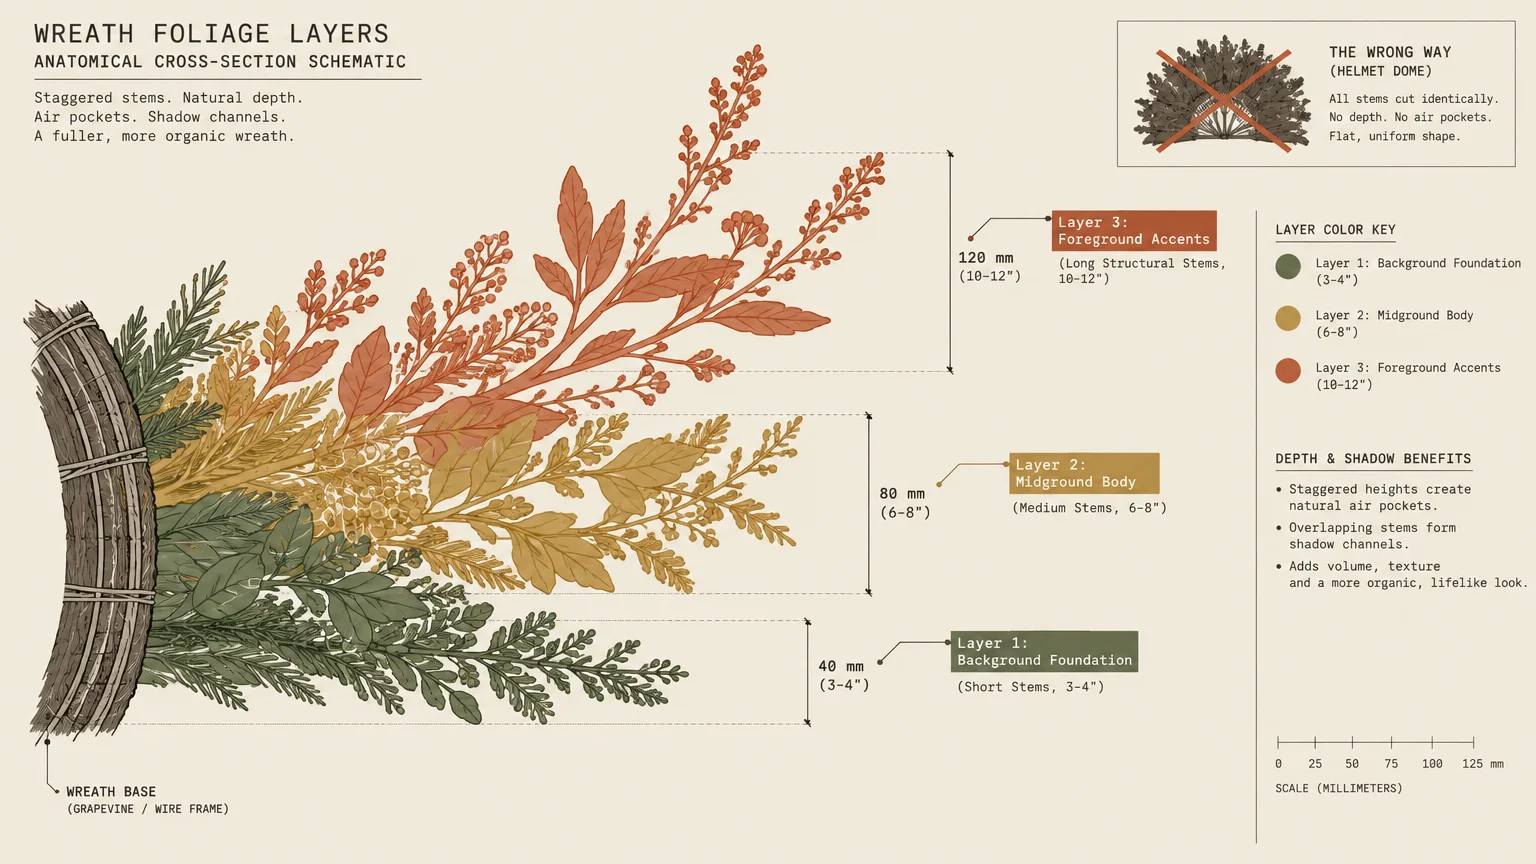
Trimming all your floral picks and dried wheat stalks to uniform five-inch pieces produces a flat, domed helmet shape. This lack of variation eliminates shadow lines, causing colors to blend into mush.
Professional florists recommend staggering your cut lengths by several inches to construct distinct structural tiers. Insights from HGTV floral design tutorials emphasize establishing foreground, midground, and background layers across seasonal arrangements.
Set your broad foliage tight against the base to form the background. Then, let airy elements like ornamental grasses and seeded eucalyptus project outward several inches past the main body.
Varying stem lengths also directs the eye smoothly around the circular frame. Highs and lows in your arrangement create the visual rhythm that flat wreaths lack.
4. Gluing Foliage Flush Against the Base
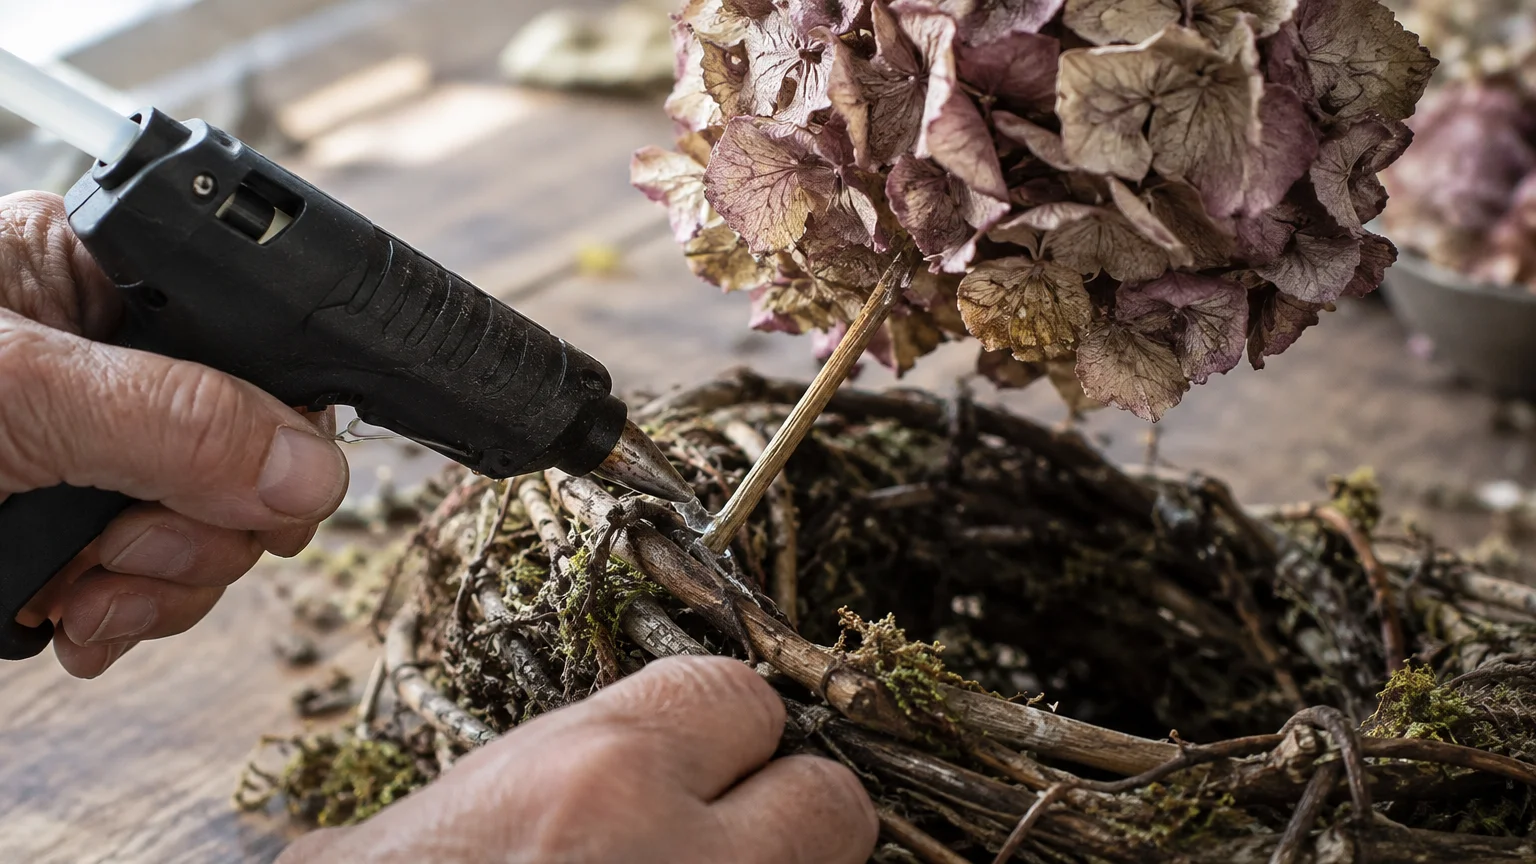
Pressing hot glue directly onto leaves and smashing them flat against the wreath base destroys organic volume instantly. This common habit eliminates the open negative space required for a rich, sculptural appearance.
Anchor your stems using green paddle wire or floral tape instead of liquid adhesive whenever possible. Mechanical fasteners preserve stem flexibility, allowing branches to stand away from the grapevine foundation.
When you must use hot glue, apply it strictly to the stem base. Insert the stem at an angle into the vine weave, letting the foliage hover freely above the surface.
Elevated leaves create physical room for lower elements to breathe. The trapped shadows underneath hovering foliage deliver genuine depth that glue cannot replicate.
5. Overlooking Contrast in Botanical Textures and Finishes
A wreath composed entirely of smooth silk maple leaves looks surprisingly flat, regardless of how many individual stems you apply. Monotonous surfaces reflect light identically, erasing depth and blurring intricate details from a distance.
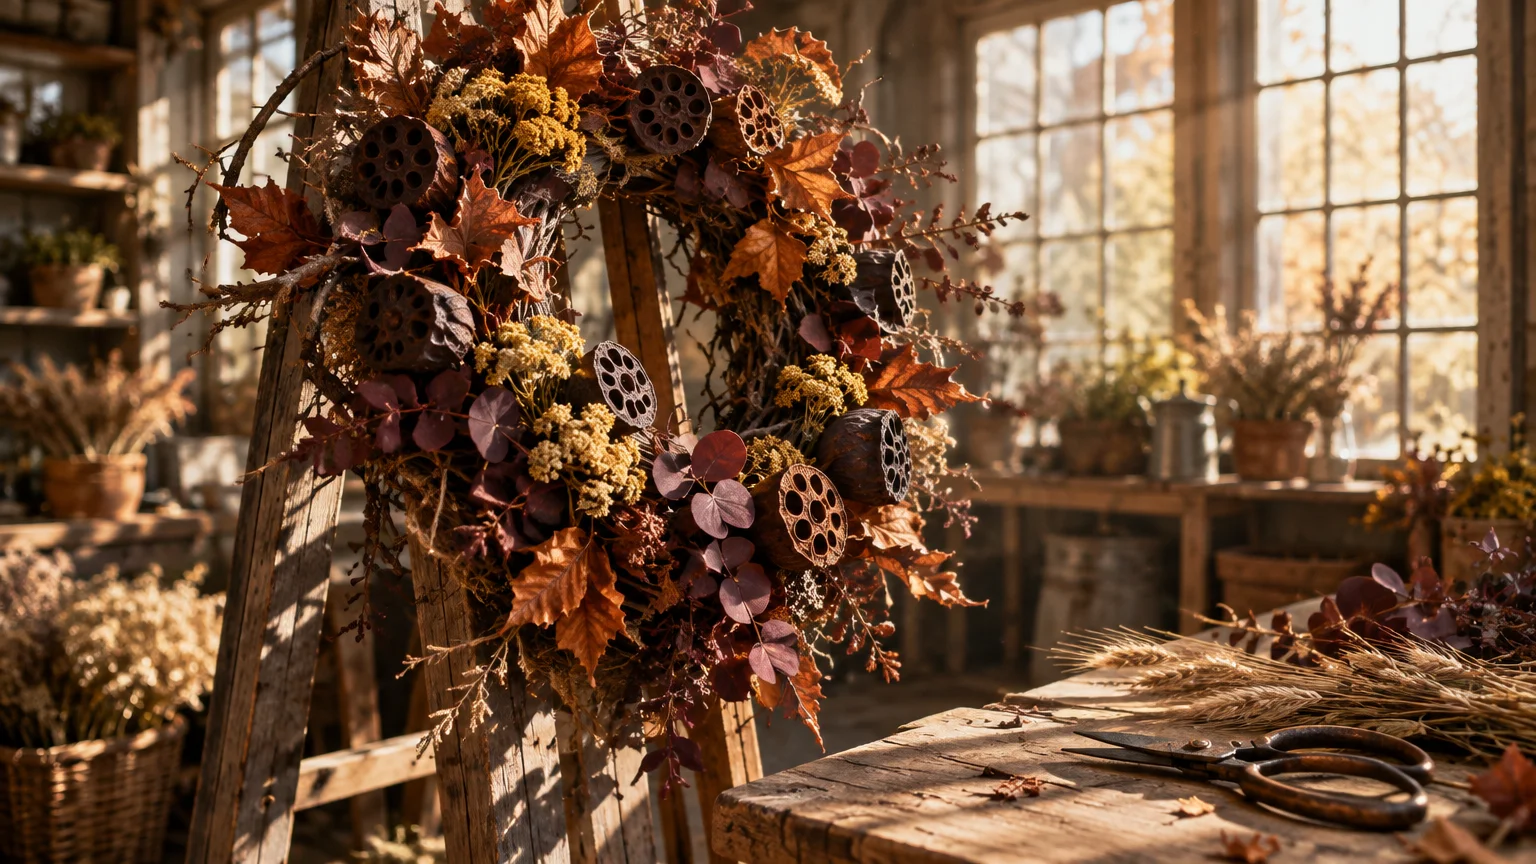
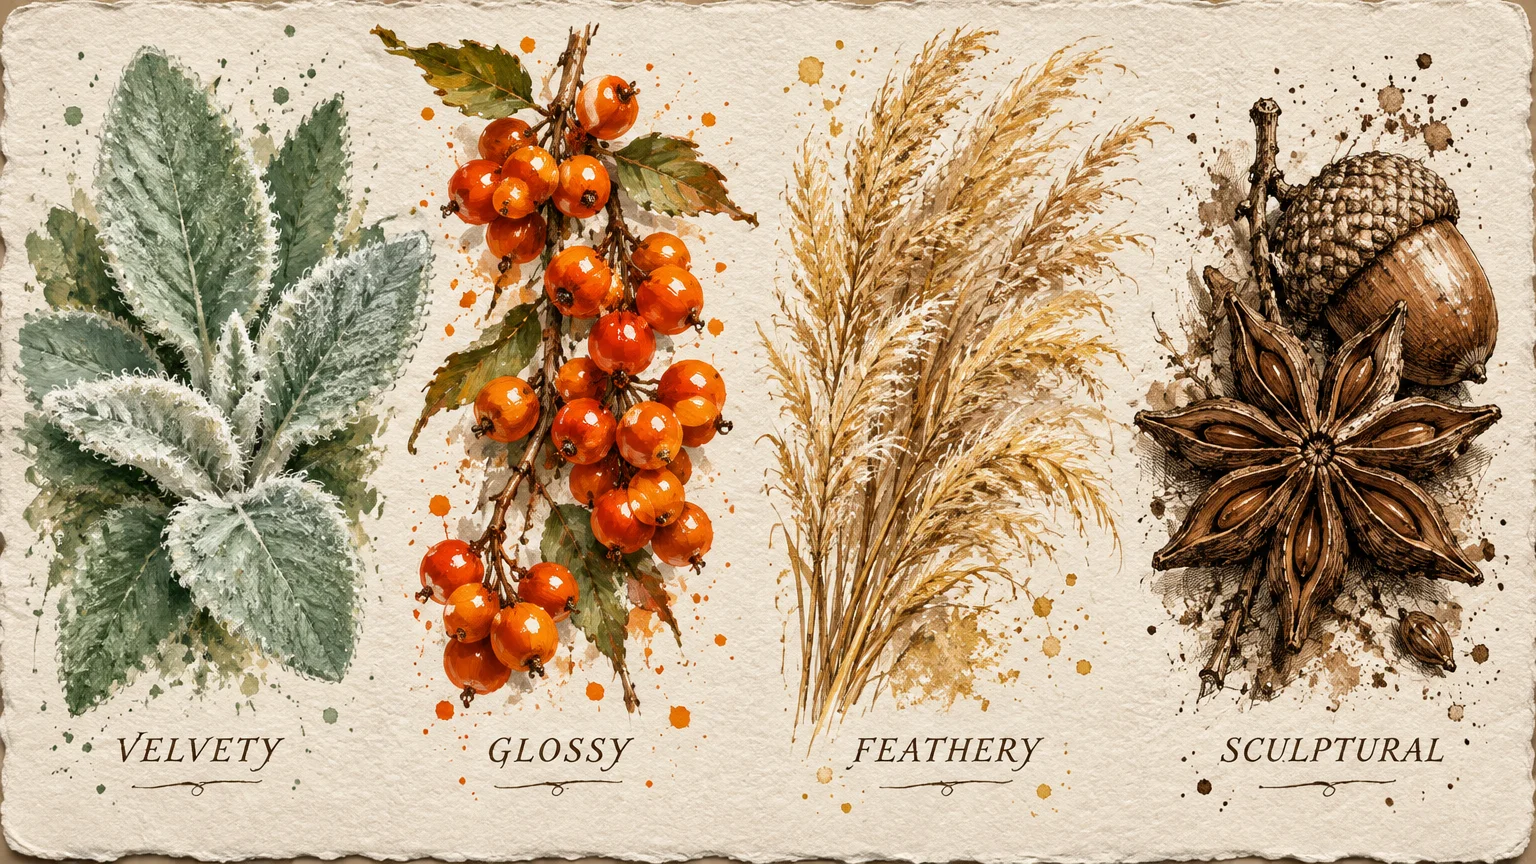
Counteract this flatness by pairing velvety magnolia leaves with rough pinecones, knobby acorns, and spiky dried thistle. Botanical specialists at Penn State Extension recommend combining contrasting seed pods and dried grains to celebrate seasonal biodiversity.
Incorporate matte textures alongside glossier elements to bounce sunlight dynamically across your door. Rough burlap, ribbed mini pumpkins, and feathery dried grasses inject immediate tactile interest into autumn front door decor.
Combining hard elements like wooden pods with soft, papery husks prevents visual fatigue. High textural contrast gives your wreath physical depth even on overcast autumn days.
6. Neglecting the Inner Ring and Outer Perimeter
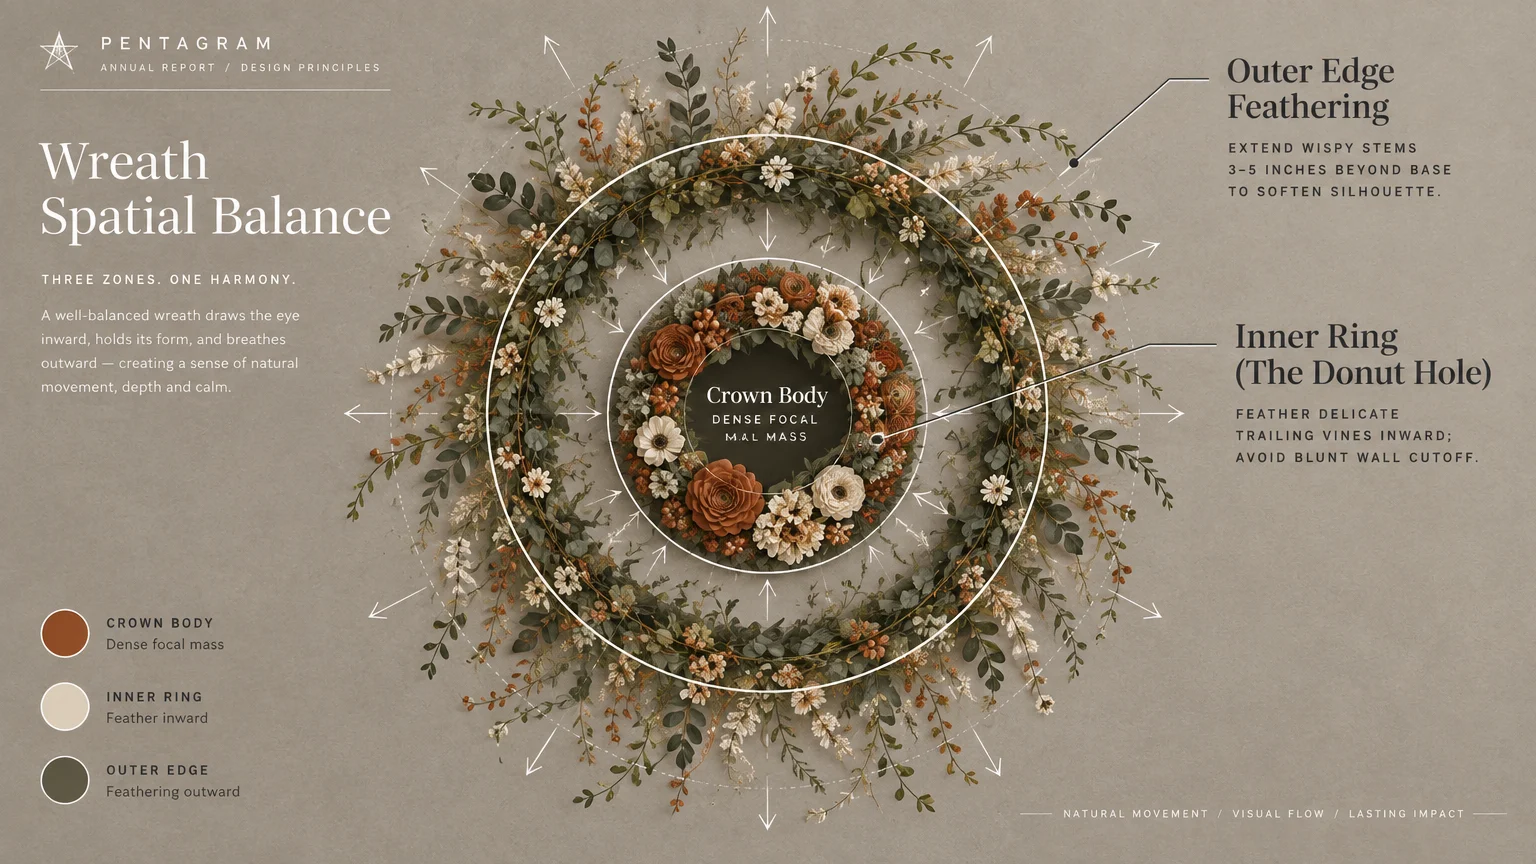
Many crafters concentrate all their materials strictly on the center face of the wreath ring. When viewed from an entryway sidewalk or driveway, an undecorated perimeter reveals bare mechanics and unfinished gaps.
To achieve professional fullness, wrap your foliage completely around the outside perimeter and down into the center hole. Angling outer stems outward visually broadens the silhouette and softens harsh structural edges.
Tucking compact leaves and small berry clusters into the interior hole frames the empty center. This interior layering draws the viewer’s eye into the design rather than through it.
Remember that guests approach your front porch from sideways angles rather than straight-on viewpoints. Dressing the outer sides creates a lush, rounded profile that looks finished from every angle.
7. Mismatching the Wreath Scale to Your Front Door
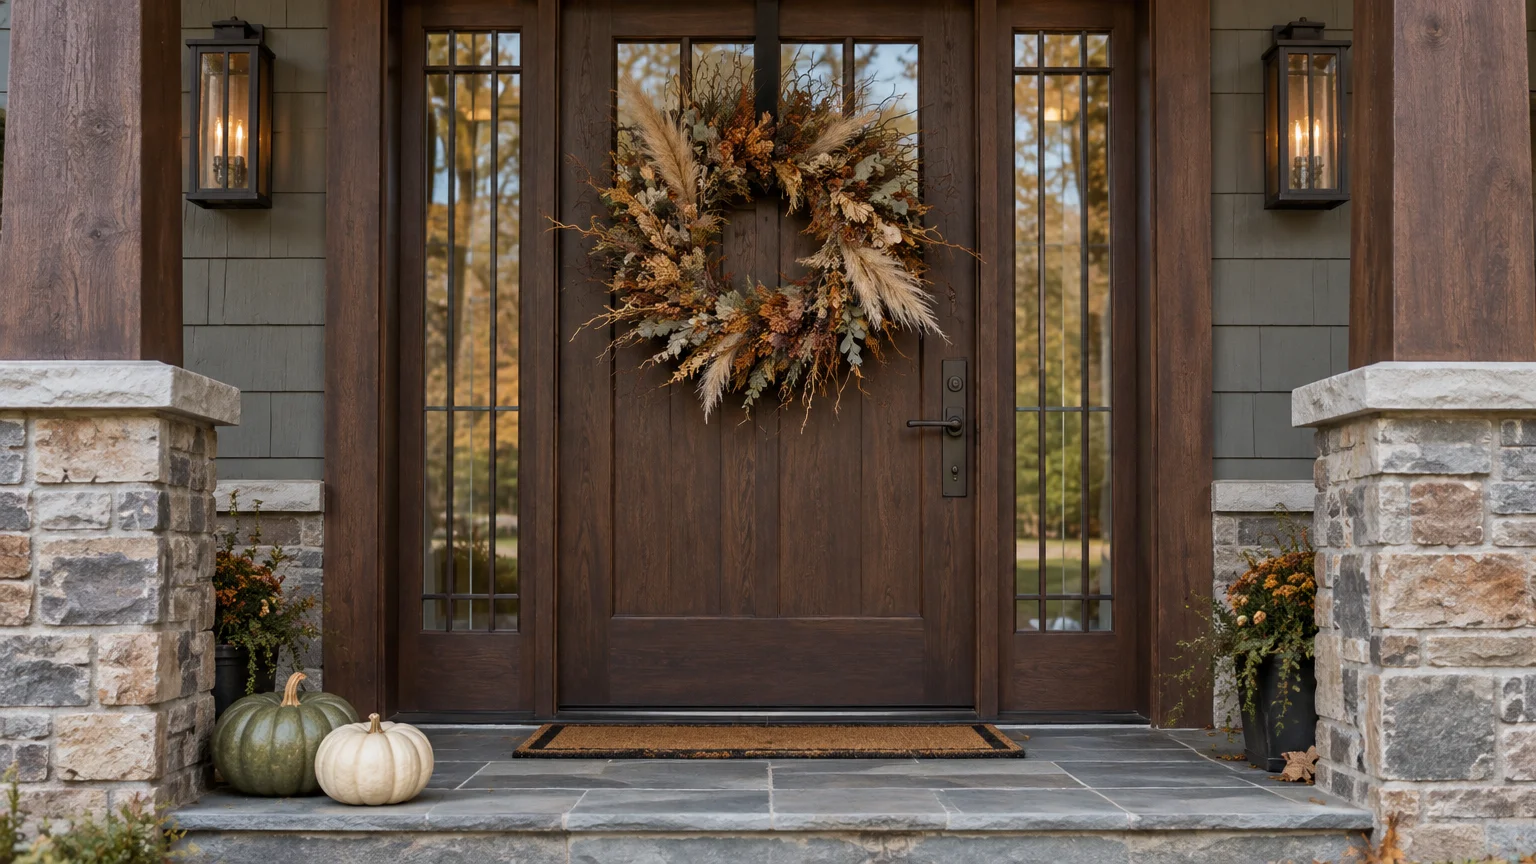
An undersized wreath hung on an expansive door looks dwarfed and visually pancake-thin, regardless of its textural richness. Proportion plays an indispensable role in how the human eye registers architectural dimension.
Design authorities at Architectural Digest note that an entryway focal point should occupy roughly two-thirds the width of your entrance door. A standard thirty-six-inch front door typically demands a wreath measuring twenty-four to twenty-eight inches wide.
Hanging a petite eighteen-inch wreath on a standard door creates awkward negative space around the perimeter. The empty door expanse swallows the piece, making the entire display appear insubstantial.
If your current wreath feels too skimpy, you do not need to discard it. Mount it on top of a larger tobacco basket or round wooden plaque to add perimeter scale immediately.
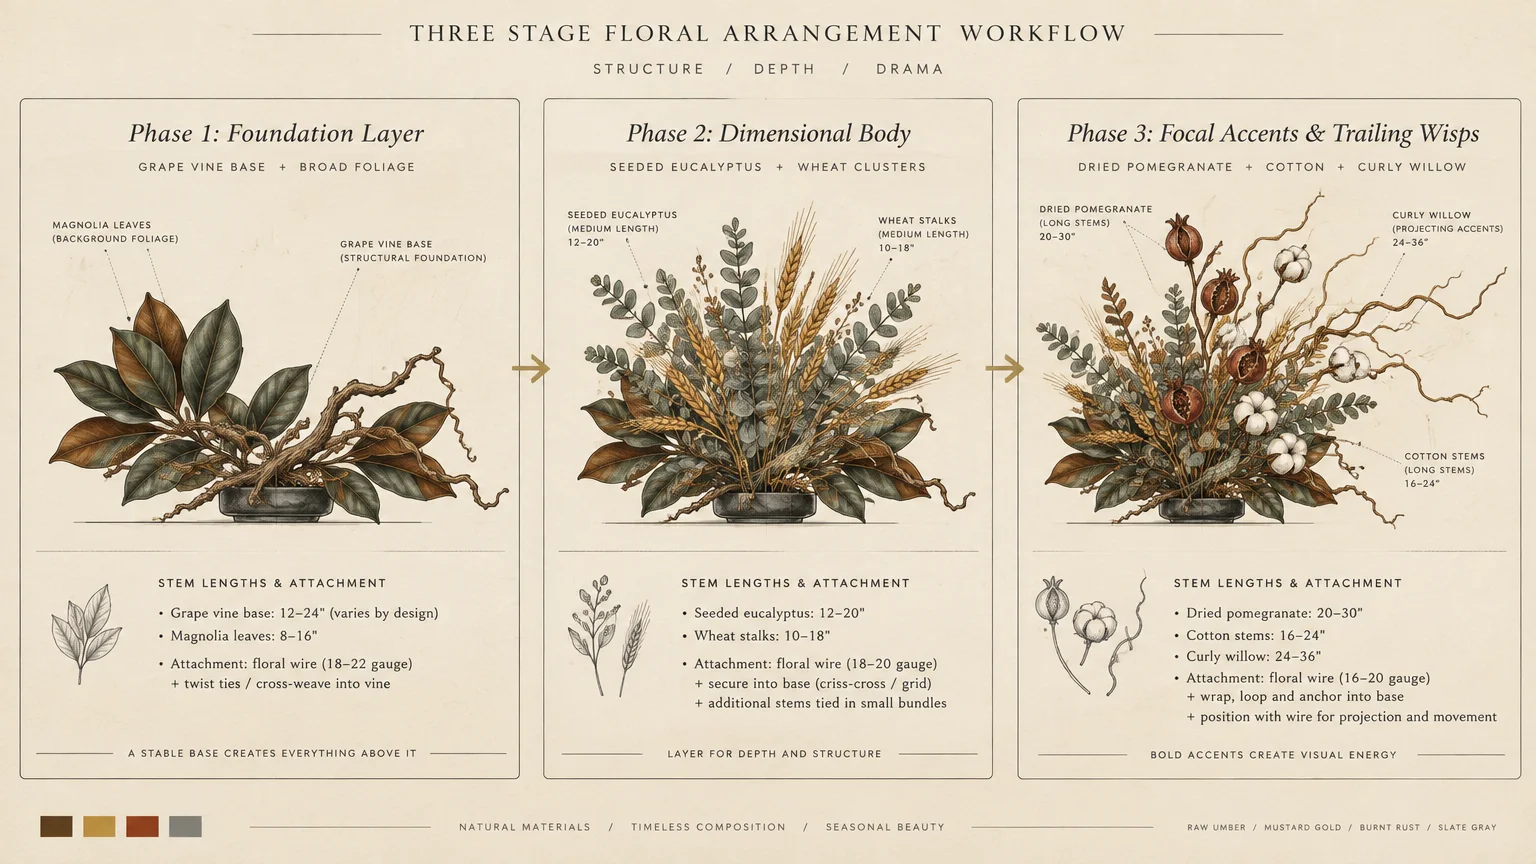
A Three-Phase Process for Sculptural Depth
Creating lasting fullness requires a methodical assembly sequence rather than random placement. Breaking your DIY fall wreath build into distinct structural phases ensures balance, durability, and rich visual interest.
Phase 1: Establishing the Structural Anchor
Inspect your grapevine base and select your focal direction, whether you desire a classic circular flow or modern crescent sweep. Secure a sturdy wire hanging loop to the rear before adding botanicals.
Weave your heaviest, broadest greenery stems deep into the frame to create an expansive, leafy canvas. These foundational pieces hide the mechanics while establishing the maximum outer diameter of your project.
Secure these heavy anchor branches firmly with paddle wire so they withstand strong autumn gusts. Test the frame with a quick shake before moving on to delicate accent layers.
Phase 2: Weaving Asymmetrical Mid-Layers
Introduce secondary foliage, dried grasses, and medium-sized accents like small faux squash or clusters of dried hydrangea. Distribute these elements along a gentle, natural curve rather than scattering them in rigid symmetry.
Vary the insertion angles so some stems lean slightly outward while others point forward. This rotational variation creates natural pockets of shadow that give your arrangement deep, lifelike movement.
Step back five to six feet from your worktable frequently during this phase. Stepping back allows you to spot flat hollows or unbalanced clusters before locking stems in place.
Phase 3: Securing Accents and Visual Bridges
Add your primary focal points, such as oversized pinecones, heirloom velvet pumpkins, or an asymmetrical ribbon bow. Anchor these prominent showstoppers slightly off-center to produce a sophisticated, organic focal resting spot.
Finish by inserting delicate accent sprigs—such as hypericum berries, curly willow twigs, and sweet autumn clematis tendrils—to bridge gaps. These airy additions should flutter gently in outdoor breezes, breaking the static plane.
Use hot glue sparingly during this final step only to secure tiny picks that wire cannot reach. Keep delicate tips pointing slightly upward toward incoming sunlight for natural visual lift.
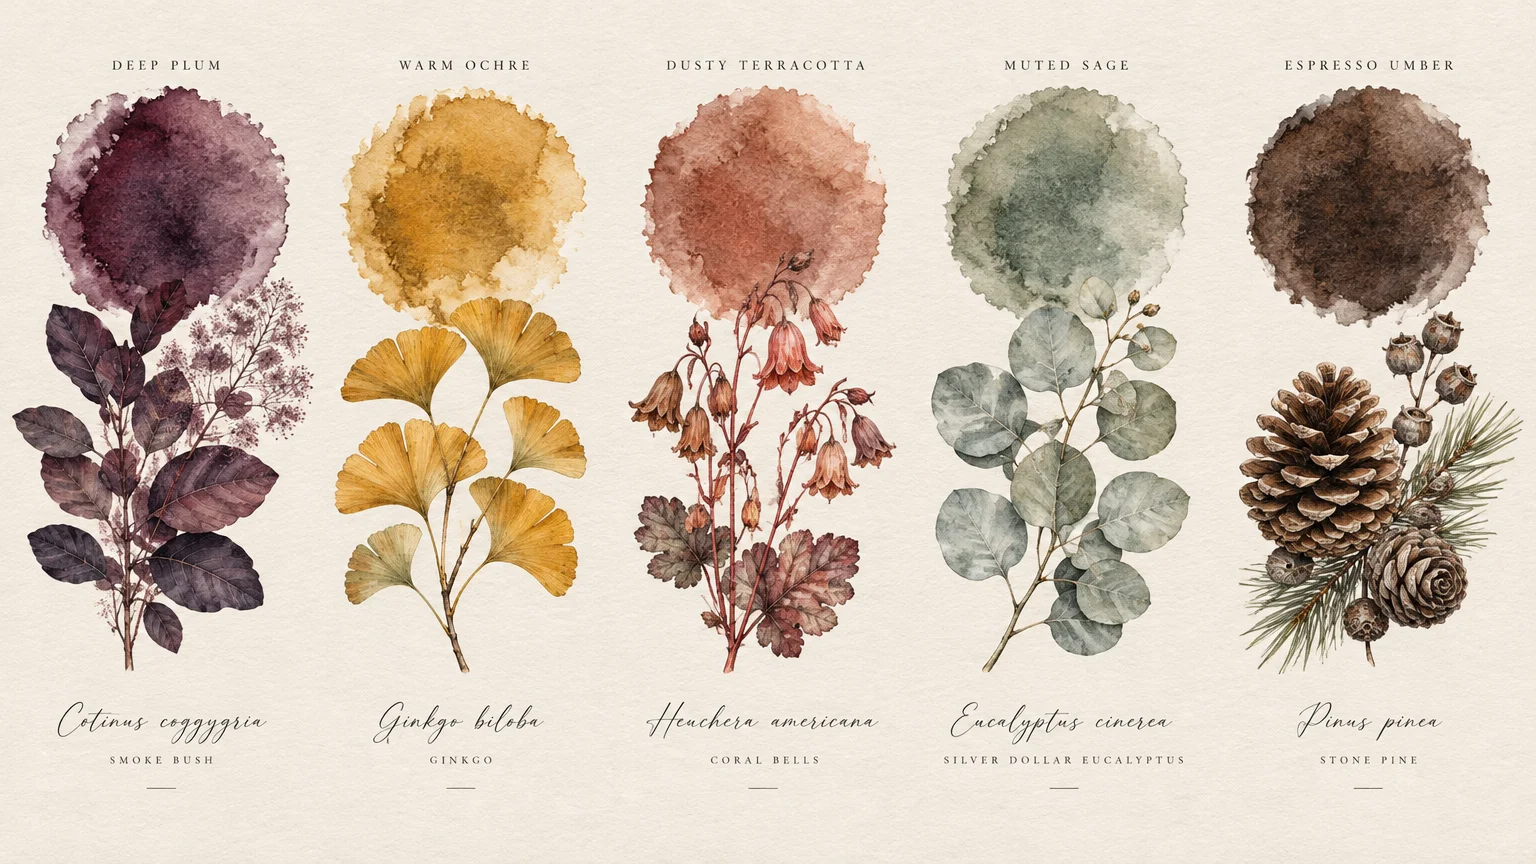
Elevating Your Palette Beyond Basic Orange
Relying exclusively on bright pumpkin orange and scarlet leaves often makes autumn wreaths look flat and predictable. Saturated, identical warm tones blend together under bright sunlight, obscuring physical contours from afar.
Build a dynamic palette by pairing rich plum, muted sage, and creamy off-white with warm brass tones. Muted olive leaves and dusty eucalyptus soften aggressive reds while providing elegant structural backdrop support.
Contrast light and dark values deliberately across your floral wreath ideas. Placing pale miniature pumpkins directly adjacent to dark burgundy leaves emphasizes the unique silhouette of each individual element.
Adding neutral dried elements like bleached flax or tan broomcorn provides visual breathing room. These gentle neutrals allow your deeper autumn hues to pop with genuine dimension.
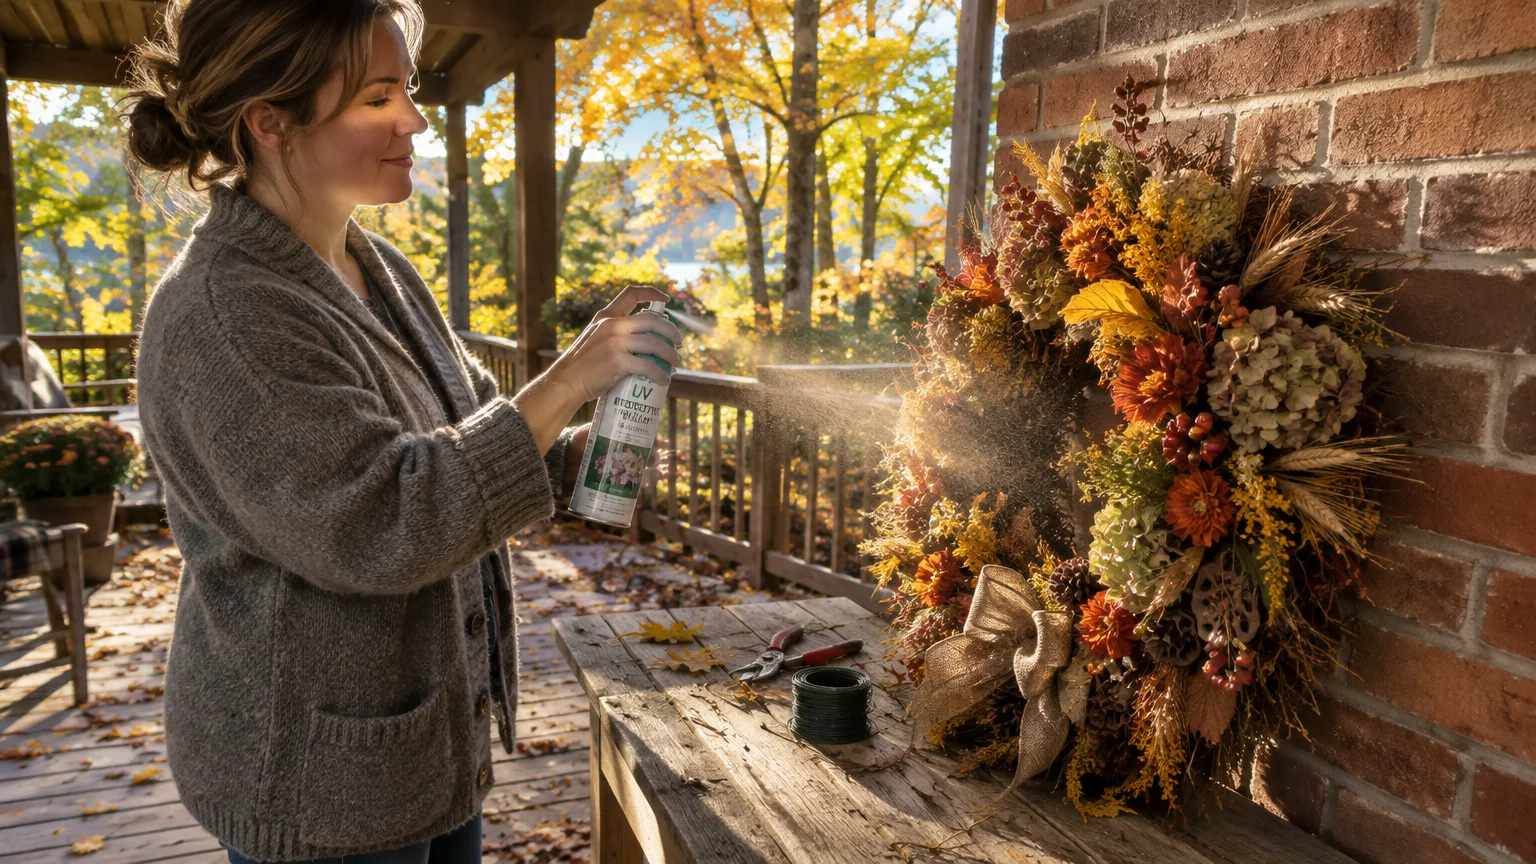
Protecting Dimension Against Autumn Weather
Harsh autumn winds, rain, and intense afternoon sun can quickly flatten foliage and bleach vibrant botanical dyes. Protecting your wreath preserves both its physical volume and realistic color throughout the entire harvest season.
If your entrance features an exterior storm door, monitor heat accumulation on sunny afternoons carefully. Energy guidelines from the U.S. Department of Energy highlight how glass storm doors trap heat, which can easily melt floral hot glue.
Coat artificial leaves with an aerosol clear UV floral protectant before hanging to prevent color fading and brittle stems. For protected porches, apply hairspray to dried seed heads to minimize seasonal shedding.
If wind crushes or dislodges outward-reaching stems during a storm, steam them gently using a handheld clothes steamer. Warm steam relaxes compressed wire stems and restores limp silk petals to their original plump shape.
Store your wreath in a rigid, plastic structured container rather than a flexible trash bag when winter arrives. Compression during off-season storage crushes delicate wire stems and ruins dimensional shaping.
Frequently Asked Questions About Fall Wreaths
Which floral wire gauge works best for heavy branches?
A twenty-two-gauge green floral wire offers the ideal balance of flexibility and holding strength for standard wreath assembly. It bends easily around thick grapevine branches while securing dense pinecones and heavy squash firmly.
For delicate berry picks or dried grass stems, switch to finer twenty-six-gauge wire. The thinner wire binds fragile stems without crushing or slicing through tender plant tissue.
Avoid using thin sewing thread or clear monofilament fishing line for heavy accents. Fishing line can stretch under outdoor temperature swings, causing heavier accents to sag downward over time.
Can you mix fresh foraged clippings with artificial foliage?
Blending fresh clippings with premium artificial stems creates realistic depth and keeps overall project costs exceptionally low. Sturdy evergreens, dried oak branches, and dried hydrangea heads blend seamlessly alongside realistic faux leaves.
Keep in mind that fresh greenery eventually dries out and changes color over several weeks outdoors. Design your base so you can quickly pull and replace fading clippings without dismantling the entire structure.
Extension specialists at Clemson Cooperative Extension suggest harvesting botanicals during dry afternoons to minimize internal moisture and mold risk. Allowing clippings to dry slightly before wiring prevents mold growth against damp grapevine frames.
Where can you source high-quality wreath materials on a budget?
Your backyard or local neighborhood walking trails offer an abundant source of free textural materials. Forage for fallen pinecones, dried seed pods, ornamental grasses, and sturdy fallen branches after windy autumn afternoons.
For artificial accents, shop craft store clearance sales in late summer or repurpose faux florals from thrift store finds. Disassembling dated vintage floral arrangements often yields high-end silk foliage for pennies.
You can also spray-paint faded plastic leaves with matte designer spray paint to mimic dried botanicals. A quick coat of warm ivory or terracotta revives cheap craft finds instantly.
How do you adjust wreath proportions for storm doors?
Tight clearances between main doors and storm glass require building outward along the perimeter rather than directly forward. Keep your total wreath depth under four inches to avoid crushing delicate foliage.
Select an oval or asymmetrical crescent layout that draws the eye across the door surface horizontally. This approach delivers bold visual curb appeal without jamming against the closing storm door frame.
Soften flat spots by feathering wispy grass plumes laterally across the door face. Lateral layering creates deep shadow lines even when physical clearance remains strictly limited.
Bring True Dimension to Your Entryway Today
Creating a rich, dimensional wreath transforms how guests and neighbors perceive your entire autumn entryway. By varying stem heights, fluffed textures, and asymmetrical layers, you eliminate flat design pitfalls effortlessly.
Step outside to gather textural branches, plug in your glue gun, and start shaping those wired stems. With just an hour of hands-on work, you can give your front door a lush, inviting seasonal centerpiece.