Choosing the right bathroom tile combinations transforms a daily washroom into an enduring sanctuary. When you pair complementary textures and balanced proportions, you create a classic bathroom design that outlasts passing trends.
High-impact tile pairings anchor your walls and floors so you never face buyer remorse five years down the road. Thoughtful material selection also protects your home investment and elevates your daily morning routine.
Discover twelve timeless bathroom tile pairings alongside practical installation methods that give your DIY remodel a master-crafted finish today.
Planning Your Bathroom Tile Renovation
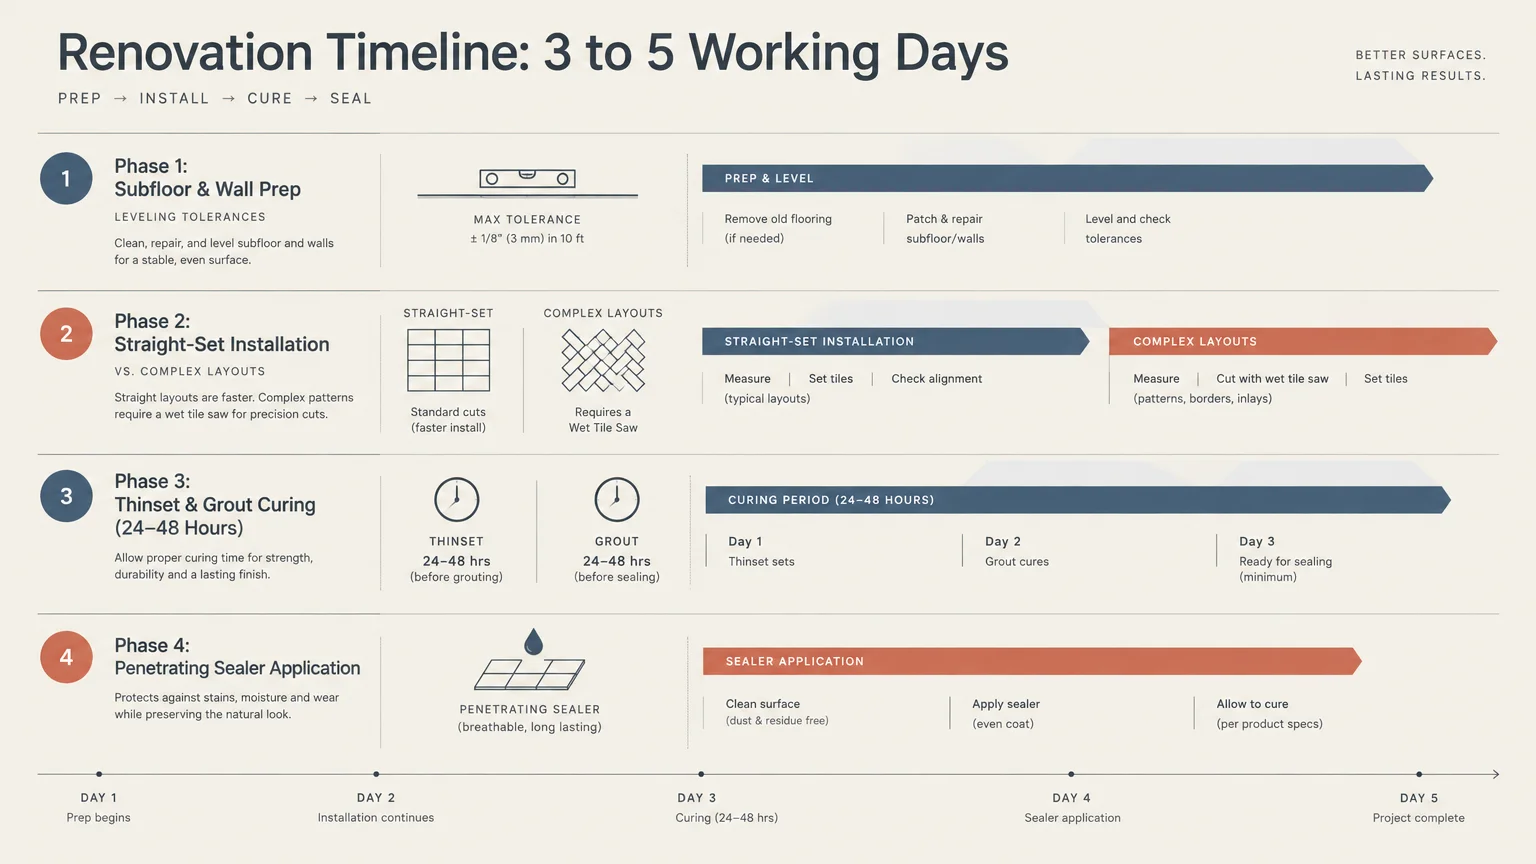
A successful tile remodel balances your project scope with realistic timelines and dedicated tool investments. Standard bathroom surfaces typically require three to five working days when you account for curing times between phases.
Budget requirements scale directly with your chosen materials; natural stones demand higher investments than standard ceramics. Setting realistic expectations early keeps your renovation stress-free and on track.
Beginners can easily tackle simple straight-set wall installations with basic hand tools. However, complex floor layouts require patience, accurate leveling systems, and a quality wet tile saw.
12 Timeless Bathroom Tile Combinations
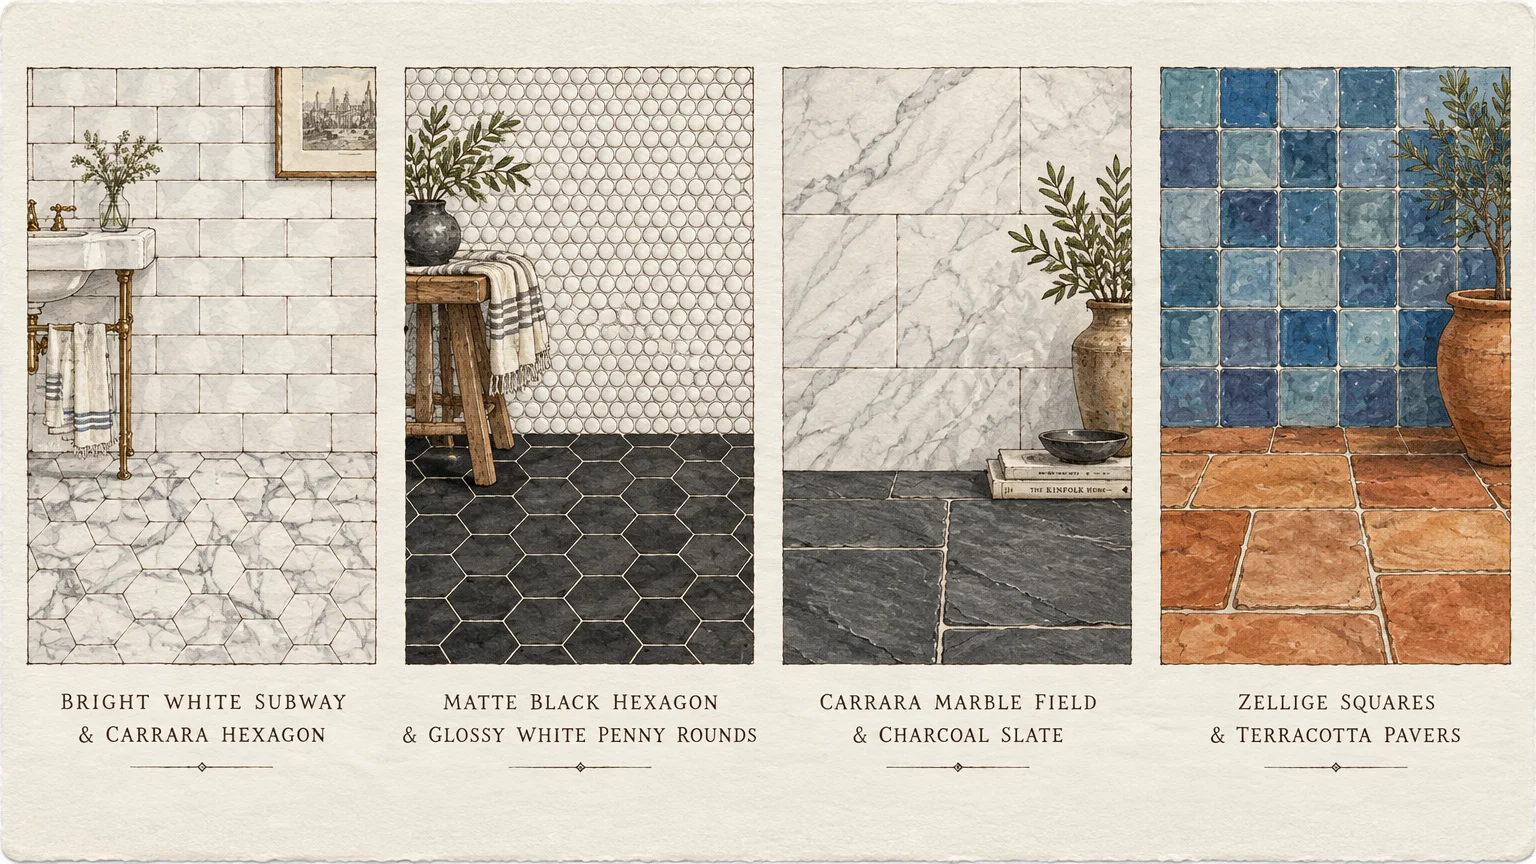
1. Bright White Subway Walls and Hexagonal Marble Floors
Crisp ceramic subway tile provides an immaculate vertical backdrop that effortlessly reflects natural window light. Pairing this clean surface with honed Carrara hexagonal floor mosaics adds soft greyscale veining beneath your feet.
This iconic duo has graced pre-war apartments and historic estates for well over a century. You can browse classic historic layouts documented by Architectural Digest design archives to see its architectural longevity in action.
Use a mid-gray grout on the floor to hide foot traffic and accentuate geometric shapes. Maintain bright white or soft platinum grout along the walls to preserve an open, airy feeling.
2. Matte Black Hexagon Floors and Glossy White Penny Wall Accents
High-contrast pairings always command attention without feeling dated. Charcoal or matte black hexagonal porcelain grounds your room, while diminutive white penny rounds energize shower niches and wainscoting.
Penny rounds feature generous grout joints that offer natural slip resistance under wet feet. Meanwhile, the broad flat surfaces of the matte black hexagons deliver a soothing, contemporary baseline.
Pair this combination with warm brass plumbing fixtures to soften the stark contrast. The metallic warmth balances the crisp monochrome palette beautifully.
3. Honed Carrara Marble Field and Charcoal Slate Tiles
Cool, refined Italian marble walls introduce delicate luxury to shower enclosures. Grounding that polished wall with dark, cleft-faced charcoal slate floors brings an organic, earthy stability to the space.
Natural slate offers exceptional grip when wet, making it an ideal candidate for curb-less shower pans. The matte, textured stone prevents the marble from feeling overly formal or sterile.
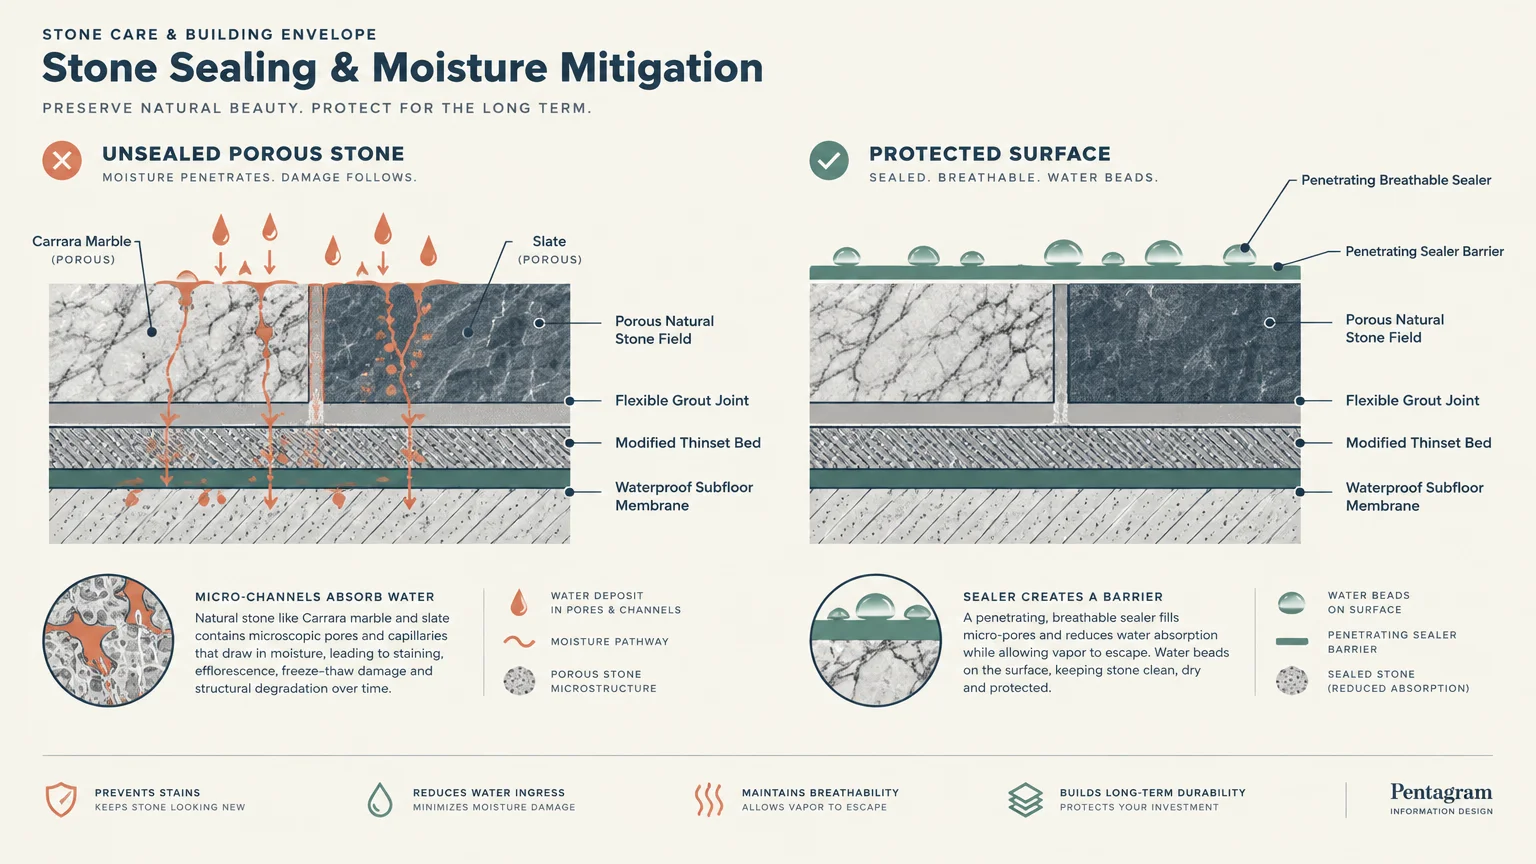
Always apply a breathable penetrating sealer to both natural stones before and after grouting. This barrier preserves the porous surfaces against hard water deposits and cosmetic discoloration.
4. Handcrafted Zellige Squares and Earthy Terracotta Pavers
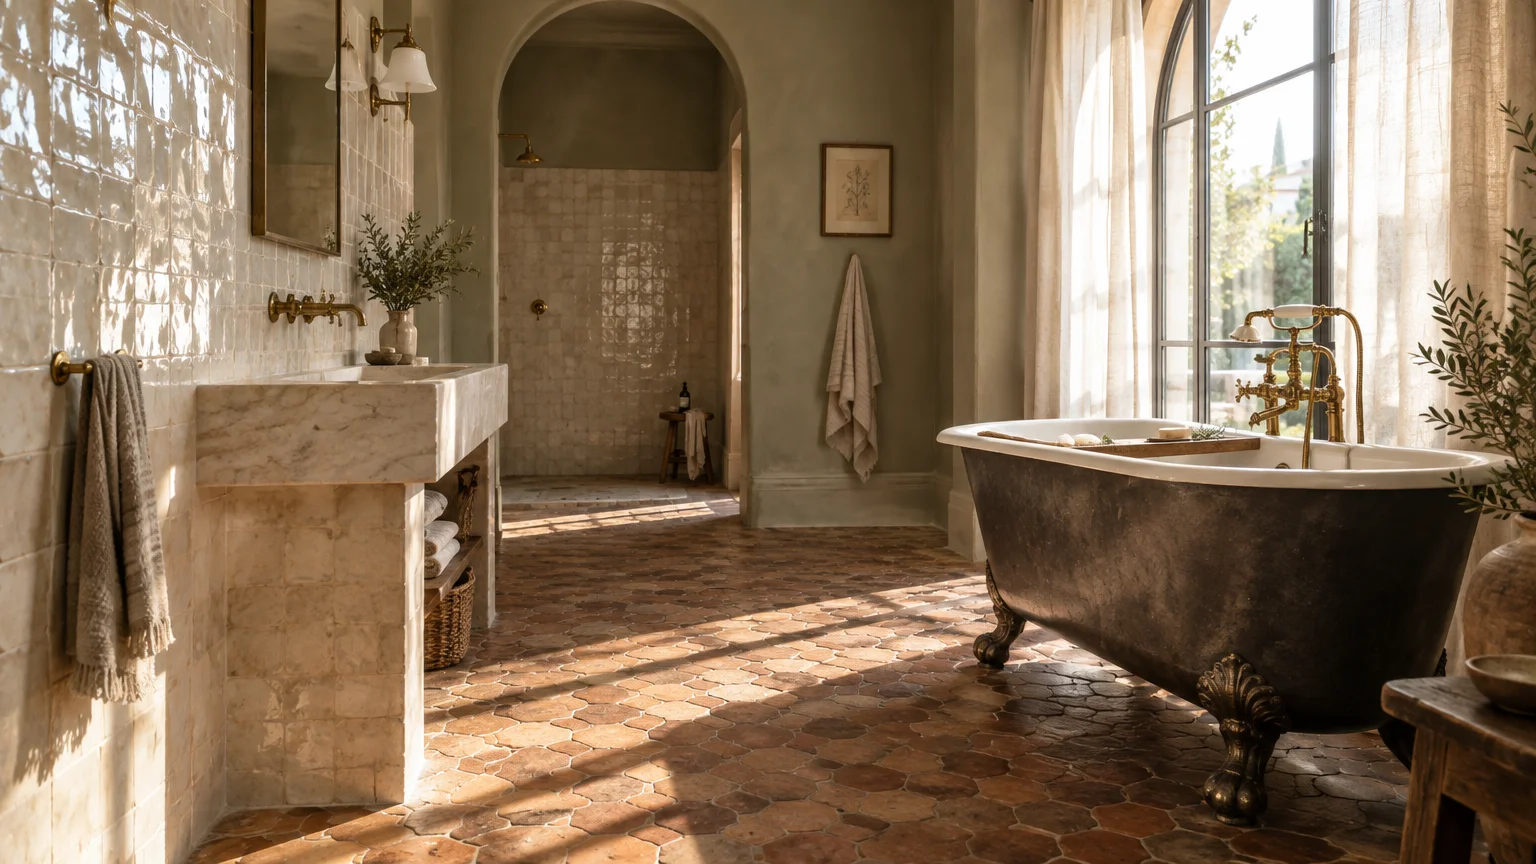
Moroccan Zellige tiles feature subtle tonal variations and gently chiseled edges that catch bathroom lighting dynamically. When you install pearlescent Zellige on vertical walls, pair it with reclaimed terracotta floor pavers.
The sun-baked clay floors infuse old-world warmth into modern washrooms. This earthy foundation balances the glossy, light-bouncing glaze of the handcrafted wall tiles.
Because handmade tiles exhibit minor thickness discrepancies, dry-lay your tiles before setting them into thin-set mortar. This simple step ensures smooth transitions and minimizes awkward lippage.
5. Beveled Bone Subway and Basketweave Marble Mosaic
If stark white feels too sterile for your home, choose off-white or bone ceramic tiles with beveled edges. The three-dimensional profile casts subtle shadows that add depth to vertical walls.
Continue that tailored sophistication downward with a traditional basketweave marble floor featuring black or gray dot inserts. The interlocking pattern introduces vintage charm reminiscent of twentieth-century grand hotels.
A warm almond or light greige grout unites the two distinct materials seamlessly. This muted joint color softens visual transitions across the room.
6. Navy Blue Herringbone Ceramic and Neutral Limestone Floors
Deep navy blue brings majestic drama to shower accent walls and vanity surrounds. Laying rectangular glazed tiles in a herringbone pattern injects dynamic directional movement that guides the eye upward.
Balance the rich blue hue by specifying smooth, sand-colored limestone slabs or large-format porcelain on the floor. The muted neutral floor keeps the room serene and visually grounded.
Choose a matching dark grout for the blue herringbone to avoid visual clutter. This monochromatic strategy highlights textural rhythm rather than jarring grout grids.
7. Sage Green Stacked Subway and Terrazzo Floor Tile
Soft sage green evokes an organic, spa-inspired atmosphere that encourages lingering relaxation. Installing ceramic subway tiles in a straight vertical stack provides a clean mid-century modern aesthetic.
Anchor that soothing botanical shade with multi-toned terrazzo flooring containing flecks of quartz, granite, and marble. The playful stone aggregate subtly reflects the green wall tones while camouflaging daily dust.
Renovation features published by HGTV remodeling resources frequently highlight soft green and terrazzo for enduring freshness. It offers understated character that outlives flash-in-the-pan design fads.
8. Checkered Black and White Marble Squares
Few patterns rival the historic majesty of a checkered floor laid on a diagonal angle. Alternating Nero Marquina and Thassos white marble tiles establishes rhythm and undeniable grandeur.
Keep your surrounding walls remarkably simple to prevent sensory overload. Large-format white porcelain or pristine wainscoting permits the checkered floor to remain the undisputed star.
Installing diagonal layouts requires careful centerline planning to ensure border cuts remain symmetrical along opposite walls. Take time to snap crisp chalk lines across the room before opening mortar bags.
9. Soft Gray Picket Tile and Wood-Look Porcelain Planks
Picket tiles reinterpret elongated hexagons with tapered ends, offering a refined, tailored appearance on vanity walls. Selecting a pale dove-gray glaze introduces subtle color that harmonizes with cool chrome hardware.
Pair those geometric wall patterns with porcelain floor planks designed to mimic rich white oak or weathered teak. You gain the inviting warmth of natural timber alongside the waterproof reliability of kiln-fired tile.
Keep floor grout joints narrow by selecting rectified porcelain planks with razor-straight edges. A tight joint profile completes the realistic hardwood illusion across your bathroom floor.
10. Dramatic Calacatta Porcelain Slabs and Fluted Ceramic Accents
Large-format Calacatta porcelain slabs drastically reduce grout lines in high-moisture shower enclosures. The dramatic ribbons of gold and charcoal veining provide natural movement and timeless architectural drama.
Contrast those expansive, silky wall slabs with vertically fluted or ribbed ceramic tiles along your vanity backsplash. The tactile, three-dimensional ridges offer inviting texture that invites closer touch.
Match your plumbing fixtures to the undertones within the slab veining. Warm brushed brass accents pick up golden ribbons, while matte black hardware complements deeper slate streaks.
11. Creamy Travertine Fields and Tumbled Stone Borders
Travertine remains an ancient classic that has lined bathhouses and Mediterranean villas for thousands of years. Soft beige honed travertine panels create an envelopment of cozy, sun-drenched tranquility.
Integrate narrow borders of tumbled stone listellos to define perimeter edges, shower ledges, and niche margins. The textural interplay between smooth honed stone and rustic tumbled edges adds quiet luxury.
Select a flexible, polymer-modified mortar specifically formulated for heavy stone installations. Proper bonding agents ensure your natural stone tiles remain securely seated for decades without hollow pockets.
12. Cobalt Talavera Accents and Warm Saltillo Hexagons
Southwestern and Spanish Colonial architecture celebrate vibrant artisan handiwork that never feels dated. Richly patterned cobalt and ochre Talavera tiles make stunning accents inside shower niches and wainscot caps.
Ground that artistic punch with warm, unglazed Saltillo hexagon tiles across the main floor footprint. The rich terra-cotta tones temper the vibrant painted glazes, establishing comfortable regional balance.
Ensure you coat raw Saltillo with a high-grade surface sealant to shield unglazed clay from staining. Ongoing care preserves the warm, rustic patina through years of foot traffic.
Step-by-Step Installation Framework
Phase 1: Substrate Preparation and Waterproofing
Never tile directly over drywall or uneven plywood floors in damp environments. Remove old wall coverings down to the framing studs to inspect for structural deflections and water damage.
Install cement backer boards or rigid foam waterproofing panels, fastening them with corrosion-resistant screws. Seal all seams and fastener indentations using alkaline-resistant fiberglass mesh tape and thin-set mortar.
Apply two continuous coats of liquid waterproofing membrane across wet zones to form an impenetrable barrier. Detailed installation standards compiled by the Tile Council of North America standards emphasize that flawless waterproofing dictates long-term installation success.
Phase 2: Layout Planning and Mortar Execution
Snap perpendicular chalk lines through the center of the room to establish precise working quadrants. Dry-fit multiple tile rows along both axes to eliminate awkward sliver cuts against baseboards.
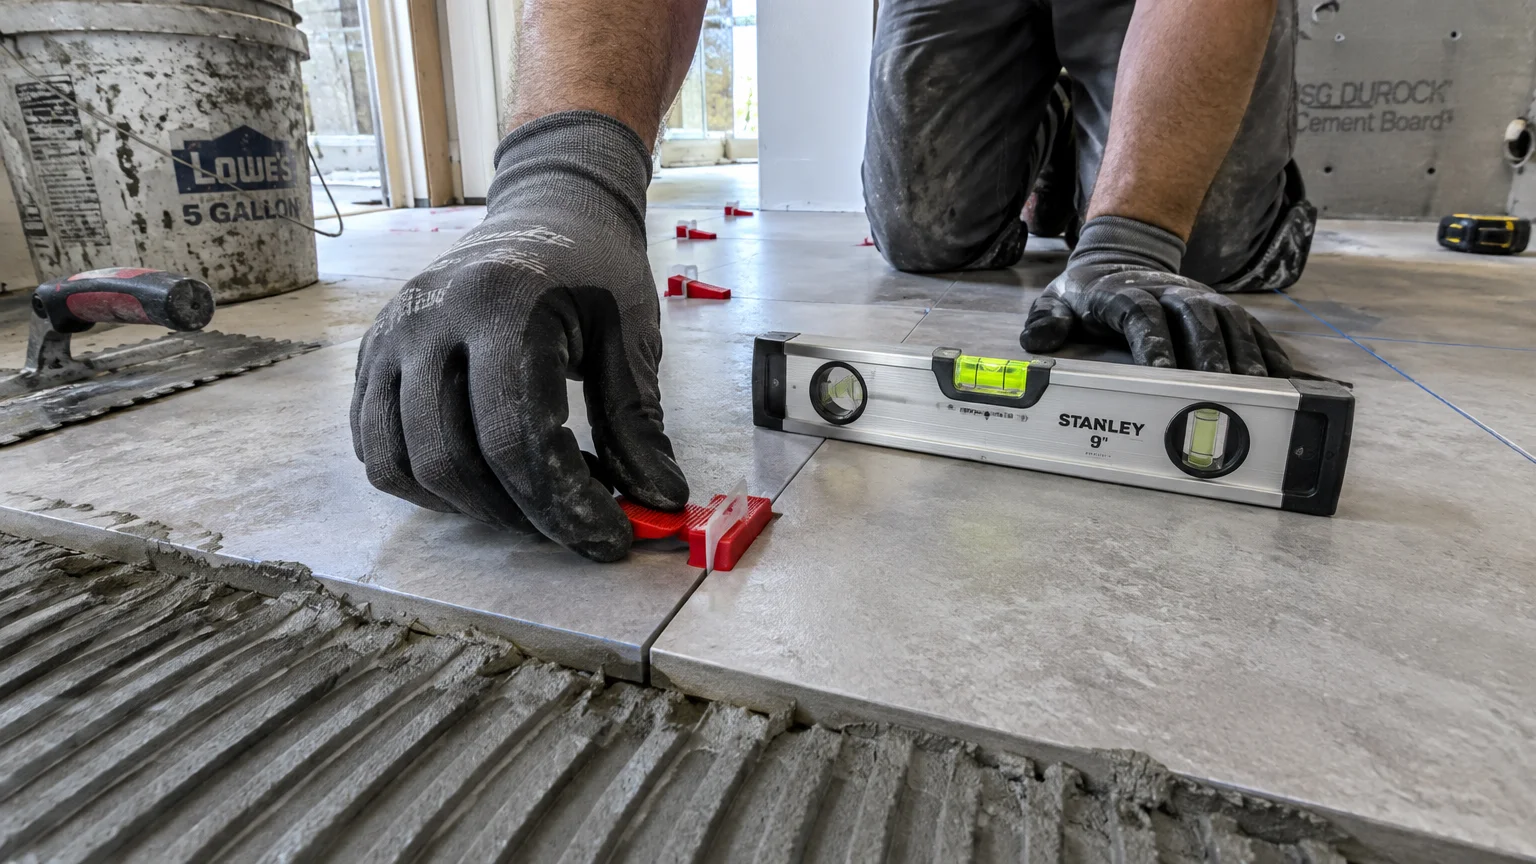
Mix polymer-modified thin-set mortar to a smooth, peanut-butter consistency using a heavy-duty drill paddle. Comb the mortar uniformly with a notched trowel, holding the tool at a consistent forty-five-degree angle.
Back-butter large-format tiles with a flat skim coat of mortar to achieve full surface coverage. Press each tile with a slight twisting motion, inserting mechanical leveling clips to keep adjacent edges flush.
Clean thin-set squeeze-out from grout joints immediately using a damp sponge and plastic pick. Mortar cured inside joints weakens future grout bonds and ruins the appearance of your final lines.
Phase 3: Grouting and Flexible Perimeter Caulking
Allow setting mortar to cure undisturbed for a full twenty-four hours before removing leveling wedges. Vacuum all debris from joint cavities so dust does not contaminate your grout mixture.
Force grout deep into joints using a rubber float held at a steep angle across the tiles. Wipe away residual surface haze after fifteen minutes using a lightly dampened, rounded sponge.
Never install rigid grout in structural change-of-plane joints, such as where walls meet floors or corners. Fill these seams with color-matched flexible silicone caulk to accommodate building movement without cracking.
Styling and Personalizing Your Tile Pairings
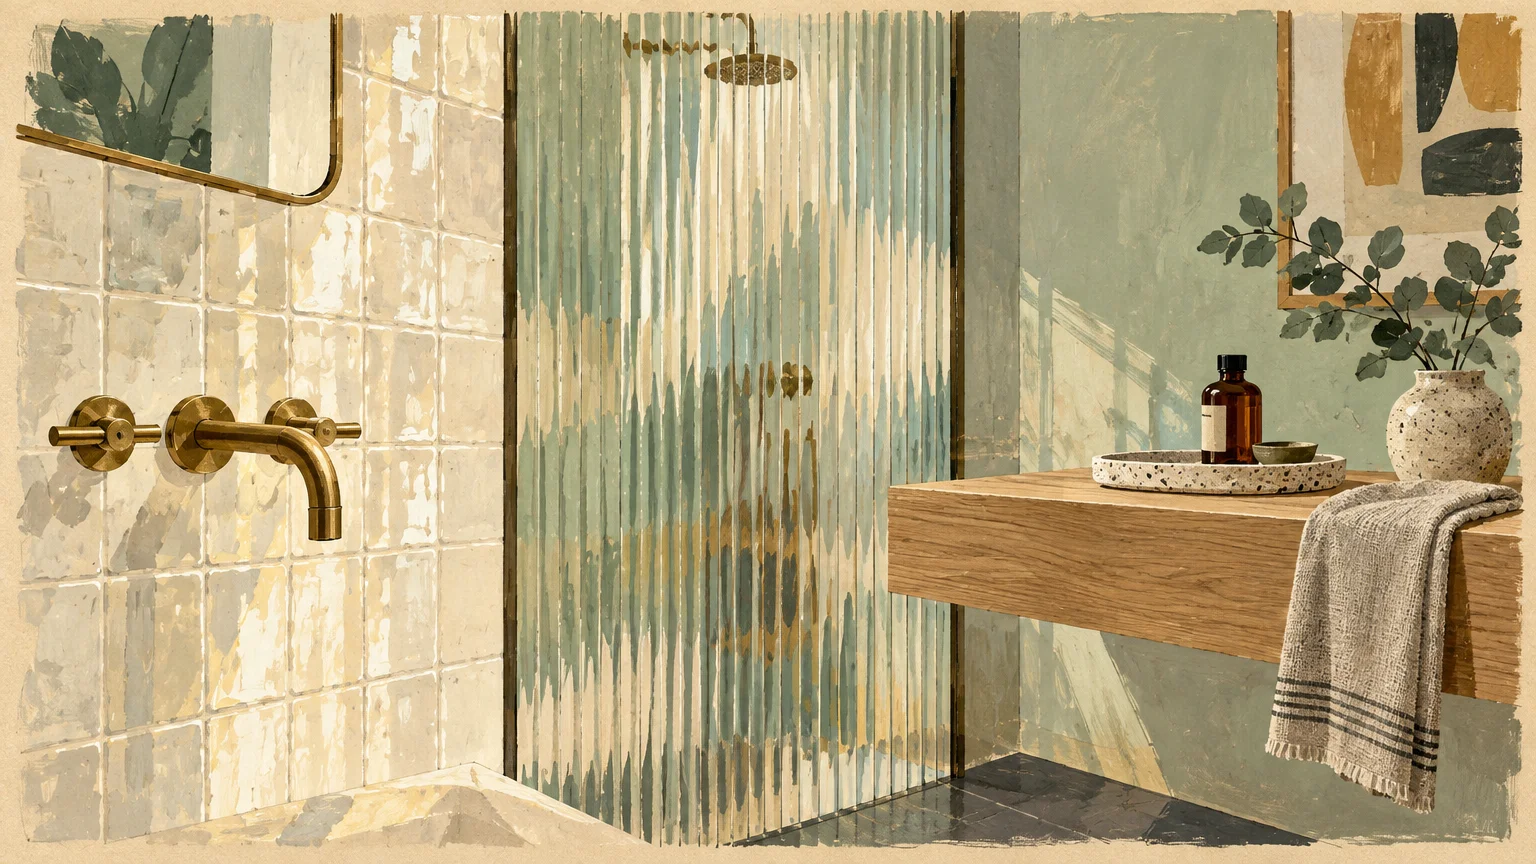
Your grout line selection dictates whether your tile combination reads as unified or graphic. Matching grout color to your field tile visually expands small bathrooms by minimizing distracting boundary lines.
Conversely, contrasting grout outlines geometric shapes like hexagons, picket tiles, and herringbone motifs. Keep contrast moderate; subtle tonal shifts look far more timeless than aggressive black-and-white grids.
Layer dynamic textures against glossy glazes by incorporating natural unlacquered brass, brushed nickel, or matte iron fixtures. These tactile metallic surfaces deepen the personality of classic ceramic surfaces.
Integrate custom details such as built-in recessed niches trimmed with solid stone threshold sills. Solid curbs eliminate fragile mitered corners and elevate the architectural presence of your shower.
Troubleshooting and Long-Term Maintenance
If you spot white powdery residue blooming on grout lines, you are dealing with mineral efflorescence. Efflorescence occurs when migrating moisture brings soluble salts to the surface during the curing phase.
Scrub the affected area with a specialized acidic cleaner or diluted sulfamic acid solution. Improve ventilation with continuous exhaust airflow to accelerate dry-out cycles and protect indoor air quality.
Read comprehensive guidance from the EPA on indoor air and moisture control to keep wet spaces mold-free. Efficient bathroom fans mitigate excessive humidity before it can compromise caulking seams.
Apply penetrating silicone sealers to cementitious grout lines annually to prevent moisture penetration and dirty staining. A quick wipe-down with neutral pH cleaners preserves the sealer and prevents dulling chemical buildup.
Frequently Asked Questions
What tools do I need to tackle bathroom tiling?
Essential equipment includes a diamond-blade wet tile saw, notched trowels, a rubber grout float, and level. You will also need a rubber mallet, mechanical tile spacers, a mixing paddle, and clean buckets.
Renting a professional-grade wet saw from your local equipment yard saves money while delivering chip-free cuts. Invest in quality knee pads to safeguard your joints during prolonged floor installations.
How do I choose between ceramic and porcelain tiles?
Porcelain is fired at higher temperatures than ceramic, producing an ultra-dense body that absorbs virtually no water. This exceptional density makes porcelain the premier choice for shower floors and heavy-traffic entries.
Standard glazed ceramic tiles cost less and are noticeably easier to cut with manual snap cutters. They perform flawlessly on vertical bathroom walls, decorative splash areas, and low-wear vertical surfaces.
Where should I source quality tiles without overspending?
Local wholesale tile distributors and specialty showrooms frequently offer discounted remnants and overstocked lots. Exploring architectural salvage centers can also yield reclaimed terracotta and historic decorative encaustic tiles.
Consult step-by-step remodeling tutorials from This Old House renovation guides to calculate exact material quantities with appropriate overage. Ordering an extra ten percent accommodates breakage and angled edge cuts without halting progress.
How can I make a small bathroom appear larger with tile?
Run large-format floor tiles continuously from the main room directly into a curbless walk-in shower. Eliminating physical visual dividers draws the gaze outward, creating the illusion of expansive square footage.
Mount glossy wall tiles vertically toward the ceiling to draw the eye upward toward natural illumination. Pair these bright vertical tiles with tone-on-tone grout to prevent the small room from feeling segmented.
Begin Your Bathroom Transformation
Designing a timeless bathroom does not require professional drafting degrees or extravagant luxury budgets. By choosing balanced proportions and classic tile combinations, you invest in durability and daily comfort.
Take your time during the substrate preparation phase to guarantee that your tile foundation stays solid and dry. Flawless prep work gives you the confidence to lay down each tile with precision.
Gather your samples, sketch your layout on grid paper, and start transforming your bathroom today. The rewarding feeling of walking across a floor you installed yourself lasts for decades.