Mastering basic home maintenance protects your property value and immediately slashes thousands of dollars from your annual household expenses. Instead of paying a professional handyman sixty to one hundred twenty-five dollars per hour alongside steep minimum trip fees for routine fixes, tackling everyday repairs yourself delivers immediate satisfaction and reliable control over your living space. From quieting a running toilet to restoring punctured drywall, basic DIY proficiency transforms intimidating mechanical challenges into quick afternoon victories. The following fundamental repairs require minimal financial investment in specialized tools, rely on straightforward mechanical principles, and give you the skills necessary to keep your home running smoothly, efficiently, and safely year after year.

Strategic Planning: Budget, Timeline, and Essential Tooling
Before diving into individual projects, establishing a modest toolkit and understanding repair economics will maximize your success. Professional trades typically charge a baseline diagnostic fee ranging between seventy-five and one hundred fifty dollars just to knock on your door, followed by steep hourly labor rates. By contrast, assembling a foundational toolkit costs roughly one hundred to one hundred fifty dollars as a one-time investment. Your starter kit should include a cordless drill with driver bits, a multi-bit screwdriver, an adjustable wrench, tongue-and-groove pliers, a six-inch flexible putty knife, a utility knife, a torpedo level, and a roll of thread-seal tape.
Most minor household repairs take between fifteen and sixty minutes once you gather the appropriate materials. Assessing your skill level honestly prevents unnecessary frustration; every project highlighted here falls within the novice-to-intermediate range and involves minimal structural or electrical risk. By understanding how your home fixtures assemble, fasten, and seal, you will diagnose issues faster and complete lasting fixes that look clean and function flawlessly.
1. Rebuilding a Running Toilet Mechanism
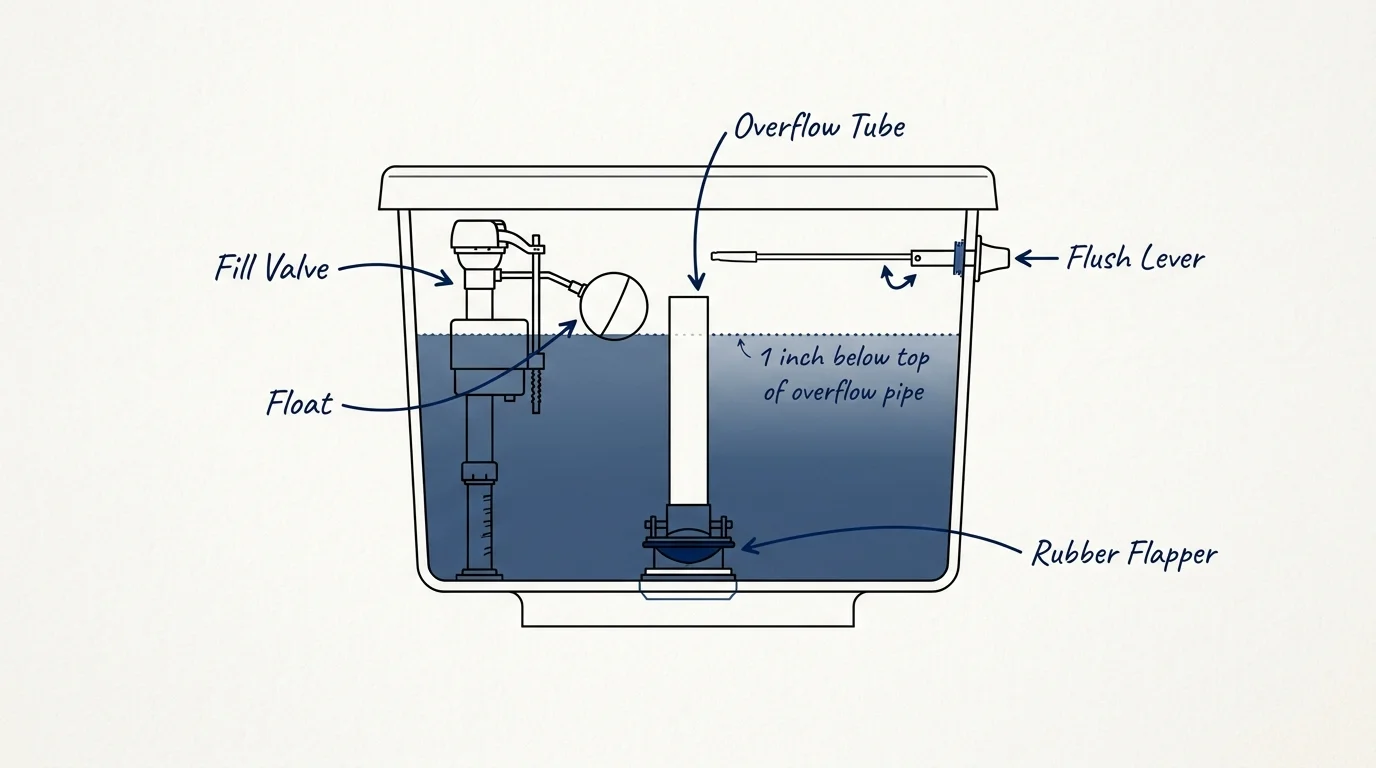
A running toilet wastes substantial amounts of water while driving up your monthly utility bills. According to the EPA WaterSense program, a constantly running toilet caused by a deteriorated flapper can waste up to two hundred gallons of water per day, which amounts to six thousand gallons every month. Hiring a plumber for this repair routinely costs between one hundred fifty and three hundred dollars, yet replacement parts cost only five to fifteen dollars at any hardware store.
Begin by shutting off the water supply valve located on the wall beneath the toilet tank, turning it clockwise until it stops. Flush the toilet and hold down the handle to evacuate most of the water, then sponge out the remaining moisture at the bottom of the tank. Unhook the old rubber flapper from the ears of the overflow tube and detach the lift chain from the flush lever arm. Wipe down the flush valve seat with a clean rag to remove mineral deposits and slime that prevent a tight seal. Snap the new universal flapper onto the mounting pegs, connect the chain to the flush arm, and adjust the chain length so it retains roughly one-half inch of slack when closed. Turn the water supply back on, allow the tank to fill, and inspect the water line; the water should stop approximately one inch below the top of the overflow pipe. If water continues spilling into the tube, turn the adjustment screw on the fill valve arm clockwise to lower the float level.
2. Fixing a Dripping Faucet
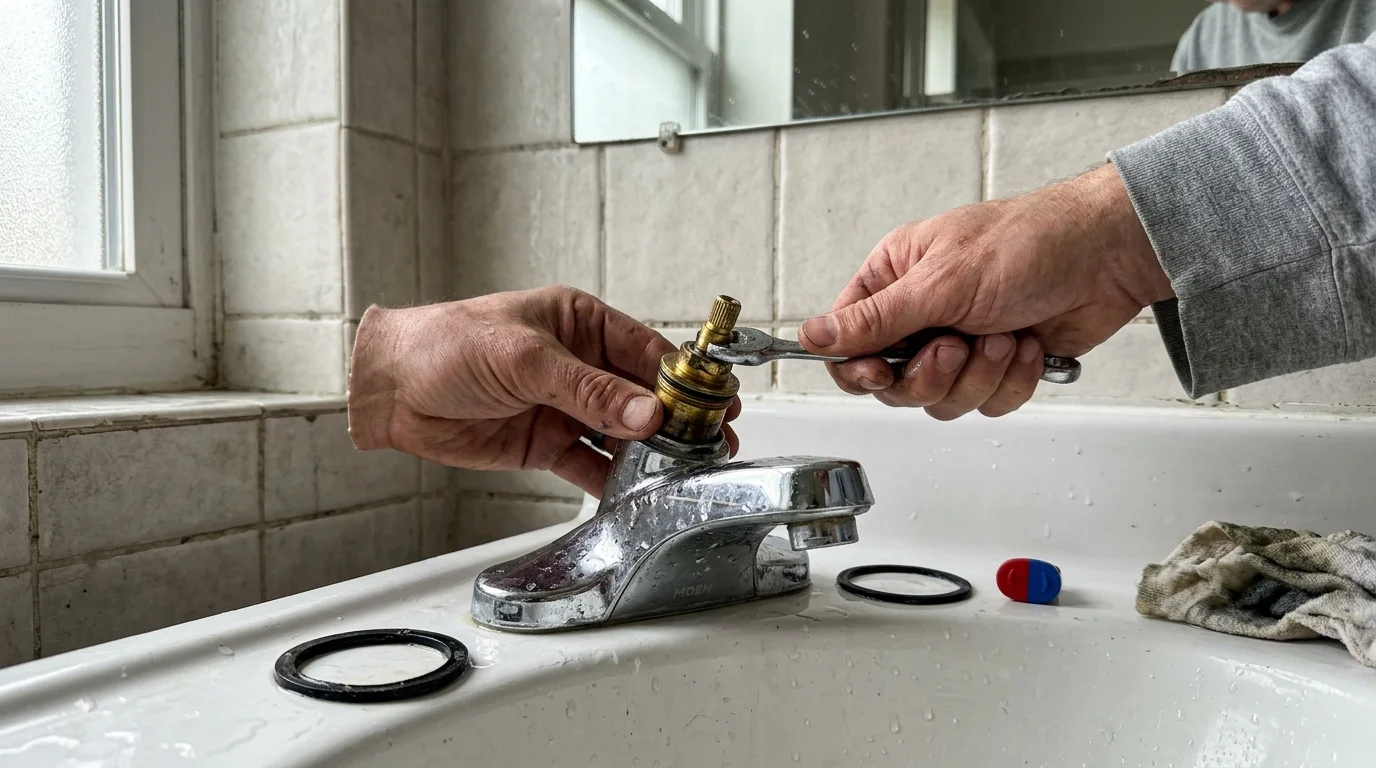
A single faucet dripping at the rate of one drop per second wastes more than three thousand gallons of water annually. While professional faucet repairs cost between one hundred fifty and two hundred seventy dollars, replacement cartridges, O-rings, and rubber seat washers cost between two and twenty-five dollars. Modern faucets generally utilize replaceable ceramic cartridges or ball valves, while older compression faucets rely on simple rubber washers.
Start by closing the hot and cold water shutoff valves beneath the sink basin. Place a towel inside the sink bowl to prevent dropped screws from falling down the drain. Pry off the decorative index cap on the faucet handle using a thin utility blade, then remove the exposed handle screw with an Allen wrench or Phillips screwdriver. Lift the handle body off the faucet stem to expose the cartridge assembly. Unscrew the retaining nut using an adjustable wrench or channel-lock pliers, noting the exact orientation of the cartridge notches. Pull the damaged cartridge straight upward; if mineral scale locks it in place, wiggle it gently or use an inexpensive plastic cartridge pulling tool. Coat the rubber seals of the new manufacturer-matched cartridge with a thin layer of silicone plumber’s grease, slide it into the valve body aligning the retention tabs, secure the retaining nut, and reattach the handle. Turn the water supply valves back on slowly to test for seamless operation.
3. Seamless Drywall Patching for Punctures and Dings
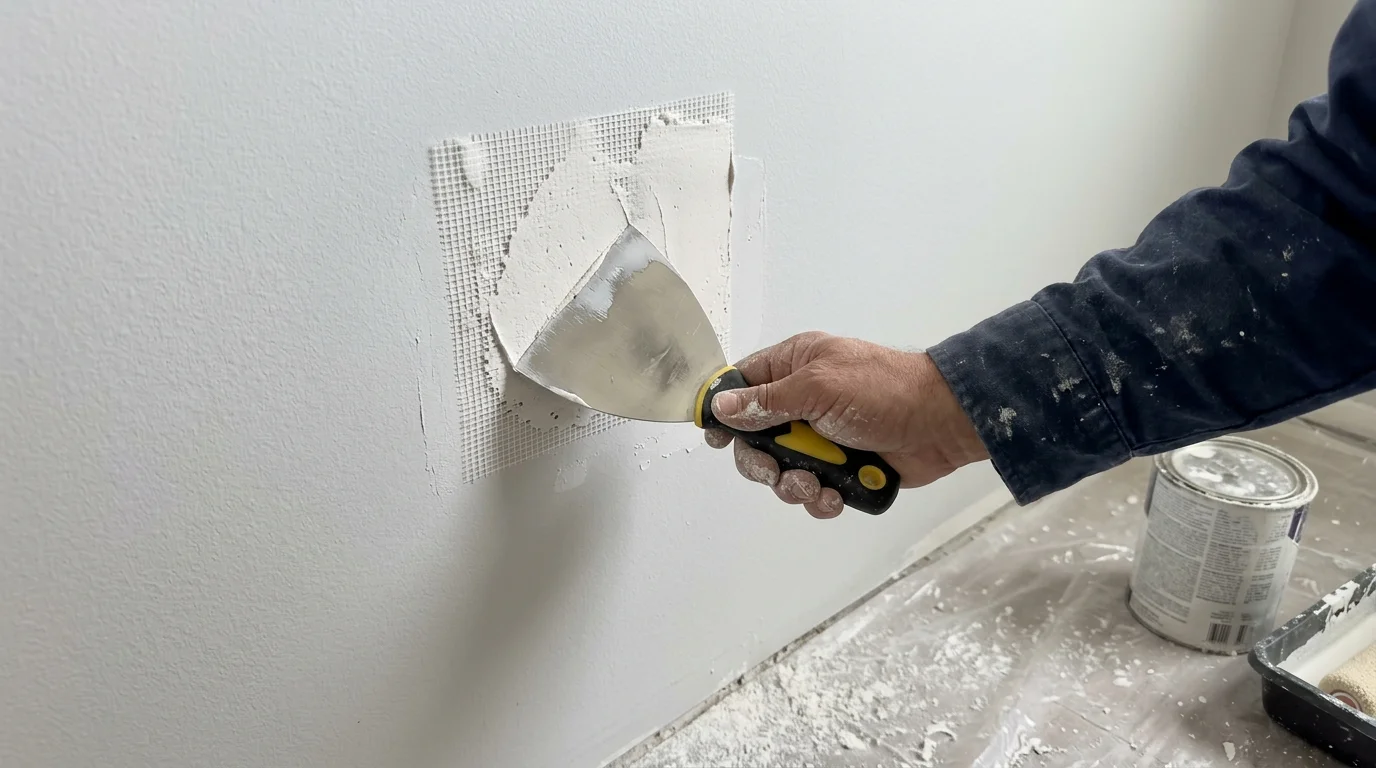
Small holes from wall anchors, door handles, and shifted furniture mar the visual appeal of any living area. Professional drywall repairs for small punctures easily run from seventy-five to two hundred dollars, whereas a complete DIY patch kit costs under twenty dollars. Achieving an invisible repair requires clean surface prep, thin compound application, and proper feathered sanding.
For holes under three inches across, clean away loose gypsum and torn paper facing using your utility knife, cutting the perimeter at a slight inward bevel. Apply a self-adhesive fiberglass mesh patch firmly over the void. Load a six-inch flexible putty knife with lightweight joint compound, holding the blade at a thirty-degree angle against the wall. Spread the compound across the mesh in smooth, continuous strokes, extending the edges three to four inches past the patch perimeter to create a subtle feather. Allow the compound to dry for four to eight hours according to ambient humidity levels. Apply a second ultra-thin skim coat extending slightly further than the first layer to eliminate surface hollows. Once completely cured, smooth the area flush with surrounding drywall using a two-hundred-twenty-grit sanding sponge. Wipe away lingering gypsum dust with a damp microfiber cloth, apply a coat of drywall primer to prevent paint flashing, and blend the final wall color over the patch with a small roller.
4. Clearing Persistent Drain Clogs Manually
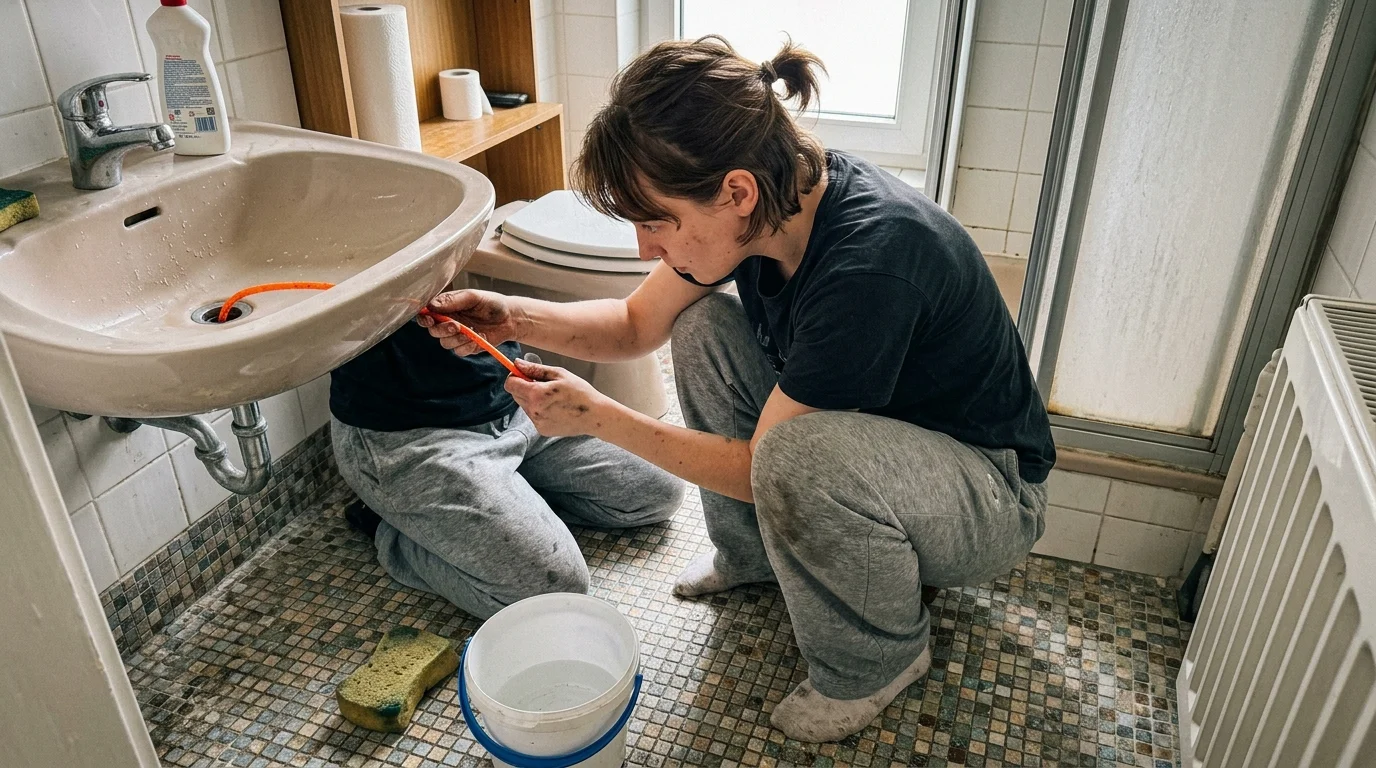
Chemical drain cleaners often generate extreme heat that softens PVC pipes, erodes older metal plumbing, and leaves toxic standing water if the blockage persists. Clearing hair and soap scum manually provides a permanent solution without damaging your wastewater infrastructure or harming septic systems.
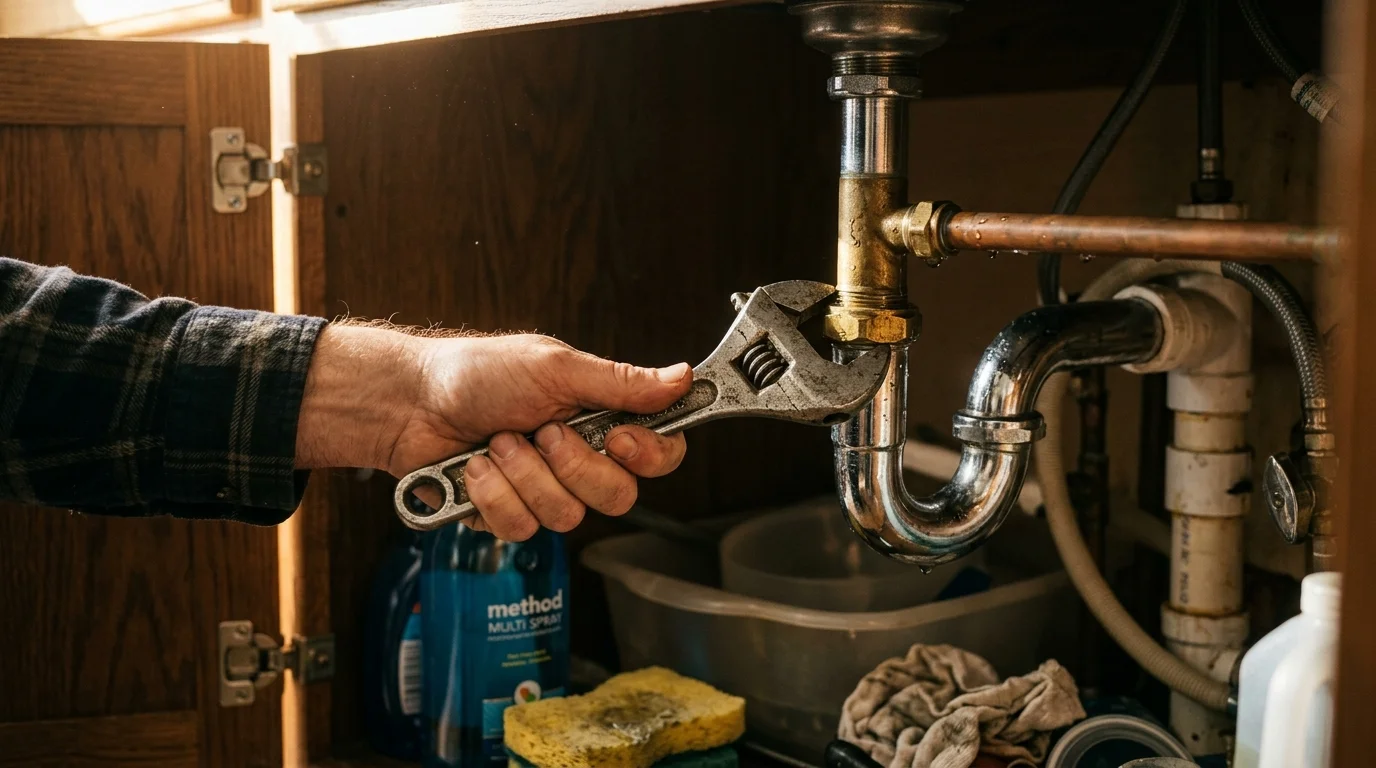
For bathroom sinks and tubs, insert an inexpensive flexible plastic drain snake directly down the drain opening past the mechanical stopper, twist the tool several times to engage tangled hair, and slowly draw the blockage out into a trash bag. If the obstruction sits deeper inside a sink assembly, place a small bucket beneath the curved P-trap under the cabinet. Loosen the two threaded slip nuts securing the curved trap pipe by hand or with slip-joint pliers. Drop the trap assembly into the bucket, rinse out accumulated sediment, and inspect the internal passage for obstructions. Inspect the beveled rubber slip-joint washers for cracks or brittleness, replacing them for pocket change if needed. Realign the pipe ends, hand-tighten the slip nuts firmly, and add an additional quarter-turn with your pliers. Run the faucet at full volume for two full minutes to confirm rapid drainage and verify a watertight joint.
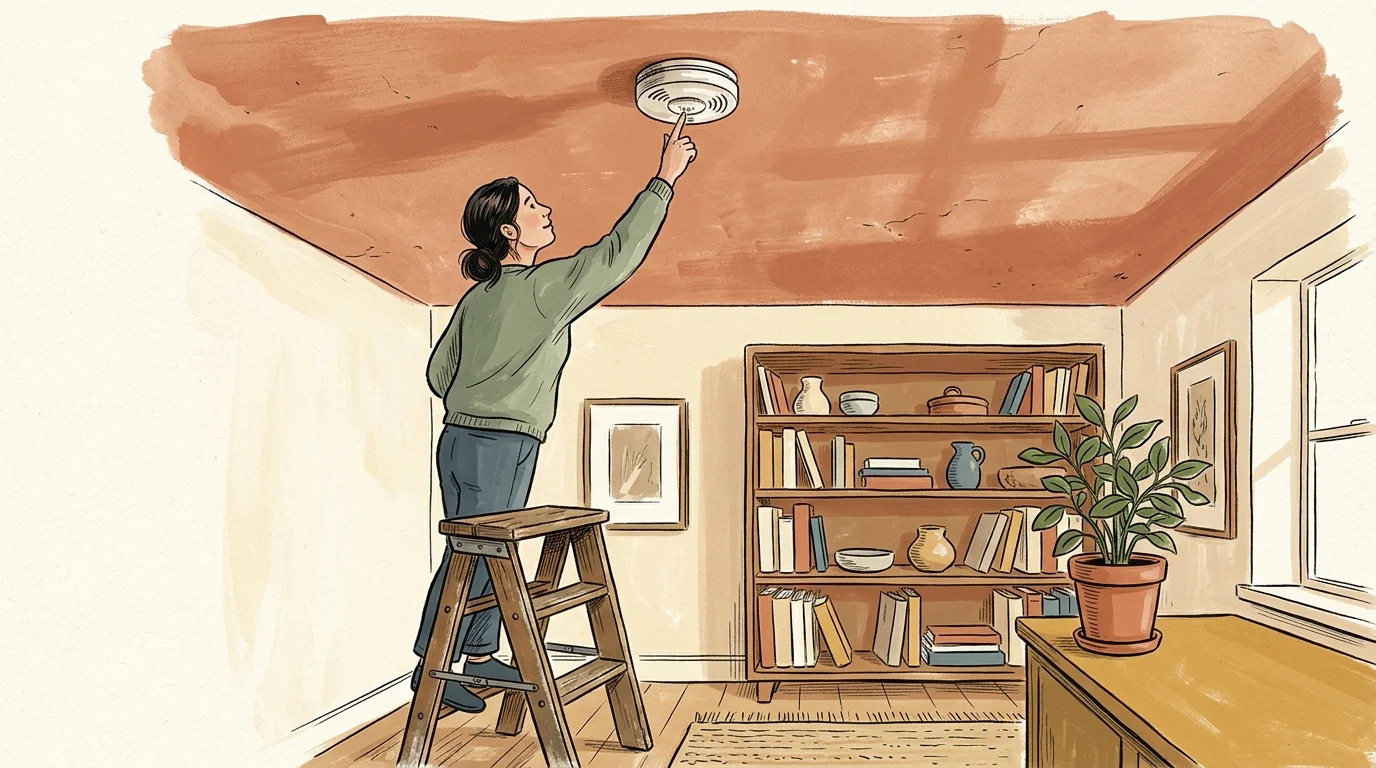
5. Servicing and Upgrading Smoke and Carbon Monoxide Alarms
Life safety devices represent the most critical hardware in your living space. According to standards published by the National Fire Protection Association, smoke alarms must be tested monthly and replaced entirely every ten years from their date of manufacture. NFPA incident research indicates that roughly three out of five home fire deaths occur in properties without functional alarms, primarily due to dead or missing batteries.
Locate the manufacture date stamped on the plastic housing on the rear of each detector; if the unit has exceeded ten years of service, replace the entire assembly immediately. For battery-operated units, twist the detector counterclockwise from its mounting bracket and install fresh nine-volt or AA alkaline batteries annually. If servicing hardwired alarms, switch off the dedicated lighting or alarm circuit breaker at your main electrical service panel before touching wiring. Disconnect the quick-connect wiring harness from the back of the old base, mount the new bracket with drywall screws, plug the wiring harness firmly into the replacement unit, and twist the device onto the bracket. Restore electrical power at the breaker panel and depress the central test button until the high-decibel siren sounds, confirming both auditory and visual strobe operation.
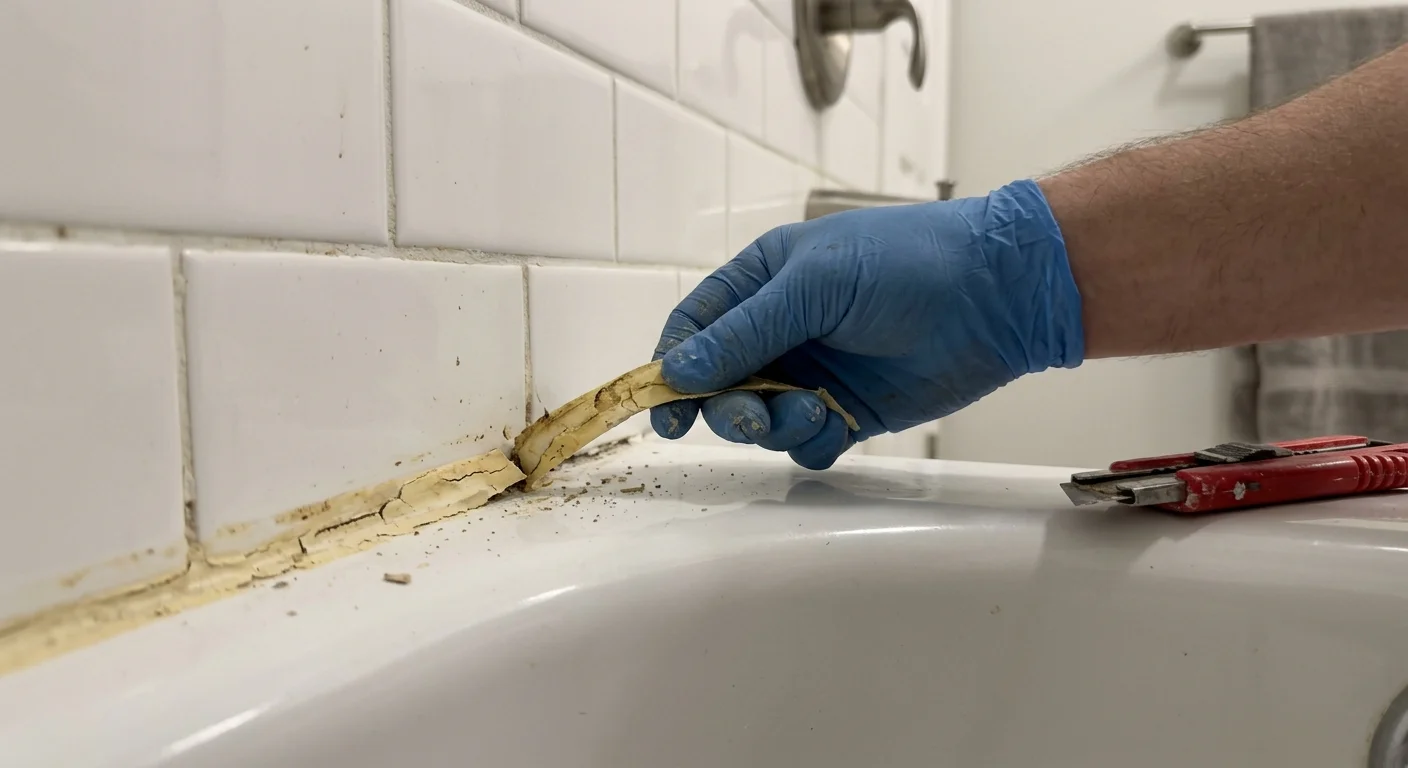
6. Removing and Reapplying Kitchen and Bath Caulk
Cracked, mildewed, or peeling caulk along shower pans, bathtubs, and kitchen backsplashes allows moisture to seep into surrounding wall framing, causing mold growth and structural wood rot. Refreshing these joints restores an airtight, waterproof seal while giving kitchens and bathrooms a crisp, polished appearance.
Never apply fresh caulk directly over degraded sealant because new caulk will not adhere properly to old material. Slice through the old caulk beads using a razor scraper or specialized caulk removal blade, taking care not to scratch delicate acrylic or fiberglass tub surrounds. Clean away remaining residue and soap scum by scrubbing the joint with isopropyl alcohol or mineral spirits, then let the seam dry completely. Choose one hundred percent silicone sealant for wet areas like showers and tubs, or siliconized acrylic caulk for painted trim. Cut the applicator nozzle at a forty-five-degree angle to produce an opening roughly one-eighth of an inch wide. Position the nozzle into the joint and maintain steady, continuous pressure on the caulk gun trigger while moving smoothly along the seam. Immediately smooth the wet bead using a gloved finger lightly misted with water or an ergonomic silicone profiling tool, creating a neat, concave seal that sheds water efficiently.
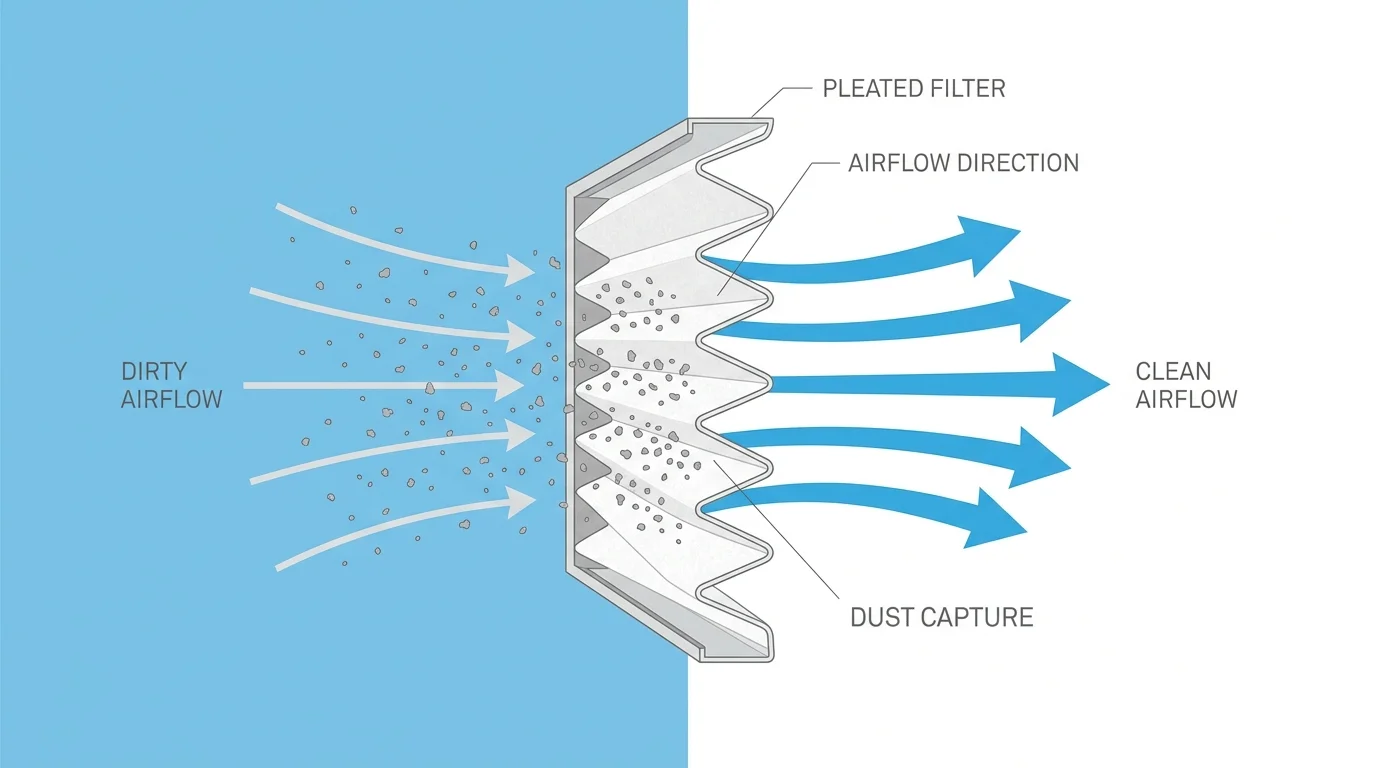
7. Replacing HVAC Filters to Protect Airflow and Efficiency
Heating and cooling equipment constitutes the largest portion of standard residential energy use. Research from the U.S. Department of Energy confirms that replacing a dirty, clogged HVAC air filter with a fresh one lowers air conditioner and furnace energy consumption by five to fifteen percent while preventing premature blower motor failure.
Inspect your air filter every thirty days, particularly during peak summer cooling and winter heating seasons, and replace it at least every ninety days. Turn off the HVAC system at the thermostat before opening the filter access door on the return air duct or indoor furnace unit. Slide out the old filter, noting the directional airflow arrows stamped along the cardboard frame. Vacuum loose dust from the filter slot with a narrow crevice attachment. Select a replacement filter with an appropriate Minimum Efficiency Reporting Value; a rating between MERV 8 and MERV 11 provides optimal household particle filtration without creating excessive static pressure that strains the blower motor. Slide the new filter into the housing, ensuring the airflow arrows point directly toward the furnace cabinet or air handler blower, and latch the access door tightly.
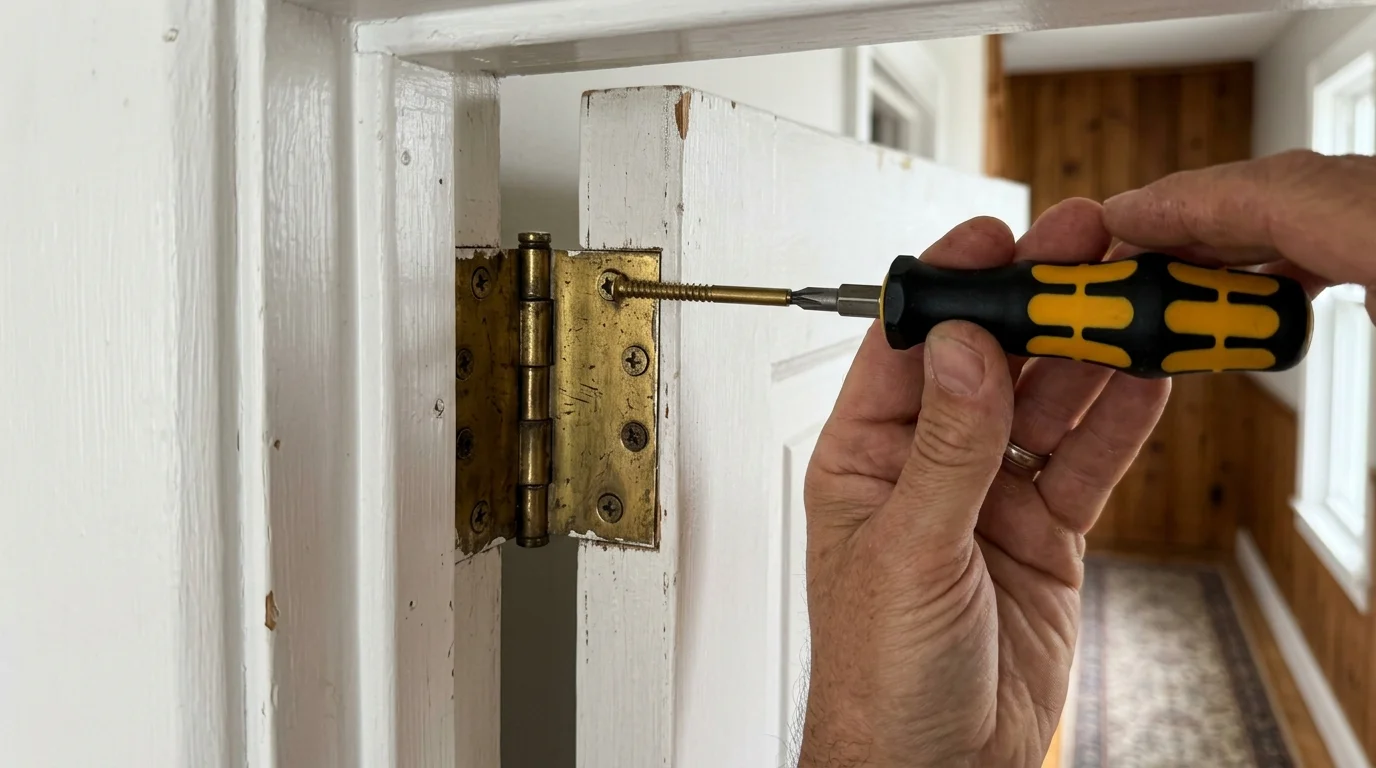
8. Aligning and Re-hanging Sagging Interior Doors
Interior doors frequently sag over time, rubbing against the top or bottom of the door jamb or refusing to latch shut properly. In most instances, this sagging occurs because short factory screws holding the top hinge work loose from the soft pine door framing under the continuous downward pull of the door slab.
To correct a sagging door without removing the entire frame, open the door completely and place a wedge beneath the outer bottom corner to support its weight. Remove the center screw from the top hinge leaf on the jamb side; you will likely notice the original screw is only three-quarters of an inch long. Replace it with a three-inch, hardened wood screw driven straight through the door jamb and deep into the solid structural two-by-four framing stud behind the wall. As you tighten the long screw with your drill or driver, it draws the top hinge tight against the jamb, lifting the latch side of the door upward and restoring an even reveal across the top and side clearances. If the door continues rubbing along the latch jamb, insert a thin cardboard or plastic shim behind the bottom hinge leaf to tip the door back into plumb alignment.
Styling and Personalization: Elevating Functional Repairs
Practical home repairs provide an ideal opportunity to elevate the aesthetics of your living space with custom hardware and refined finishes. When replacing plumbing trim, switch out dated chrome components for warm brushed brass, matte black, or classic oil-rubbed bronze fixtures that complement modern interior design trends. Leading interior design platforms like Architectural Digest highlight the visual impact of coordinated hardware details across kitchens and baths.
When completing drywall repairs, consider updating entire accent walls with rich, modern matte paint formulations rather than settling for mismatched spot touch-ups. Upgrade aging plastic switch plates and outlet covers with screwless architectural wall plates during electrical safety checks to create a sleek, seamless wall profile. When recaulking wet areas, choose colored silicone sealants matched precisely to your tile grout rather than standard bright white to create an intentional, designer-grade look across backsplashes and wet rooms.
Troubleshooting Pitfalls and Preventative Maintenance
Executing repairs correctly the first time requires avoiding common DIY mistakes. When dealing with plumbing connections, never overtighten plastic slip nuts or threaded brass fittings; excessive torque easily cracks brittle plastic fittings and crushes rubber washers, causing slow leaks behind walls. Hand-tightening connections followed by a gentle quarter-turn with a tool provides an ideal seal.
When patching drywall, avoid applying joint compound in thick, heavy layers because thick mud shrinks, cracks, and takes days to cure. Instead, apply multiple thin coats, allowing each layer to dry completely before applying the next. If your paint flashes over a patched area, showing a dull or shiny spot under raking light, you likely skipped the crucial step of priming the raw gypsum compound before rolling your topcoat. For caulk lines, avoid using silicone over old silicone residue; fresh silicone will not chemically bond to cured silicone, leading to rapid water infiltration.
Frequently Asked Questions
What basic tools should I buy before tackling these home repairs?
You can complete almost all introductory home maintenance projects with a compact starter set containing an eighteen-volt cordless drill, a multi-bit screwdriver, an eight-inch adjustable wrench, slip-joint channel pliers, a utility knife with fresh blades, a six-inch flexible putty knife, a torpedo level, and a roll of PTFE thread-seal tape. This versatile assortment handles plumbing fixtures, hardware adjustment, drywall patches, and general mechanical fastening without requiring costly specialty equipment.
How do I know when a plumbing or electrical issue exceeds DIY limits?
DIY plumbing should focus on visible, accessible fixtures, surface drainage lines, and isolated components downstream of shutoff valves. If you encounter main sewer line backups, frozen pipes inside enclosed walls, or leaks before the main water meter, call a licensed master plumber. For electrical work, stick to simple device replacements like swapping smoke alarms or cover plates after shutting off the breaker; leave main electrical panel work, heavy service cable installations, and ungrounded wiring updates to a licensed electrician.
Where should I source reliable replacement parts for brand-name fixtures?
To ensure perfect mechanical fit and avoid leaks, source original equipment manufacturer parts from dedicated plumbing supply houses, local hardware stores, or authorized online distributors. Inspect the stem of your faucet cartridge or the underside of your toilet tank lid to locate brand names and model numbers before purchasing replacement components. Taking the old part directly to the hardware store for side-by-side visual comparison prevents return trips and ensures gasket compatibility.
How can renters adapt these repair techniques without jeopardizing their security deposit?
Renters can safely execute reversible, non-invasive maintenance such as replacing HVAC filters, clearing drain traps mechanically, testing smoke alarms, and smoothing minor nail holes with spackle. Always retain original components if you swap out hardware like showerheads or cabinet pulls, storing the original pieces safely so you can reinstall them before move-out inspections. For repairs involving water supply lines or electrical components, consult your property manager in writing to avoid violating lease terms.
Take Control of Your Living Space Today
Building hands-on maintenance skills transforms your relationship with your home, converting stressful maintenance emergencies into manageable, rewarding tasks. By understanding how to service plumbing seals, drywall surfaces, mechanical hardware, and airflow systems, you take charge of your living environment while keeping substantial money in your bank account. Pick one small issue in your home this weekend—whether it is a slow sink drain, an unlatched interior door, or a worn-out furnace filter—gather the necessary materials, and enjoy the lasting confidence that comes with doing it yourself.