Upgrading your kitchen design boosts your home value and daily enjoyment, but sinking your budget into outdated fads guarantees rapid buyer remorse. You need actionable home renovation strategies that replace fading fads with enduring, elevated aesthetics. Designers actively steer clients away from previously dominant styles—think stark all-white palettes, open shelving overload, and faux distressed finishes—favoring warmer, highly functional alternatives. Knowing exactly which kitchen trends have peaked allows you to plan a remodel that feels fresh for decades rather than months. By evaluating budget-friendly upgrades and timeless material choices, you can execute a kitchen transformation that balances immediate visual impact with long-term structural resilience. Focus on these strategic shifts to achieve a tailored space.

Planning Snapshot: Gauging Your Kitchen Renovation Scope
When you embark on a kitchen remodeling project, accurately gauging your renovation scope prevents budget blowouts and half-finished weekends. You must establish a clear financial boundary before lifting a single crowbar or ordering a hardware sample. Minor cosmetic updates—such as swapping cabinet pulls, painting doors, or installing a new faucet—typically require a modest budget and demand only fundamental DIY skills. These surface-level transformations comfortably fit into a standard weekend timeline. Conversely, attempting structural modifications like moving plumbing lines, rewiring electrical fixtures, or installing heavy solid stone slabs pushes the project into advanced territory. You should allocate a minimum of three to four weeks for extensive overhauls, factoring in extra time for material delivery delays. Evaluate your personal skill level honestly; while anyone can learn to apply Roman clay to a range hood, handling complex plumbing might exceed your current capabilities. Set aside a contingency fund representing twenty percent of your total budget to absorb unforeseen complications like hidden water damage behind old tile.
The 7 Overdone Kitchen Trends and Their Timeless Replacements
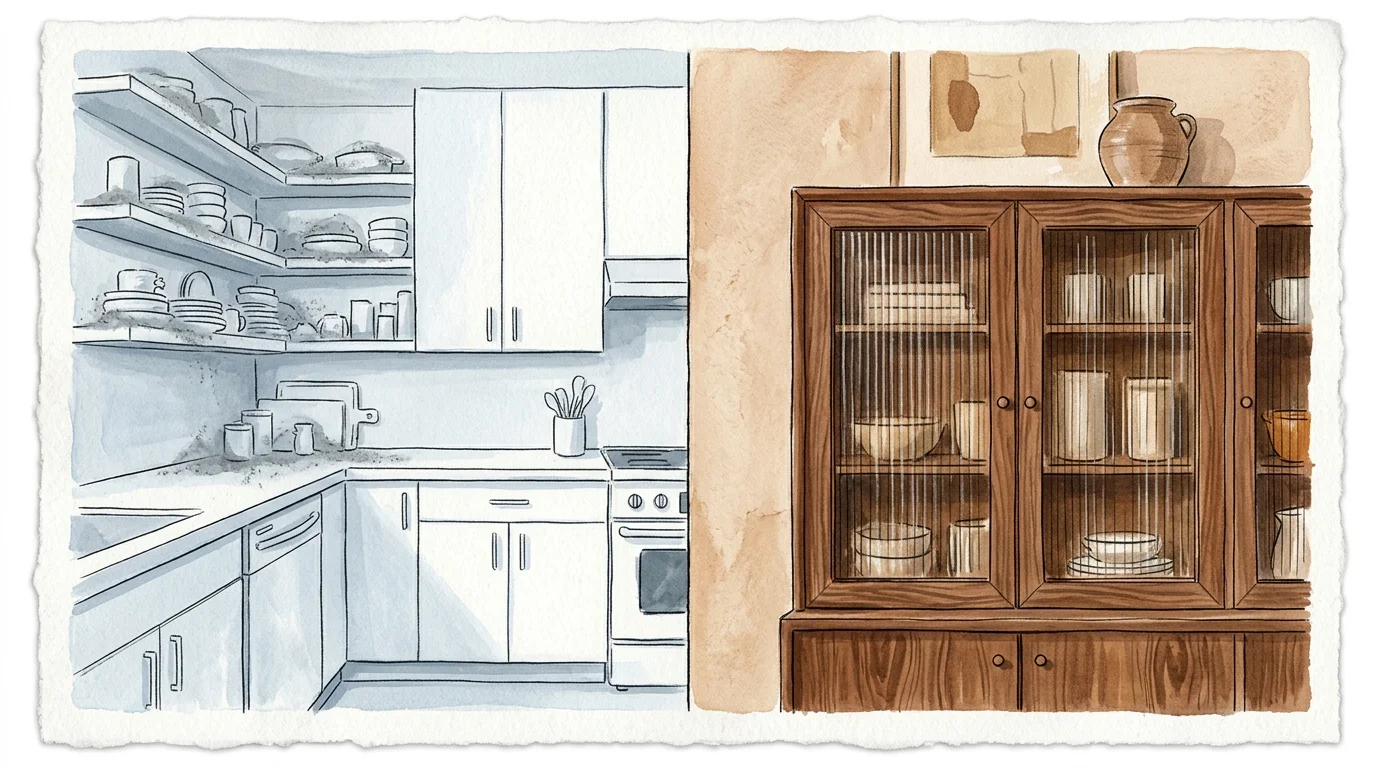
Trend 1: Stark All-White Kitchens and the Shift to Warm Wood Tones
The clinical, all-white kitchen dominated interior design for the past decade, but industry professionals now view this monolithic palette as sterile and lacking personality. Homeowners report that keeping pristine white cabinets free of scuffs and grease feels like a second job. You can confidently leave this hospital-like aesthetic behind by introducing warm wood tones that ground the space with organic texture. Walnut, white oak, and deeply stained ash cabinets offer rich grain patterns that hide minor imperfections while exuding warmth. If replacing all your cabinetry exceeds your current budget, you can execute a strategic two-tone transformation. Consider sanding down your kitchen island and applying a protective natural wood stain, or install thick butcher-block floating shelves to break up a sea of white paint. Incorporating raw, natural wood elements immediately softens the room and creates a welcoming atmosphere that invites people to gather.
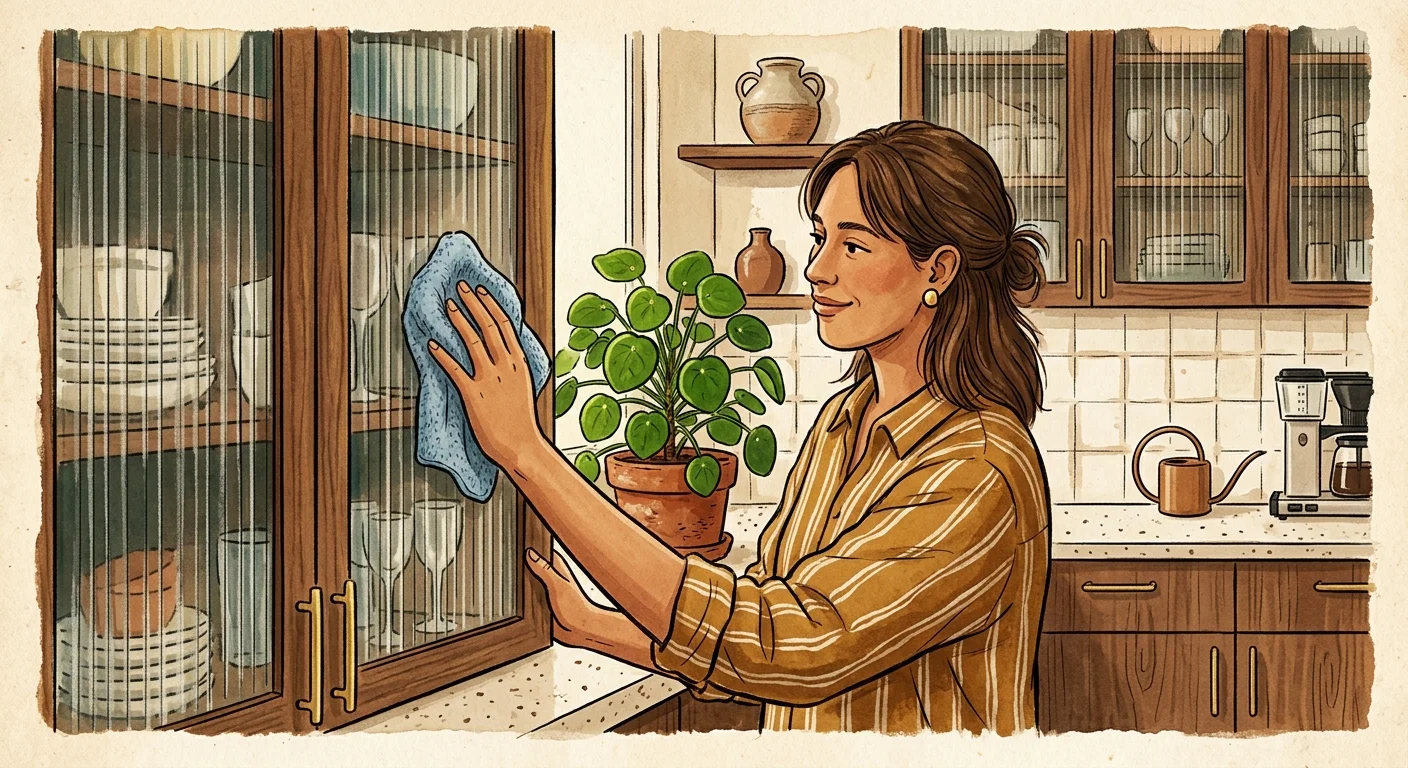
Trend 2: Impractical Open Shelving and the Return to Concealed Storage
Design enthusiasts initially loved open shelving for its airy aesthetic, but the daily reality of dusting meticulously arranged bowls quickly exhausted homeowners. Constant exposure to cooking grease turns beautiful displays into sticky magnets for grime. Designers now champion the return to concealed storage, prioritizing highly organized, enclosed pantry walls that maximize vertical space without demanding constant curation. You can achieve this streamlined look without making your kitchen feel heavy or closed off. Replacing solid wooden center panels on your upper cabinet doors with ribbed or fluted glass offers a perfect compromise. The textured glass obscures the chaotic outlines of mismatched coffee mugs while reflecting light around the room. For guidance on creating sophisticated, balanced storage solutions that blend form and function, consult architectural resources like Architectural Digest, which consistently highlight the elegance of purposeful cabinetry design.
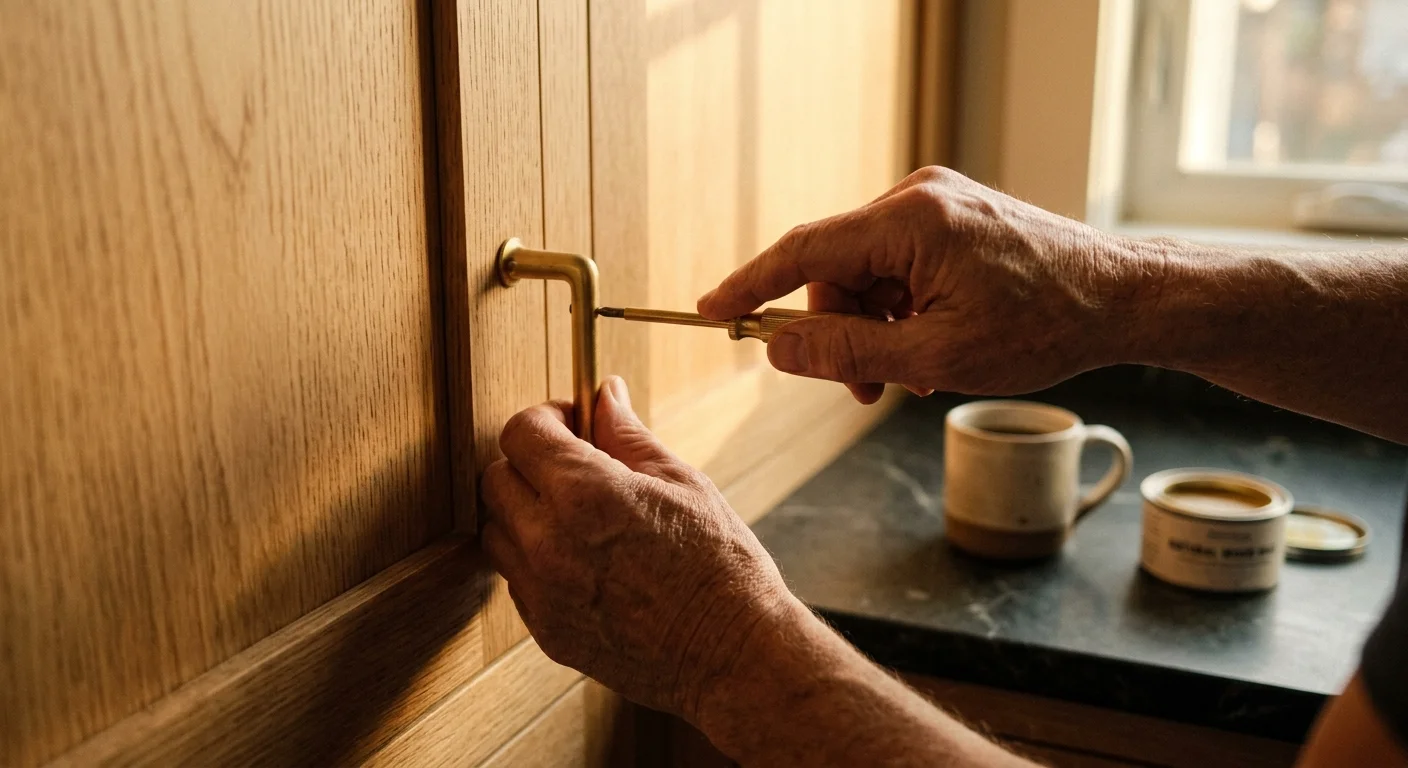
Trend 3: Matte Black Hardware Overload and the Pivot to Unlacquered Brass
Matte black finishes saturated the market so heavily that the look shifted from striking to standard almost overnight. Hardware acts as the jewelry of your kitchen design, and flat black pulls often create harsh visual interruptions against lighter cabinetry. The sophisticated replacement currently dominating high-end renovations is unlacquered brass. Unlike heavily coated metals, unlacquered brass features a living finish that develops a unique, mottled patina over time through natural oxidation and daily touch. You can easily upgrade your space by unscrewing your current hardware and installing solid brass pulls. Measure the center-to-center distance between existing drill holes with precise calipers before purchasing replacements; matching this measurement allows you to install the new hardware in minutes without breaking out the wood filler and drill. This simple metal swap elevates the entire room, injecting a sense of historic charm and quiet luxury.
Trend 4: Overly Ornate Range Hoods and the Move to Integrated Plaster
Oversized wooden range hoods featuring massive corbels, intricate molding, and heavy architectural details overwhelm average-sized kitchens. These bulky focal points consume valuable upper wall space and date a renovation instantly. Modern kitchen remodeling favors integrated, minimalist range hoods that blend seamlessly into the surrounding drywall. You can tackle this architectural update by constructing a lightweight wooden frame over your existing mechanical vent insert and wrapping it in standard drywall. Finishing the structure with Roman clay or specialized joint compound creates a smooth, continuous surface that feels both earthy and modern. Applying the finish with a flexible trowel allows you to control the texture, yielding a subtle, hand-troweled appearance that draws the eye upward without dominating the room. This integrated approach emphasizes clean geometry and makes ceilings appear taller.
Trend 5: Faux Distressed Farmhouse Details and the Rise of Transitional Elegance
The era of heavily distressed wood, overly rustic signage, and ubiquitous shiplap paneling has officially passed its expiration date. While the farmhouse style offered comfort, the faux-aged applications ultimately felt contrived and themed. Interior designers now guide homeowners toward transitional elegance—a sophisticated style that marries traditional architectural elements with crisp, modern lines. You can eliminate dated farmhouse details by carefully prying off shiplap boards and patching the underlying drywall for a smooth, refined surface. Replace chunky rustic trim with classic beadboard or sleek flat-stock molding that offers subtle architectural interest. If you want to understand how to balance these classic and contemporary elements seamlessly, industry platforms like HGTV provide excellent visual blueprints for transitional spaces. Upgrading your trim and smoothing your walls provides a timeless canvas that adapts easily to future design evolutions.
Trend 6: Tiny Subway Tile Backsplashes and the Popularity of Solid Stone Slabs
Standard three-by-six-inch white subway tile represents the ultimate safe choice, yet its sheer ubiquity makes it feel thoroughly uninspired today. Furthermore, the extensive network of grout lines requires constant scrubbing to prevent discoloration behind the stovetop. The industry pivot favors running the countertop material directly up the wall to create a dramatic, seamless stone slab backsplash. While maneuvering heavy quartz or marble slabs typically requires professional fabrication and installation, you can achieve an identical aesthetic through clever DIY alternatives. Installing large-format porcelain tiles—often measuring two by four feet—drastically reduces the number of visible grout lines and closely mimics the sweeping veining of natural marble. Utilizing a high-quality tile leveling system during installation ensures a perfectly flush surface, giving your kitchen that coveted high-dollar, continuous stone appearance without the exorbitant fabrication costs.
Trend 7: Matching Everything and the Embrace of Curated Eclecticism
Purchasing lighting, plumbing fixtures, and cabinet hardware in the exact same finish creates a rigid, catalog-showroom aesthetic. Spaces where every single metal matches perfectly lack depth and historical character. Curated eclecticism encourages mixing metal finishes strategically to build a layered, custom environment. You might combine a polished nickel kitchen faucet with unlacquered brass pendant lights and oil-rubbed bronze cabinet latches. To execute this properly, you must establish one dominant metal finish that accounts for roughly seventy percent of the room, using a secondary metal for the remaining accents to provide visual contrast. If buying entirely new light fixtures strains your budget, you can use high-heat metallic spray paints to alter the finish of your existing pendants. Gently scuffing the metal surface with fine-grit sandpaper prior to spraying ensures excellent paint adhesion and a durable, factory-like finish that perfectly complements your newly mixed scheme.
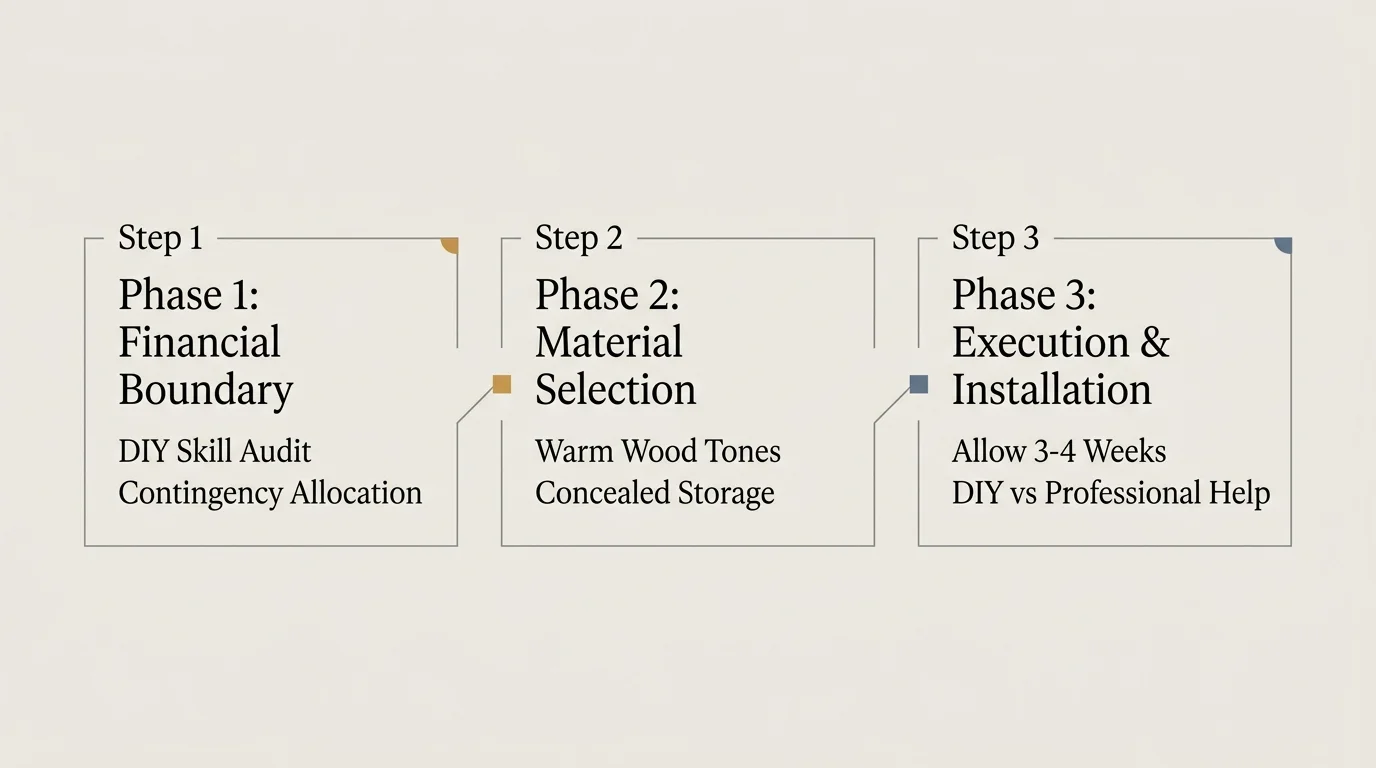
Step Framework: Executing Your Trend-Proof Kitchen Update
Phase One: Preparation and Demolition
Proper preparation dictates the ultimate success of your kitchen transformation. You must begin by emptying all cabinets, removing freestanding appliances, and protecting your floors with heavy-duty builder board. Taping thick plastic sheeting over doorways prevents fine demolition dust from circulating throughout your home and settling into soft furnishings. When removing old backsplashes or dismantling unwanted decorative range hoods, wear appropriate personal protective equipment, including a respirator and safety glasses. Shut off the main electrical breakers and water supply lines before disconnecting any fixtures. Thoroughly wash your cabinet boxes with a heavy-duty degreaser to strip away years of accumulated cooking oils; paint and primer will immediately fail if applied over grease. For comprehensive guidelines on safely handling demolition debris and managing indoor air quality during renovations, consult resources provided by Utah State University Extension, which offer valuable insights for maintaining a healthy home environment during major projects.
Phase Two: Installation and Execution
With a clean, prepped room, you transition into the core installation phase. If you are painting cabinets, apply a high-adhesion bonding primer followed by two coats of durable urethane alkyd enamel, sanding lightly between coats for a glass-like finish. Install your new large-format tile backsplash by back-buttering each tile with modified thinset mortar to guarantee complete coverage and prevent hollow spots. As you upgrade the room, consider modernizing your electrical footprint. Integrating energy-saving LED lighting strips under your upper cabinets provides excellent task lighting and highlights your new backsplash. The Department of Energy emphasizes that efficient lighting significantly reduces electrical consumption while enhancing ambient warmth in high-traffic work zones. When installing new unlacquered brass hardware, use a specialized cabinet hardware jig; this inexpensive plastic template ensures every single handle sits perfectly level and aligned, eliminating the risk of crooked pulls ruining your fresh paint job.
Phase Three: Finishing Touches and Quality Checkpoints
The final phase transforms a construction zone back into a functioning home. You must meticulously inspect all freshly painted surfaces for drips or uneven coverage, touching up anomalies with a fine artist’s brush. Run a continuous bead of high-quality, mold-resistant silicone caulk along the junction where your new backsplash meets the countertop; smooth the bead with a damp finger to create a watertight, invisible seal. Reattach your cabinet doors and spend time adjusting the internal hinges. Most modern concealed hinges feature three-way adjustment screws that allow you to tweak the door’s position up, down, left, right, in, and out until the gaps between doors are perfectly uniform. Test your newly installed plumbing fixtures for micro-leaks by running hot water for several minutes and feeling along the supply line connections with a dry paper towel.
Styling and Personalization for a Custom Feel
Once the heavy construction concludes, styling injects your personal narrative into the space. You should layer textures to soften the hard edges inherent in kitchen design. Place a vintage, low-pile runner rug between your island and the main sink to provide warmth underfoot and introduce complex color palettes. Instead of keeping small appliances clustered on the counters, display functional art like heavily grained wooden cutting boards, handmade ceramic fruit bowls, and living herbs in terracotta pots. Window treatments offer another opportunity to elevate the aesthetic; swap out basic vinyl blinds for custom-measured woven wood shades or linen Roman shades. The fabric introduces a necessary softness that contrasts beautifully with solid stone surfaces and sharp architectural lines. Pay attention to the negative space on your walls; hanging a framed vintage oil painting or an oversized modern art print pulls the room away from feeling strictly utilitarian and establishes it as a highly curated living area.
Troubleshooting and Upkeep for Your Remodeled Space
Maintaining the integrity of your updated kitchen requires consistent, targeted care rather than just aggressive scrubbing. If you installed unlacquered brass hardware, you will notice fingerprints oxidizing rapidly in the first few months. You can let the patina develop naturally for an antique look, or you can restore the bright shine using a specialized brass polish and a microfiber cloth. For homeowners who integrated raw wood elements like butcher-block shelves or islands, regular conditioning remains mandatory. You must apply food-safe mineral oil every few weeks during the first year to prevent the wood fibers from drying out and cracking under fluctuating humidity levels. If your freshly painted cabinet doors begin to stick to the frames, you likely closed them before the enamel fully cured; rubbing a thin layer of paraffin wax along the contact points eliminates the stickiness without damaging the finish. Promptly clean up acidic spills like lemon juice or tomato sauce from stone surfaces to prevent irreversible etching.
Frequently Asked Questions
How do you mix metals without making the space look chaotic?
You succeed at mixing metals by adhering to the rule of dominant and accent finishes. Select one primary metal, such as polished nickel, for large fixtures like your faucet and main lighting. Introduce a secondary metal, like unlacquered brass, exclusively for cabinet hardware or small decorative accessories. Keeping the metals physically separated—for example, using brass on the lower cabinets and nickel on the ceiling—prevents visual clutter and makes the combination look intentional rather than accidental.
Can you paint over existing laminate cabinets successfully?
You can paint laminate cabinetry, but the process requires unwavering dedication to surface preparation. Laminate possesses a slick, non-porous surface that readily rejects standard latex paint. You must scuff the entire surface thoroughly with medium-grit sandpaper to create a physical profile for the new coating to grip. Following the sanding phase, apply a specialized bonding primer designed specifically for glossy surfaces, allowing it to cure completely before applying a high-quality cabinet enamel.
What is the most cost-effective way to update a kitchen backsplash?
When tearing out tile exceeds your budget, painting a ceramic tile backsplash offers a remarkable, low-cost transformation. You must clean the grout lines meticulously with a stiff brush and a heavy-duty degreaser. Once dry, coat the tiles and grout with an extreme-bond primer, followed by two coats of epoxy or urethane acrylic paint. While this painted finish lacks the multidimensional depth of brand-new stone or porcelain, it effectively erases dated patterns and unifies the wall for a fraction of the cost of replacement.
How do you update kitchen lighting without rewiring the entire ceiling?
You can dramatically improve your lighting scheme using plug-in fixtures and battery-operated technology if running new electrical wire proves impossible. Hardwired pendant lights can often be swapped out using the existing ceiling junction boxes without pulling new cables. For areas lacking wiring entirely, consider mounting stylish wall sconces and installing remote-controlled, rechargeable LED puck lights inside the sockets instead of traditional bulbs. This strategy allows you to introduce layered, sophisticated lighting anywhere in the room without hiring an electrician.
A Motivating Push for Your Renovation Journey
Transforming your home does not require submitting to fleeting fads or draining your savings on massive structural overhauls. By recognizing which styles have outlived their welcome and focusing your energy on timeless, functional replacements, you reclaim control over your environment. Every weekend spent stripping old paint, installing solid brass hardware, or carefully applying Roman clay to a custom hood moves you closer to a space that genuinely reflects your personal taste. You possess the capability to execute these strategic upgrades with patience and the right fundamental techniques. Gather your supplies, tape off your workspace, and take that critical first swing at your demolition prep. The elegant, enduring kitchen you envision waits just beneath the surface of your current layout, ready for you to bring it to life.