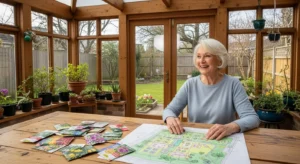
Finding activities that genuinely engage your grandchildren requires moving beyond standard coloring books and embracing hands-on creativity. You need approachable DIY projects that spark their imagination, fit your weekend schedule, and actually result in keepsakes they feel proud to use or display. Building something together bridges the generational gap and creates lasting memories without demanding professional carpentry skills. This guide delivers seven practical, high-interest builds ranging from personalized garden stepping stones to custom fabric-stamped tote bags. You will discover exactly how to plan your budget, select safe materials, and execute each step so your family weekend transforms into a productive, joyful maker session.

Planning Your Crafty Weekend: Budget, Timeline, and Skill Level
Before pouring concrete or slicing vegetables for stamps, you must establish a clear framework for your crafting weekend. Most of these DIY projects demand a modest budget ranging from twenty to fifty dollars, depending heavily on what supplies you already have stored in your garage. You should allocate a full afternoon for the main construction phase, keeping in mind that items like stepping stones and painted canvas require at least a twenty-four-hour curing or drying period before handling. Skill levels vary slightly across the projects; however, none require advanced carpentry knowledge or dangerous specialized power tools. You only need basic manual dexterity, a willingness to get a little messy, and patience. By reviewing the specific requirements of each craft ahead of time, you eliminate frustrating mid-project supply runs and ensure the activity appropriately matches the age and attention span of your grandchildren. Prepare your mindset for collaboration rather than absolute perfection; the ultimate goal remains shared experience over flawless execution.
Phase One: Gathering Materials and Prepping the Workspace
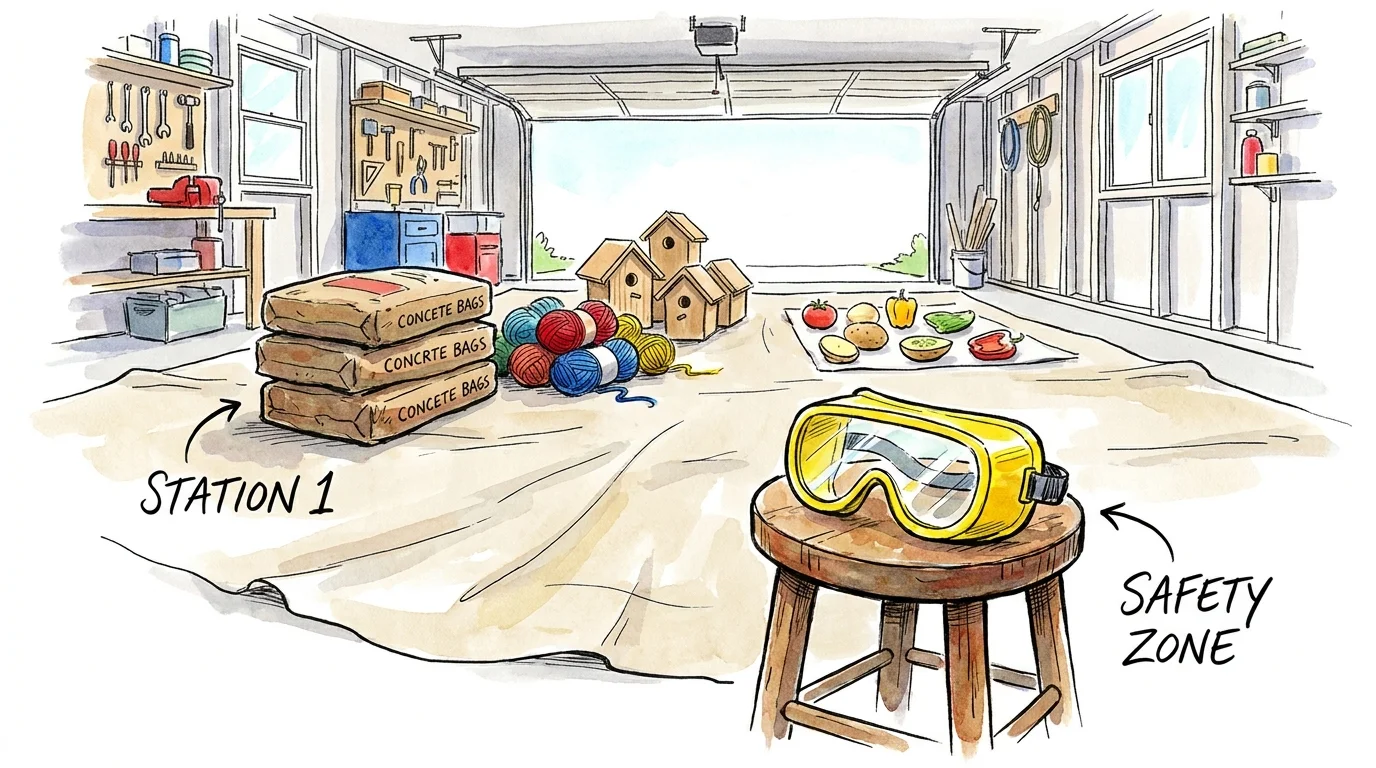
Successful DIY sessions with young helpers rely entirely on deliberate and thoughtful preparation. Start by establishing a designated maker zone, ideally outdoors on a patio or over a heavy-duty canvas drop cloth in a well-ventilated garage. You must protect your surfaces before opening any paint or mixing any cement. Gather all necessary tools—trowels, foam brushes, non-toxic adhesives, and safety goggles—and place them within easy reach. Taking the time to organize materials into distinct stations prevents chaos once the creative energy starts flowing. Address safety immediately by discussing which tools are strictly for adult use and which are safe for small hands. If you plan to incorporate minor woodworking, review proper handling techniques to protect tiny fingers and prevent accidental scrapes. You can find excellent guidelines on establishing safe home workspaces through resources like the Penn State Extension hand tool safety guide, which offers highly practical advice for amateur builders. Clear communication during this prep phase builds confidence and establishes essential boundaries for the fun ahead.
Phase Two: Executing the 7 Grandkid-Approved DIY Projects
1. Custom Concrete Garden Stepping Stones
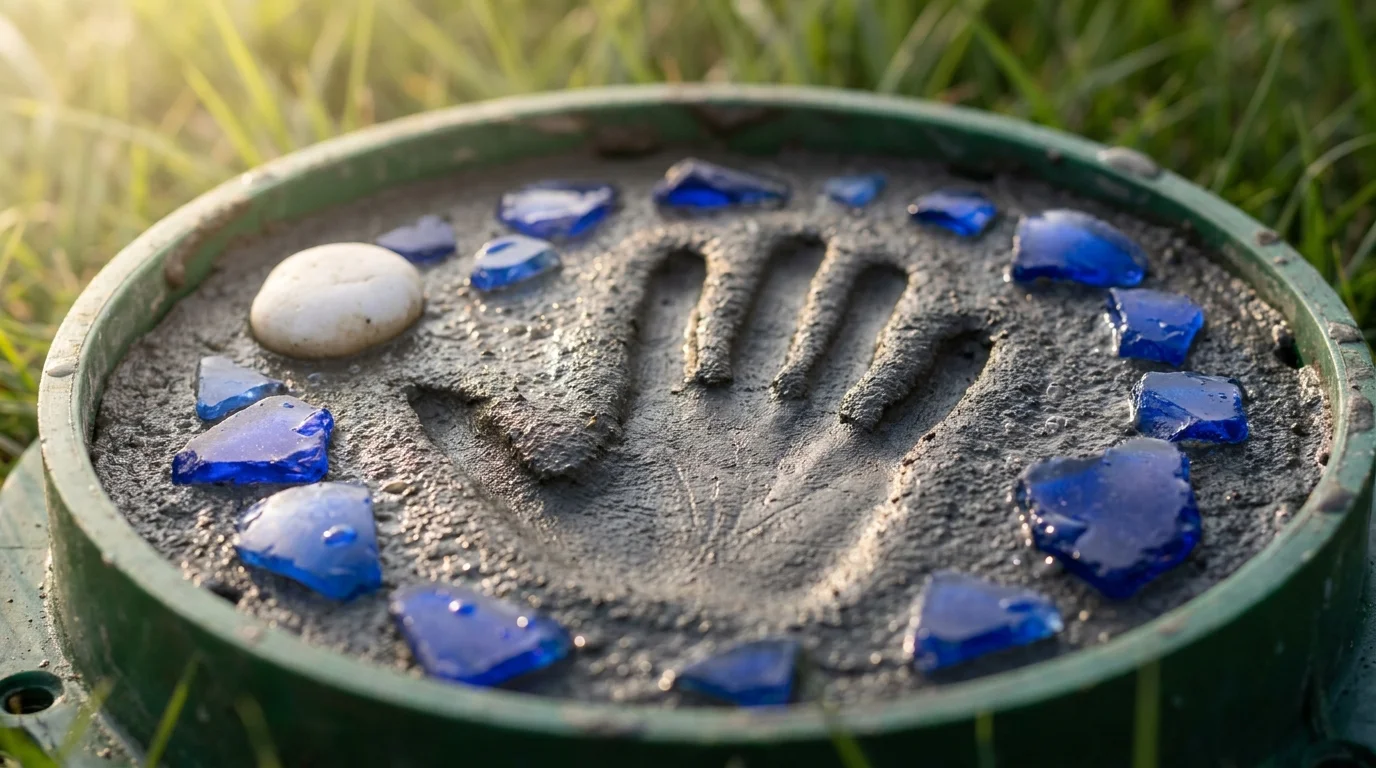
Transforming plain concrete into personalized garden stepping stones offers a highly tactile and rewarding experience. You will need quick-setting concrete, reusable plastic molds, and a collection of embellishments like sea glass, flat marbles, or smooth river rocks. Mix the concrete in a dedicated heavy-duty bucket until it reaches the consistency of thick pancake batter, then carefully pour it into your molds. Tap the sides of the mold to release any trapped air bubbles. While the mixture remains wet, encourage your grandchildren to press their chosen decorations firmly into the surface. They can even press their hands directly into the center to capture a permanent handprint. The concrete requires at least a full day to cure properly, so set the molds in a dry, shaded area away from foot traffic.
2. Painted Canvas Tote Bags with Vegetable Stamps
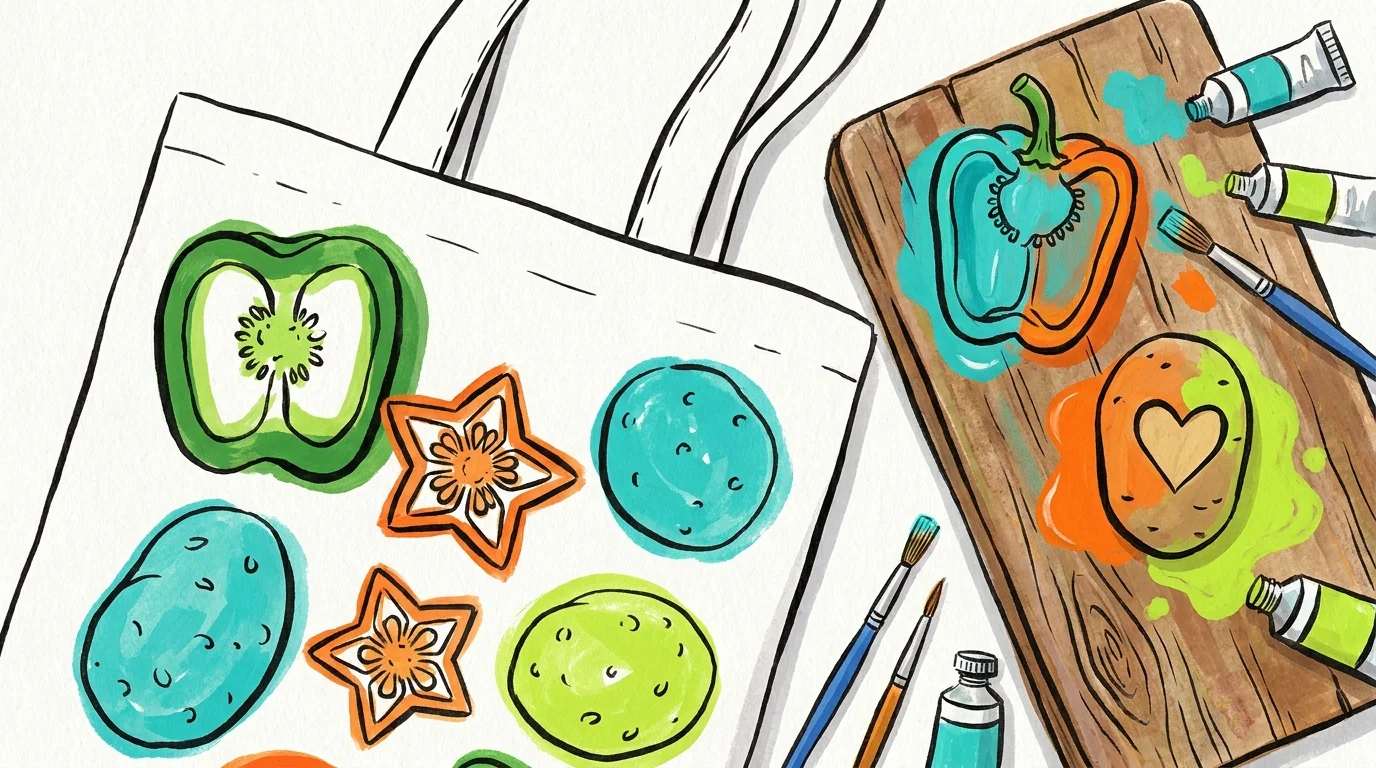
Customizing heavy-duty canvas tote bags using vegetable stamps introduces children to textile art and practical sustainability. Purchase plain cotton totes and vibrant, non-toxic fabric paint. Slice everyday vegetables like celery, bell peppers, and potatoes to reveal interesting cross-sections. A cut celery stalk perfectly mimics a blooming rose, while bell peppers create distinct, geometric clover shapes. Squeeze the fabric paint onto paper plates, dip the cut vegetables into the paint, and stamp them firmly onto the canvas. You must place a rigid piece of cardboard inside the bag to prevent the wet paint from bleeding through to the other side. This project allows kids to experiment with color theory and pattern repetition while creating a reusable grocery or library bag.
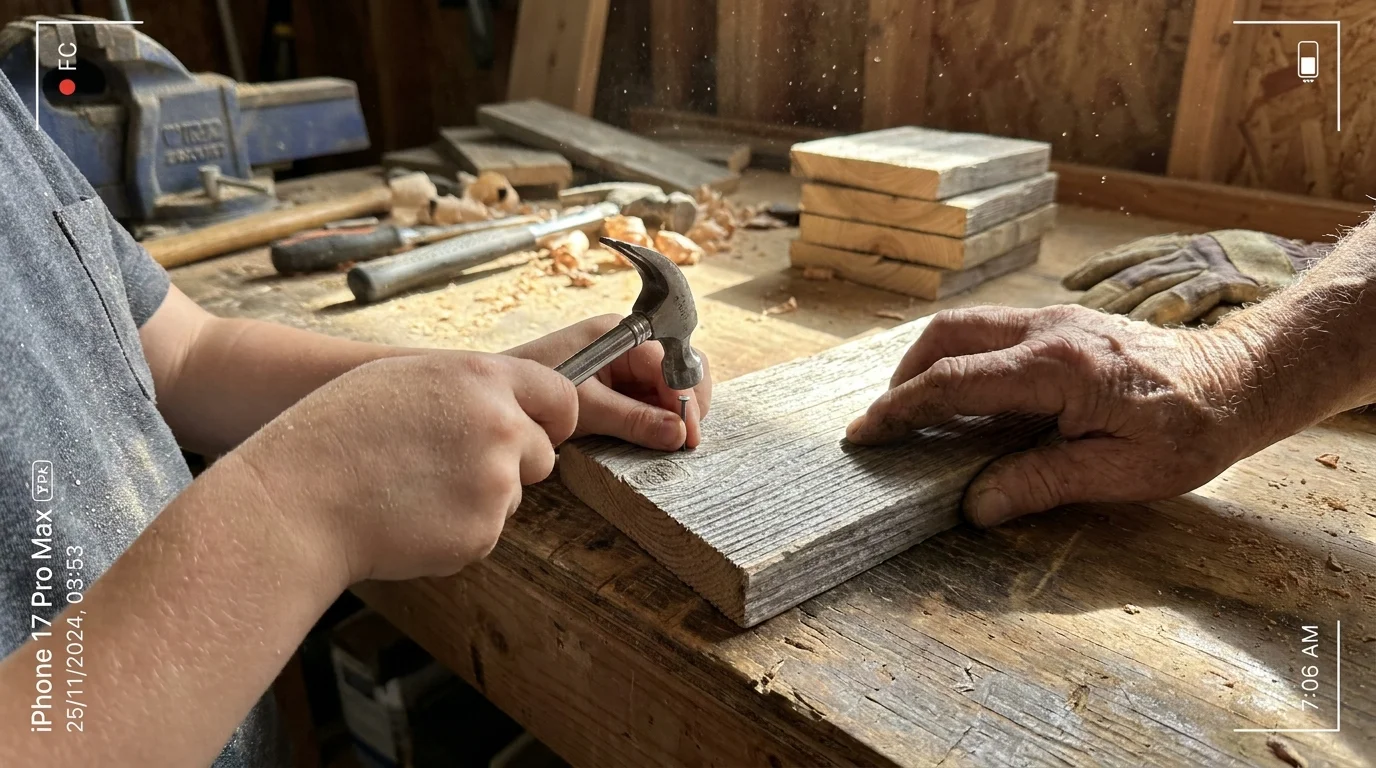
3. Upcycled Birdhouses from Repurposed Wood
Building upcycled birdhouses from repurposed wood introduces basic engineering concepts and actively encourages wildlife observation in your backyard. You can utilize old cedar fence panels, discarded pallet wood, or pine planks left over from previous home renovations. Cut the pieces to the appropriate size beforehand to keep the assembly process safe and entirely straightforward for your helpers. Let your grandchildren apply generous beads of wood glue and help hold the pieces square while you secure the joints with finishing nails. For precise dimensions, ventilation requirements, and entry hole sizes tailored to local bird species, consult the National Audubon Society birdhouse building specifications. Paint the exterior with non-toxic, weather-resistant colors, but always leave the interior wood raw for the safety of the nesting birds.
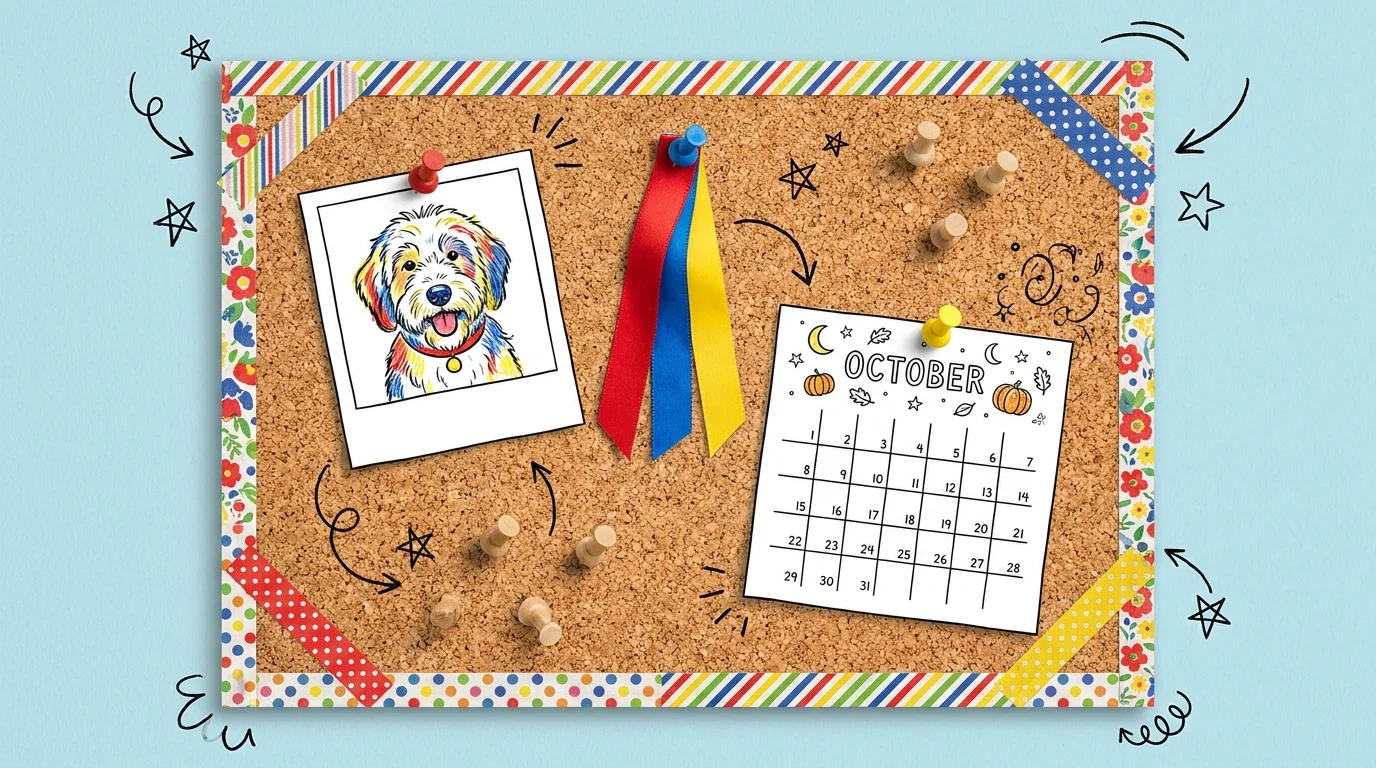
4. Personalized Corkboard Command Centers
Creating personalized corkboard command centers gives older grandchildren a practical, stylish accessory for their bedrooms or remote study spaces. Start with an inexpensive framed corkboard or a thick roll of cork glued securely to a sturdy plywood backing. Provide standard painter’s tape and instruct them to block off geometric shapes, bold stripes, or zigzag patterns across the cork surface. Once the tape is firmly pressed down, apply acrylic craft paint in their favorite complementary colors. After the paint dries completely, carefully peel away the tape to reveal crisp, professional-looking designs. They can customize the outer wooden frame using decorative metal pushpins, glued-on wooden initials, or textured fabric borders.
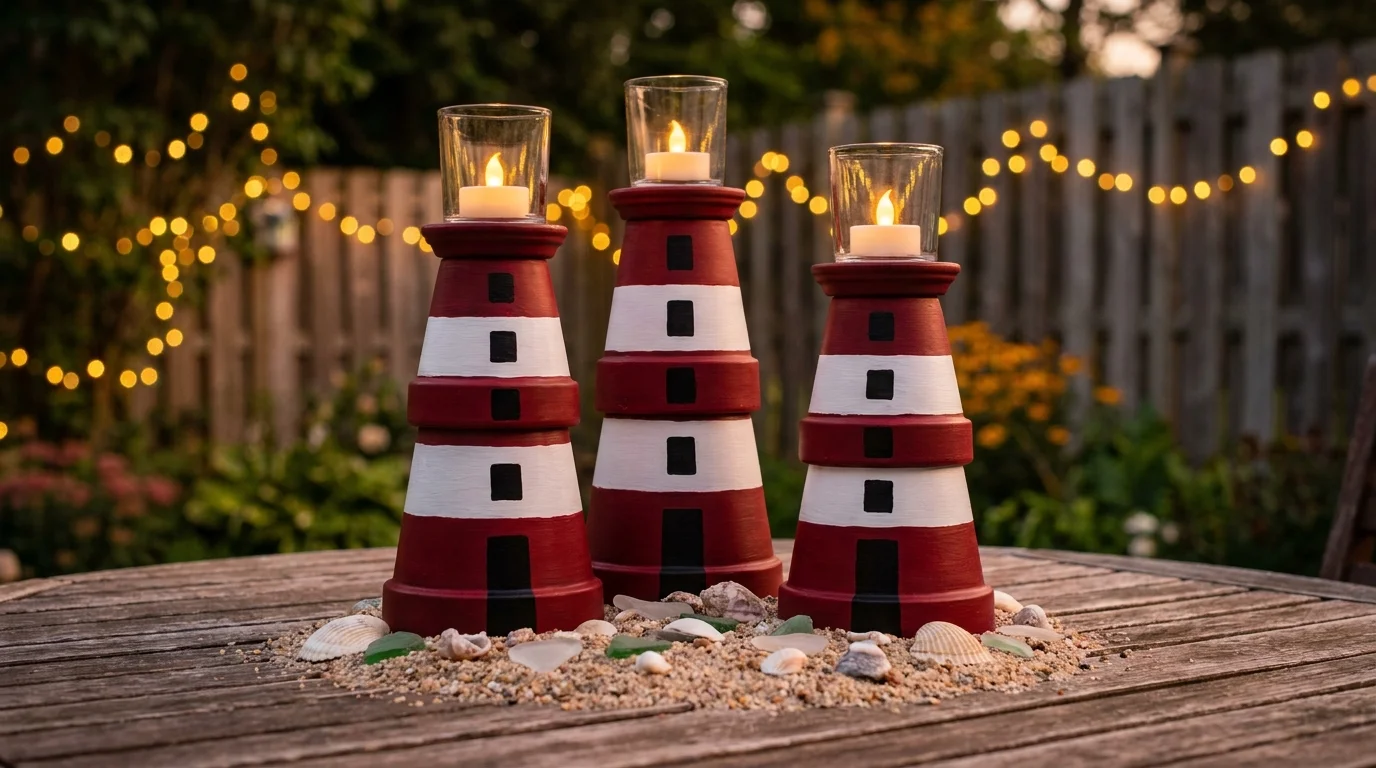
5. Terracotta Pot Lighthouses
Stacking terracotta pots to form miniature lighthouses brings a charming coastal vibe to any garden bed or front porch. You need three terracotta pots in graduated sizes, outdoor-grade acrylic paint, and waterproof construction adhesive. Instruct your young builders to paint rustic windows, wooden doors, and classic bold lighthouse stripes onto the individual pots. After the paint dries completely, apply a thick ring of adhesive to the bottom rims and stack the pots upside down, working from the largest base to the smallest top. Top the entire structure with a small solar-powered pathway light secured with another dab of adhesive. This simple addition illuminates the yard at night and gives the project a magical, functional finish. You can learn more about the efficiency and placement of these fixtures through the Department of Energy guide to outdoor solar lighting.
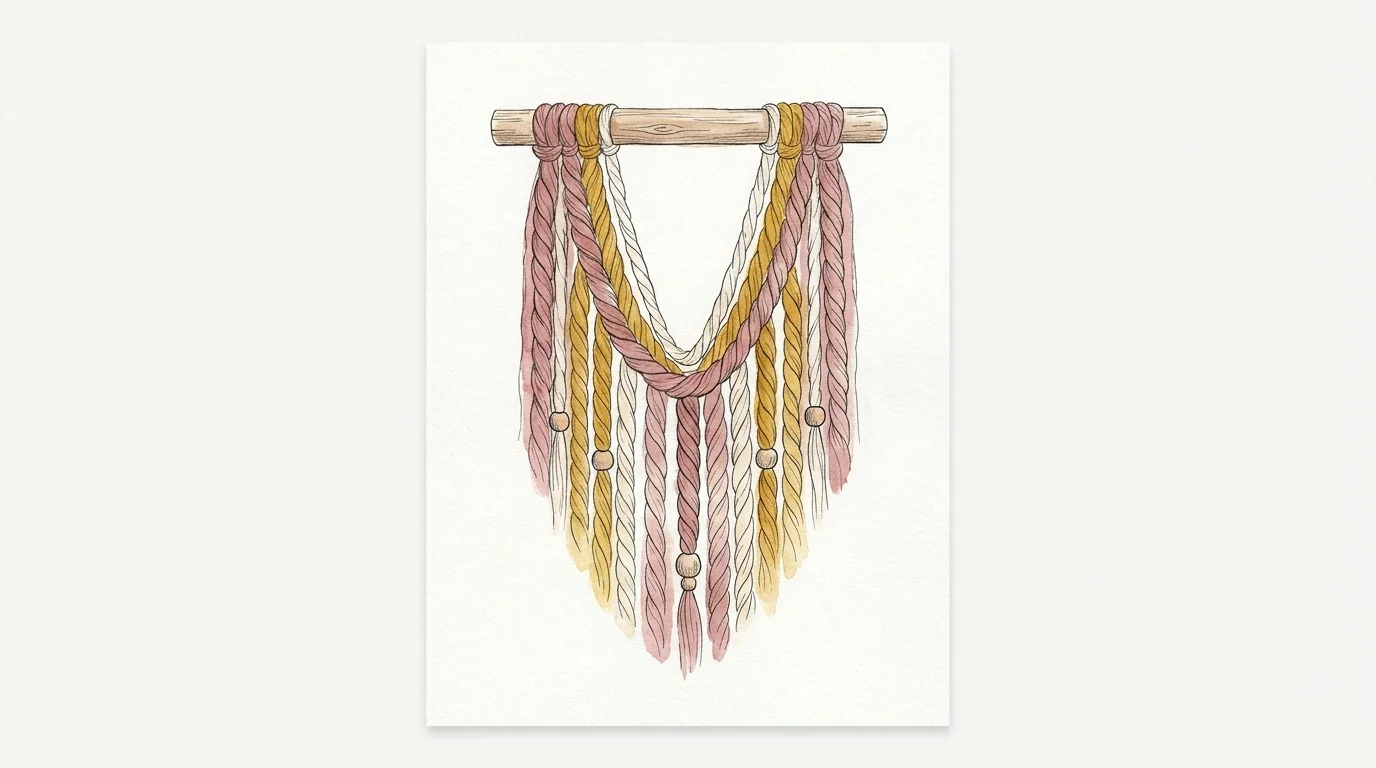
6. Woven Yarn Wall Hangings
Woven yarn wall hangings offer a quiet, highly focused activity perfect for a rainy weekend afternoon indoors. Gather a sturdy, interesting branch from the yard to serve as the rustic base of the tapestry. Cut various lengths of textured yarn, chunky wool, and thin cotton string in a cohesive color palette. Teach your grandchildren how to tie simple loop knots to attach the folded yarn pieces to the branch, pushing the strands close together for a dense, luxurious appearance. They can alternate colors to create color-blocked sections or mix textures for a bohemian aesthetic. Once all the yarn is attached, lay the piece flat and trim the bottom edge into a neat point, an asymmetric diagonal, or a clean horizontal line.
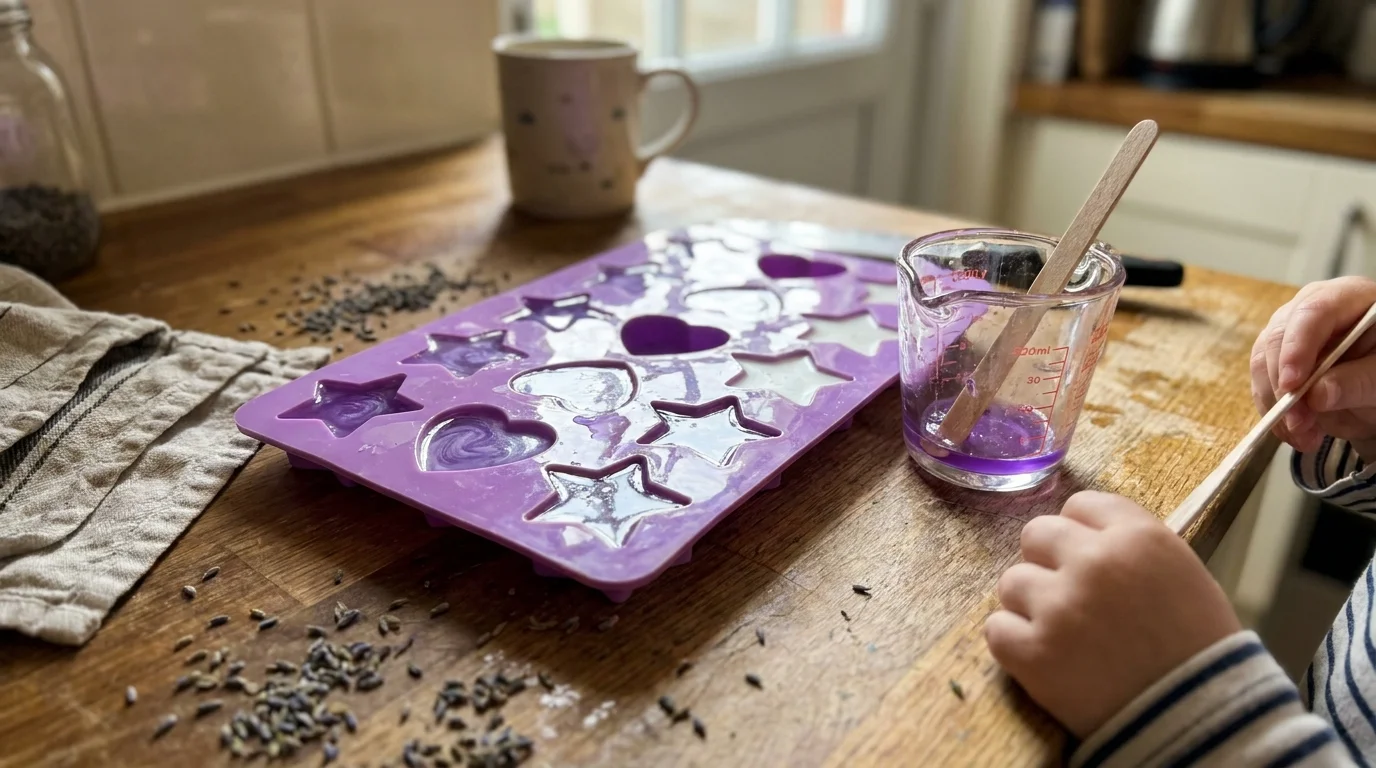
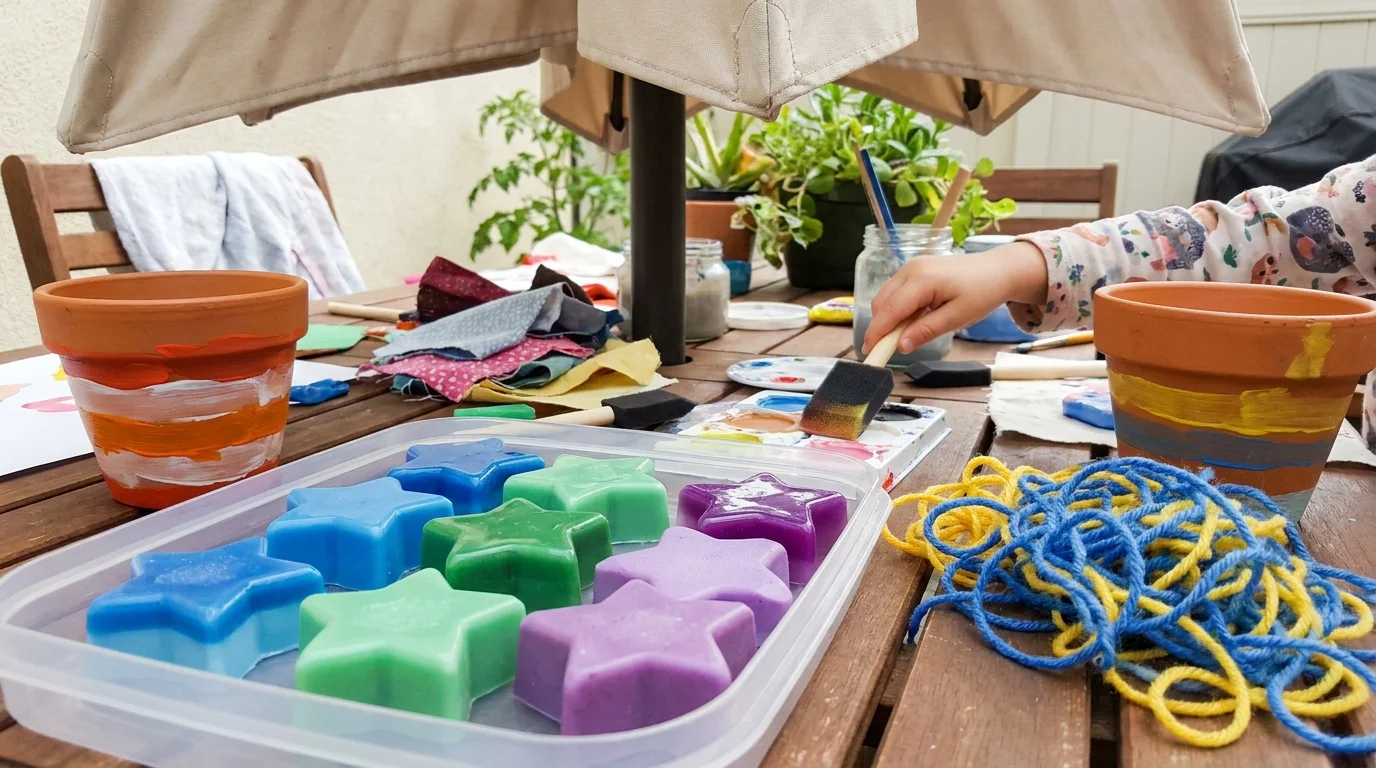
7. Custom Scented Melt-and-Pour Soaps
Crafting custom scented melt-and-pour soaps feels like an interactive science experiment and yields fantastic, usable gifts for family members. Purchase a high-quality glycerin soap base, skin-safe essential oils, and flexible silicone baking molds. Melt the cubed base in the microwave in short thirty-second bursts, stirring gently until perfectly smooth. You handle the hot liquid while your grandchildren choose the liquid colorants and stir in drops of lavender, sweet orange, or peppermint oil. They can drop dried flower petals, coffee grounds, or soothing oatmeal into the molds before you carefully pour the liquid soap over the additions. The bars solidify at room temperature within a few hours. You can find fantastic inspiration for natural, botanical additions through HGTV soap making tutorials.
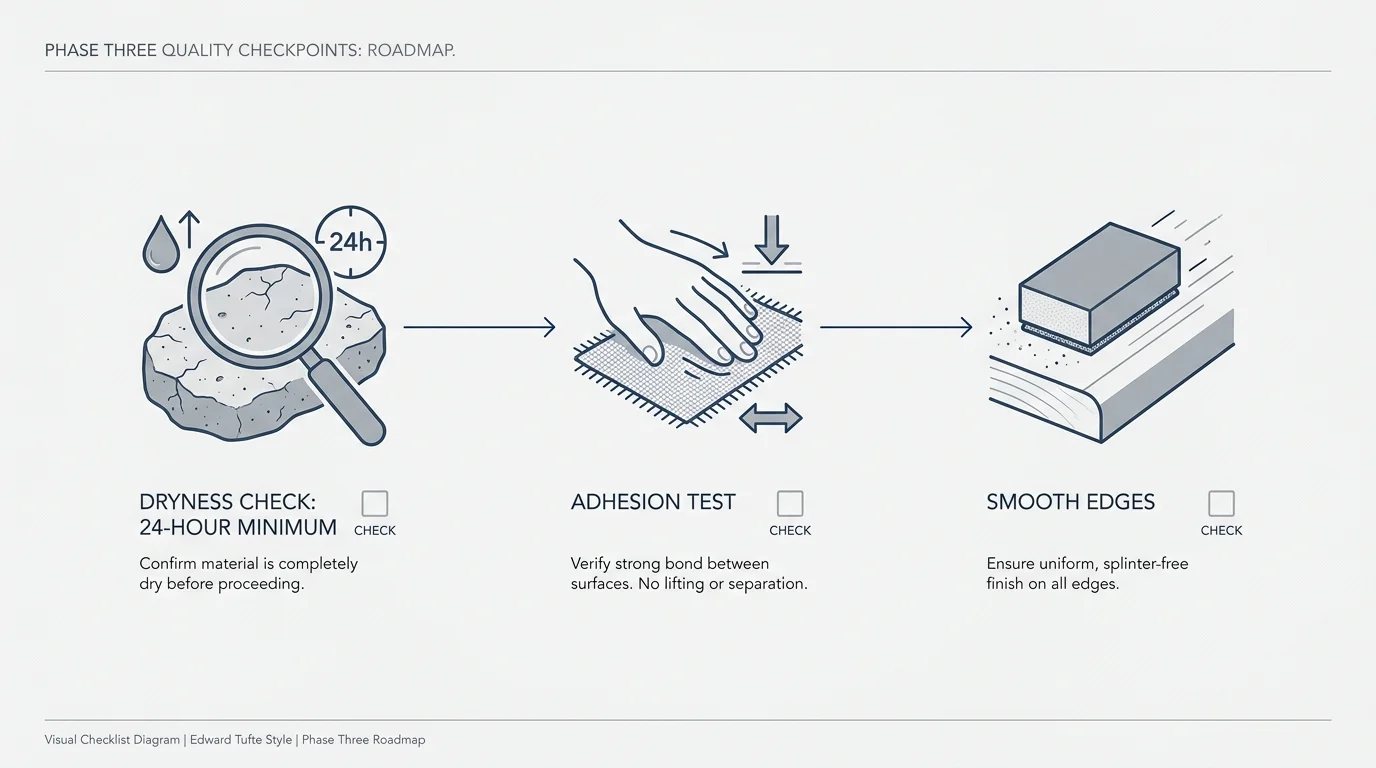
Phase Three: Finishing Touches and Quality Checkpoints
The final stage of any DIY project separates temporary afternoon crafts from enduring family keepsakes. For outdoor items like the concrete stepping stones and upcycled birdhouses, you must apply a clear, water-based polyurethane sealant to protect the surfaces against heavy rain and intense UV damage. Use a wide foam brush to coat the painted areas evenly, working outside or in a highly ventilated area. Fabric projects like the vegetable-stamped tote bags require aggressive heat setting; use a hot household iron over a thin pressing cloth to lock the fabric paint securely into the canvas fibers. Inspect all wooden projects for rough, jagged edges, applying fine-grit sandpaper to smooth away any potential splinters. Taking these meticulous final steps demonstrates the intrinsic value of craftsmanship to your grandchildren and ensures your collaborative creations withstand daily wear and tear.
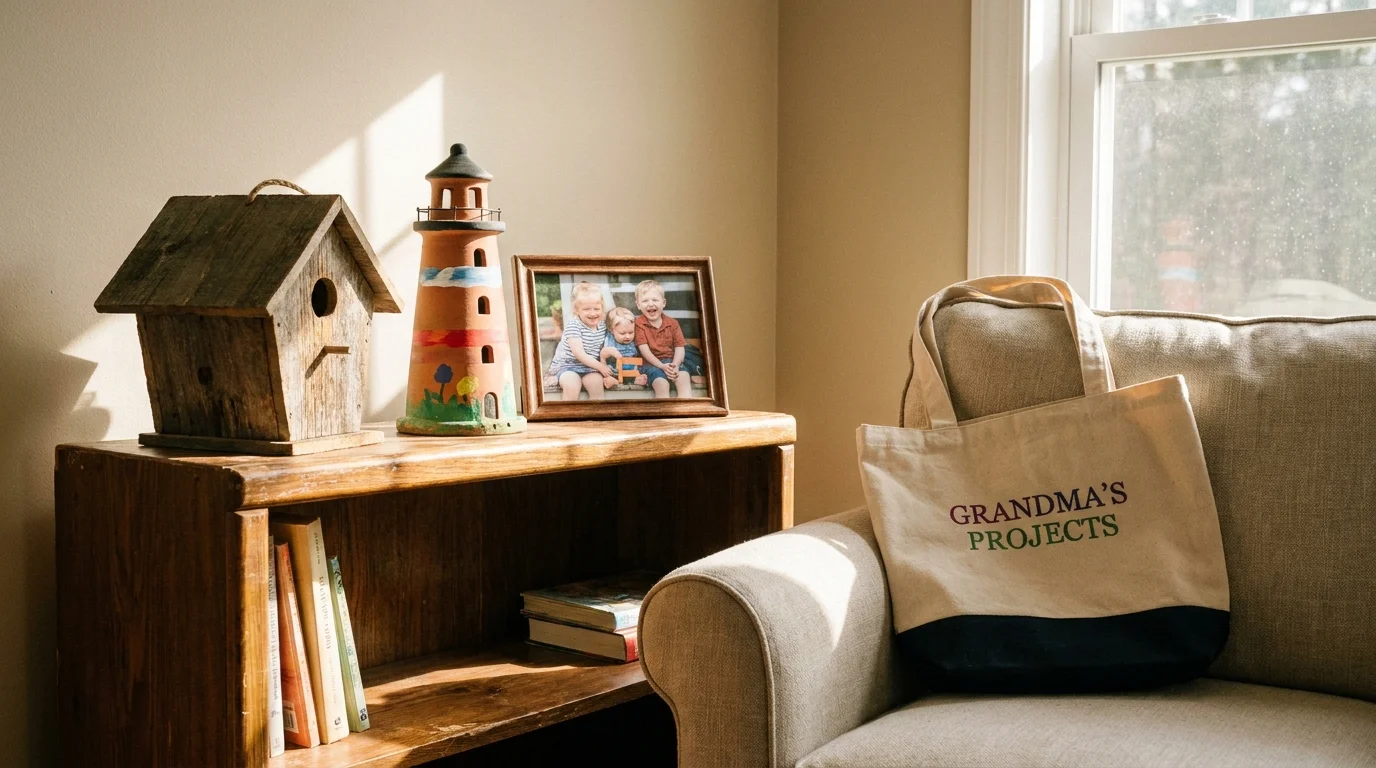
Styling and Personalizing Your Family Masterpieces
Integrating handmade items into your established home decor requires a thoughtful approach to color coordination and intentional placement. You want to properly honor your grandchildren’s creativity without visually overwhelming your existing aesthetic. Treat their completed projects as genuine art pieces rather than disposable clutter. Hang the textured yarn wall hangings in a structured gallery wall alongside framed family photographs and formal prints. Place the heavy garden stones intentionally along a well-manicured flowerbed border rather than scattering them randomly across the open lawn. For guidance on elevating homemade pieces, interior design experts often emphasize intentional, well-lit curation; you can read more about displaying children’s artwork thoughtfully to find the perfect balance between sentimental value and sophisticated design. When you frame or purposefully position their work, you continuously validate their effort and seamlessly blend their vibrant creativity into your daily environment.
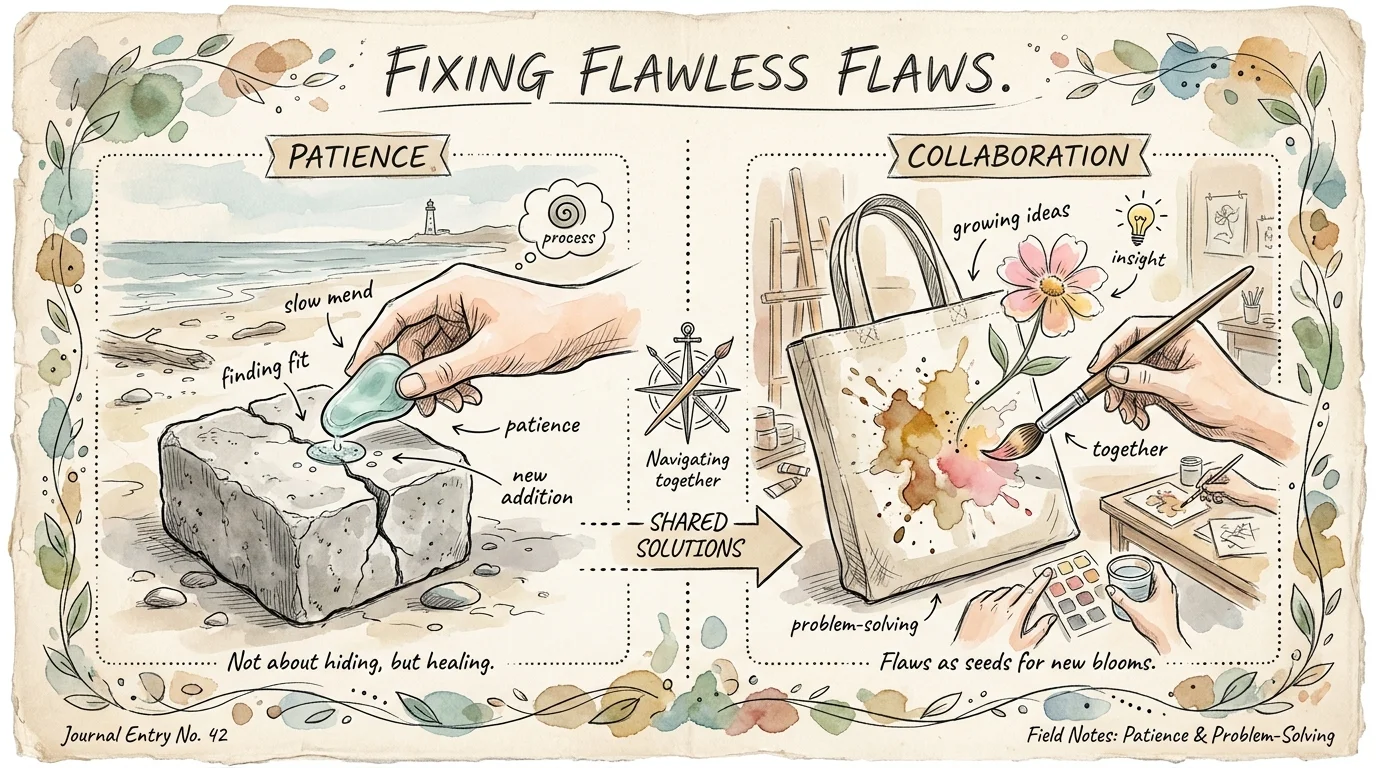
Troubleshooting Common Craft Pitfalls and Project Upkeep
Even the most meticulously planned family DIY sessions inevitably encounter occasional setbacks. If your concrete stepping stones crack significantly during the curing process, you likely added far too much water to the dry mix; next time, strictly follow the manufacturer’s precise ratio and ensure the plastic molds sit on a perfectly level surface. When fabric paint bleeds heavily under the vegetable stamps, the paint application was too thick. Encourage your young artists to dab excess paint onto a paper towel before stamping the canvas. If wood pieces for the birdhouse warp or split during assembly, you may be using older lumber that holds too much internal moisture. Opt for kiln-dried wood or pre-drill your nail holes to relieve tension in the wood grain. Regular maintenance ensures long-term longevity; simply wipe down indoor crafts with a dry cloth and reapply a fresh coat of protective sealant to outdoor crafts every spring to keep the colors vibrant and the materials completely intact.
Frequently Asked Questions About Crafting with Grandchildren
What are the safest adhesives for young builders?
When working with young children, prioritize non-toxic, low-VOC glues. Traditional white school glue or standard yellow wood glue works perfectly for porous materials like bare wood and heavy paper. For heavier projects requiring a stronger, more immediate bond, seek out water-based construction adhesives. Never allow young children to use hot glue guns or industrial epoxies independently, as these pose severe burn risks and dangerous chemical hazards.
How do I source affordable lumber for upcycled projects?
You can easily find budget-friendly wood by carefully dismantling discarded shipping pallets, though you must verify they contain an “HT” stamp indicating they are heat-treated rather than chemically treated. Local hardware stores and major home improvement centers often sell heavily discounted cull lumber that features minor cosmetic imperfections but works beautifully for rustic birdhouses. Additionally, check local community online marketplaces for neighbors actively giving away leftover cedar fencing or decking boards from recent backyard renovations.
Can we adapt these activities for small apartment balconies?
Absolutely. Projects like the woven yarn wall hangings, vegetable-stamped tote bags, and scented melt-and-pour soaps require minimal square footage and generate very little ambient mess. If you want to tackle the terracotta lighthouses or concrete stepping stones in a restricted apartment setting, simply lay down a heavy plastic drop cloth over your kitchen table or concrete balcony floor to securely contain the stray soil, water, and paint splatters.
How do I remove acrylic paint from clothing and upholstery?
Speed serves as your absolute best defense against stubborn acrylic paint stains. While the paint remains wet, wash the affected fabric immediately with warm water and heavy-duty dish soap. If the paint has already dried completely, it forms a tough plastic polymer bond. You can often break this stubborn bond by soaking the localized area in rubbing alcohol or standard hand sanitizer, then gently scraping the loosened paint away with a dull butter knife before laundering the garment as usual.
Building More Than Just Crafts
The true value of these hands-on projects extends far beyond the finished birdhouses, fragrant soaps, or colorful garden stones. Dedicating a Saturday afternoon to mixing concrete or stamping fabric creates a focused, relaxed environment where organic conversation flows naturally and pervasive digital distractions fade away. You are actively passing down practical problem-solving skills, teaching the quiet value of patience, and proving that the most cherished items in a home are often the ones made by hand. Gather your tools, clear off the workbench, and invite your grandchildren over for an afternoon of genuine creativity. The time and energy you invest right now will consistently yield functional art and enduring memories that your family will treasure for decades.