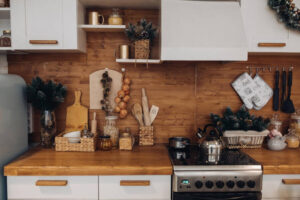
Transform everyday dollar store finds into gallery-worthy focal points that elevate your living space without draining your wallet. By applying advanced crafting techniques to budget materials, you can bypass the hefty retail markups associated with high-end home decor and customize every piece to match your precise aesthetic. Master simple chemistry with baking soda paint, explore textural layering with natural jute, and harness the oxidative power of antique mirroring sprays. This collection of seven accessible weekend projects prioritizes sustainability and clever repurposing while demanding minimal prior experience. Gather a few basic supplies and start building durable, display-ready pieces that look identical to premium boutique equivalents.
The Spark Behind High-End Budget Crafts
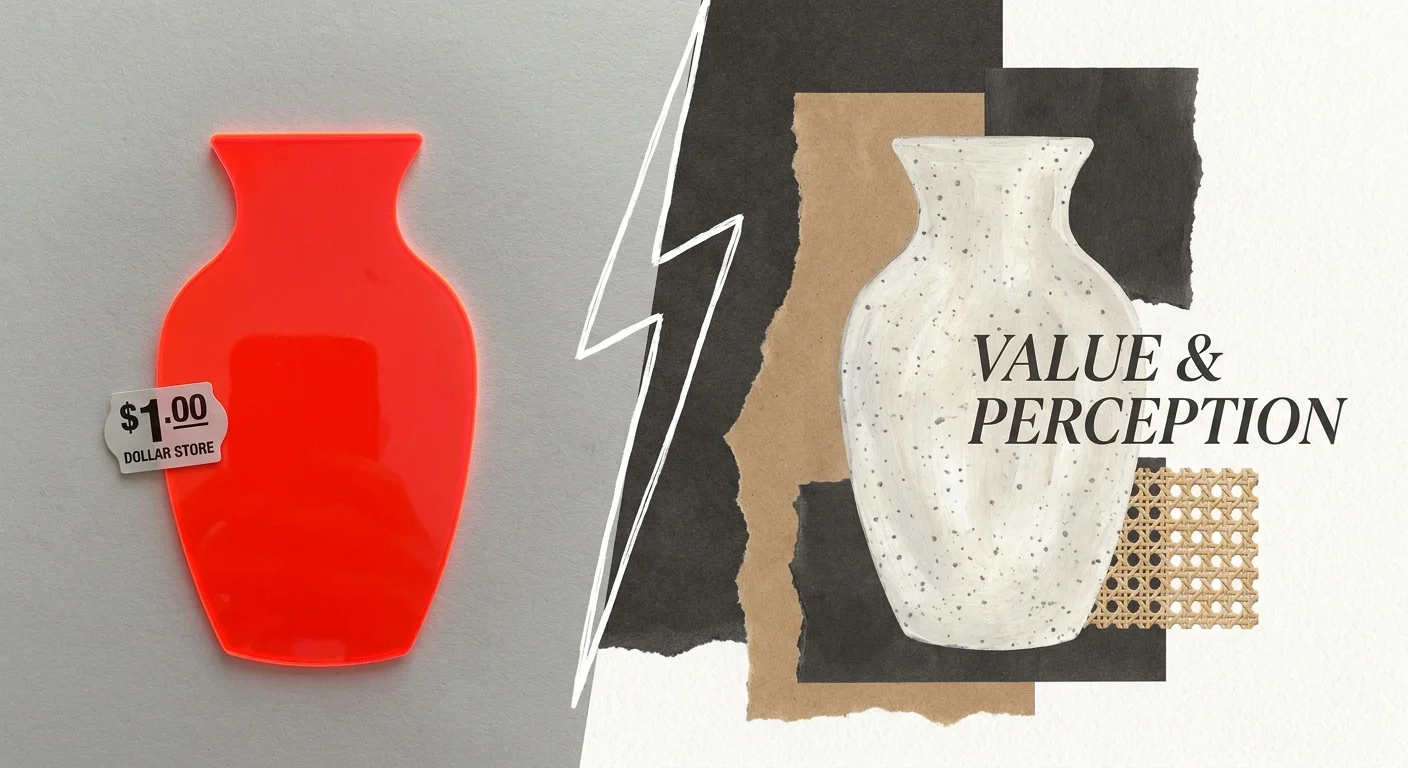
Thrift flipping and budget projects owe their popularity to a simple revelation; inexpensive foundational materials look remarkably similar to premium goods once stripped of their cheap finishes. The true magic lies in the intersection of form and texture. Look past the glossy, mass-produced paint on a cheap plastic vase to find a beautifully sculpted silhouette waiting to be transformed. Recreate the look of authentic stoneware or woven rattan simply by altering the surface treatment. Reclaiming these forgotten shapes gives you absolute control over your color palette and interior design.
Sourcing and Preparing Your Foundational Materials
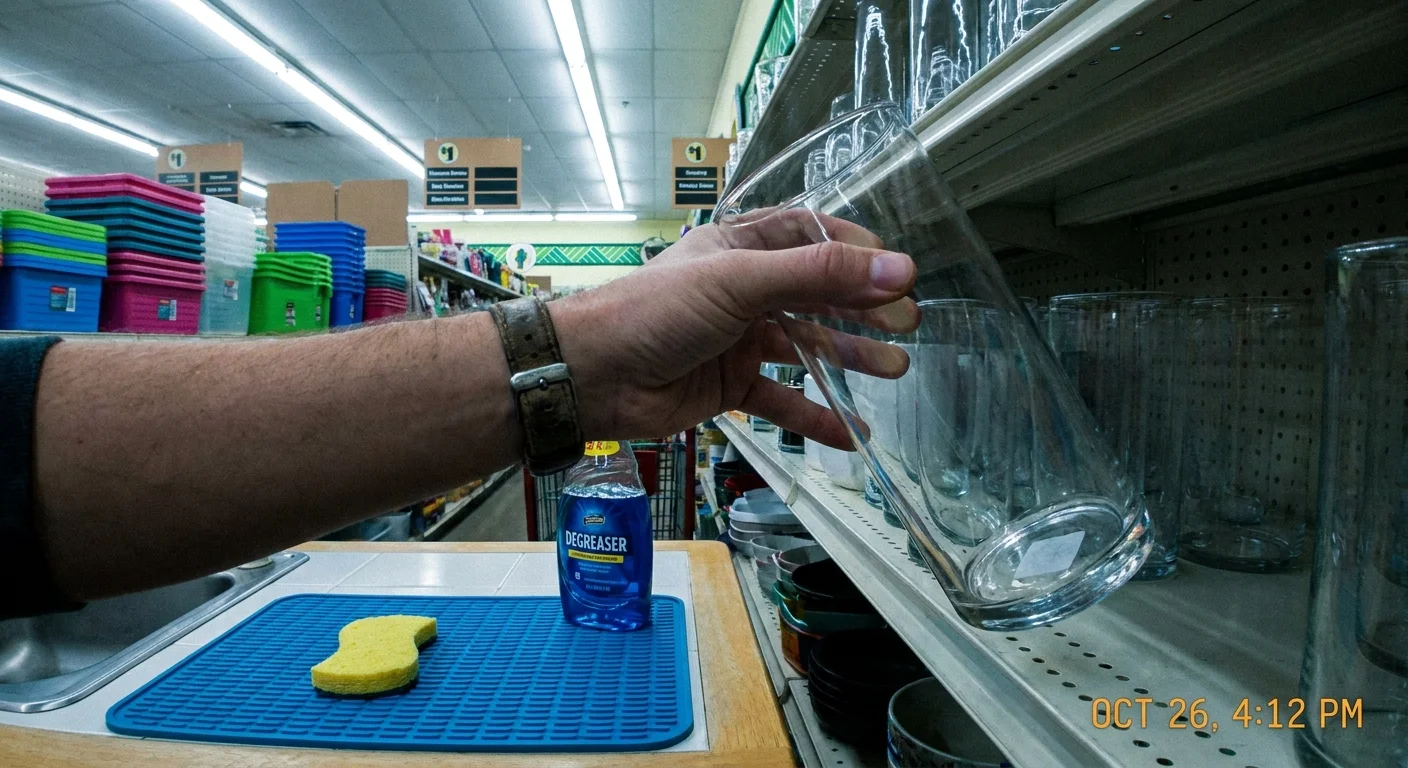
Navigate discount aisles looking strictly at shapes, ignoring garish colors. Camouflage minor structural seams on glass items with thick textured paint. Wash surfaces with degreasing dish soap to remove manufacturing residues, ensuring paints bond correctly. Consult the Craft and Hobby Association for guidelines on selecting safe adhesives for indoor use. Skip standard school formulas in favor of heavy-duty construction adhesive or industrial-strength silicone for a lasting hold. Provide younger helpers with non-toxic pastes and safety scissors. Protect your work surface with reusable silicone mats—an easy sustainable choice that makes scraping off dried hot glue incredibly satisfying.
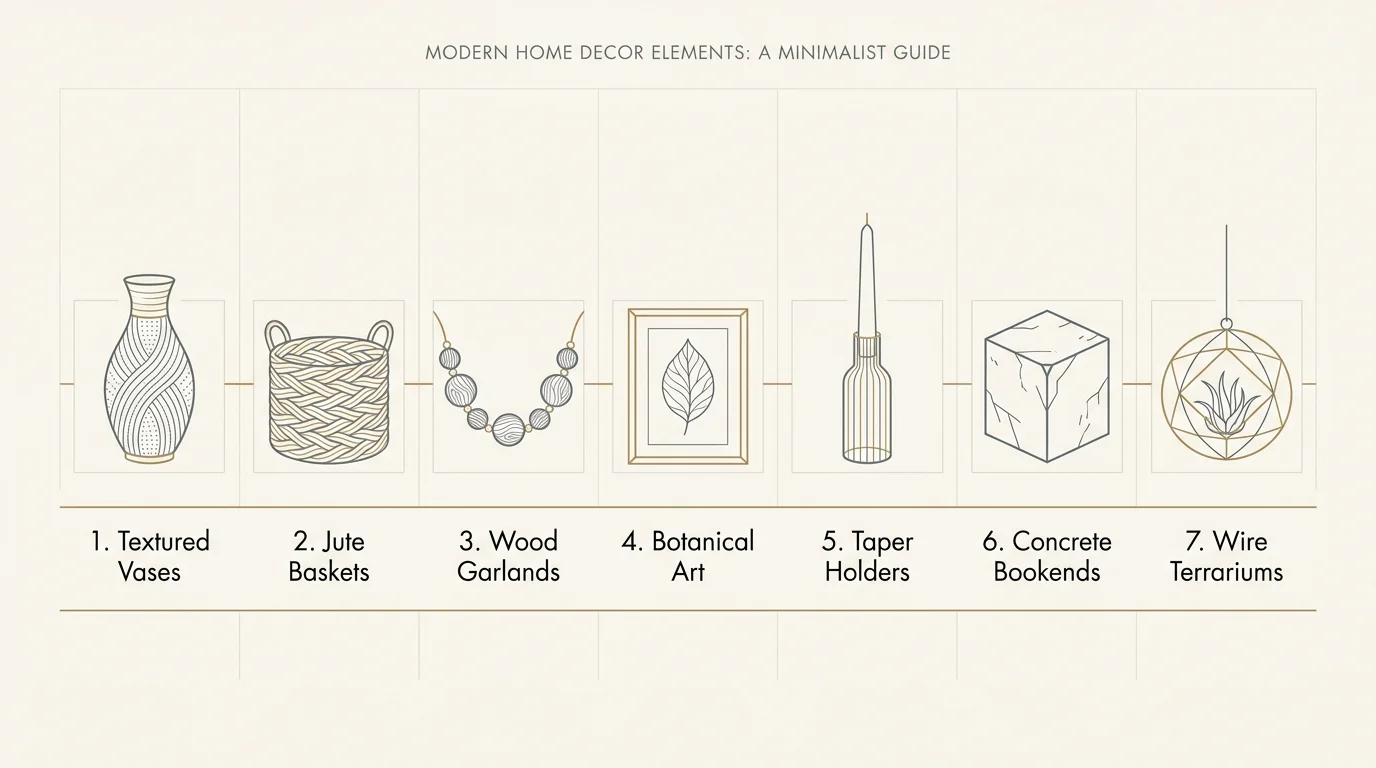
7 Budget DIY Builds for Your Home
1. Baking Soda Textured Ceramic Vases
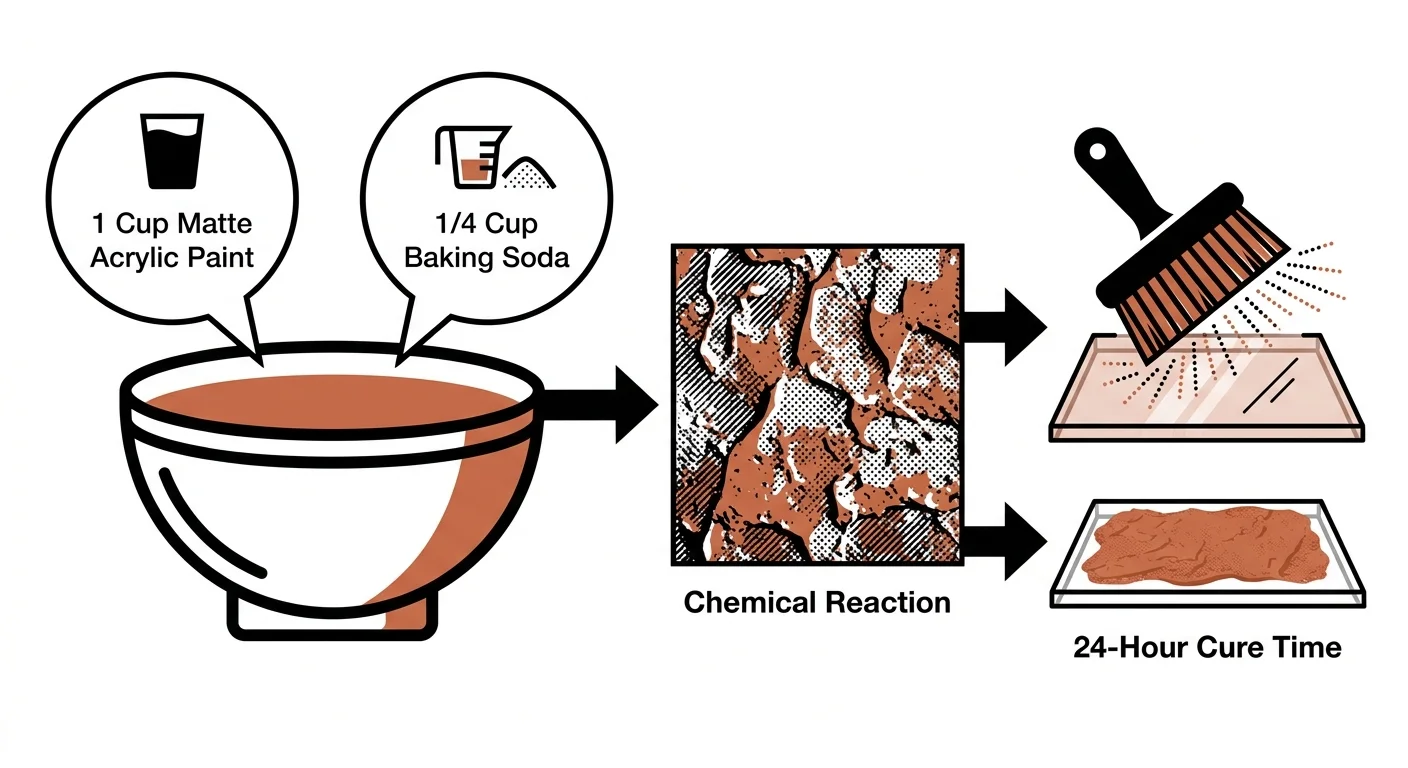
Transform glossy glass vessels into faux ceramics using acrylic paint and baking soda. Mix one cup of matte acrylic paint with one-quarter cup of baking soda until the consistency resembles gritty frosting. Apply the mixture using a stiff-bristled brush, stippling the surface to build stoneware texture. The baking soda creates a chemical reaction that thickens paint rapidly; work quickly and clean brushes immediately with warm water. The technique of using textural mediums for gritty finishes is extensively documented by Golden Artist Colors. Allow the vase to cure for twenty-four hours before staging.
2. Layered Jute Rope Catch-All Baskets
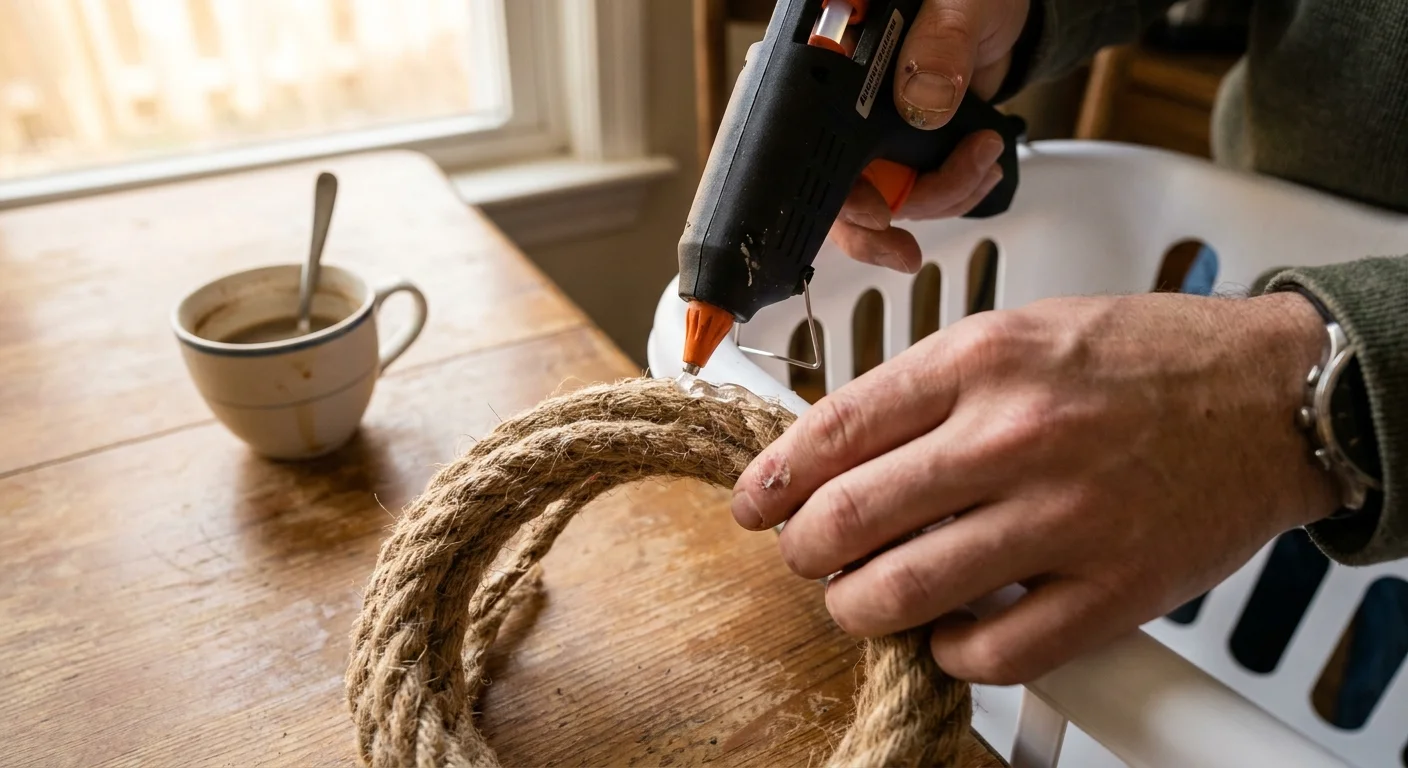
Flimsy laundry baskets serve as the skeletal frame for nautical-inspired storage bins. You need three spools of thick jute rope and a hot glue gun. Apply a steady line of adhesive from the bottom edge and press the rope firmly into place, winding up the sides in tight coils. The coarse smell of natural jute adds sensory richness. Press firmly to eliminate gaps, keeping fingers clear of molten glue. The adhesive sets quickly, leaving you with a rigid, textured basket ready for storing folded blankets in your living room.
3. Sun-Bleached Wooden Bead Garlands
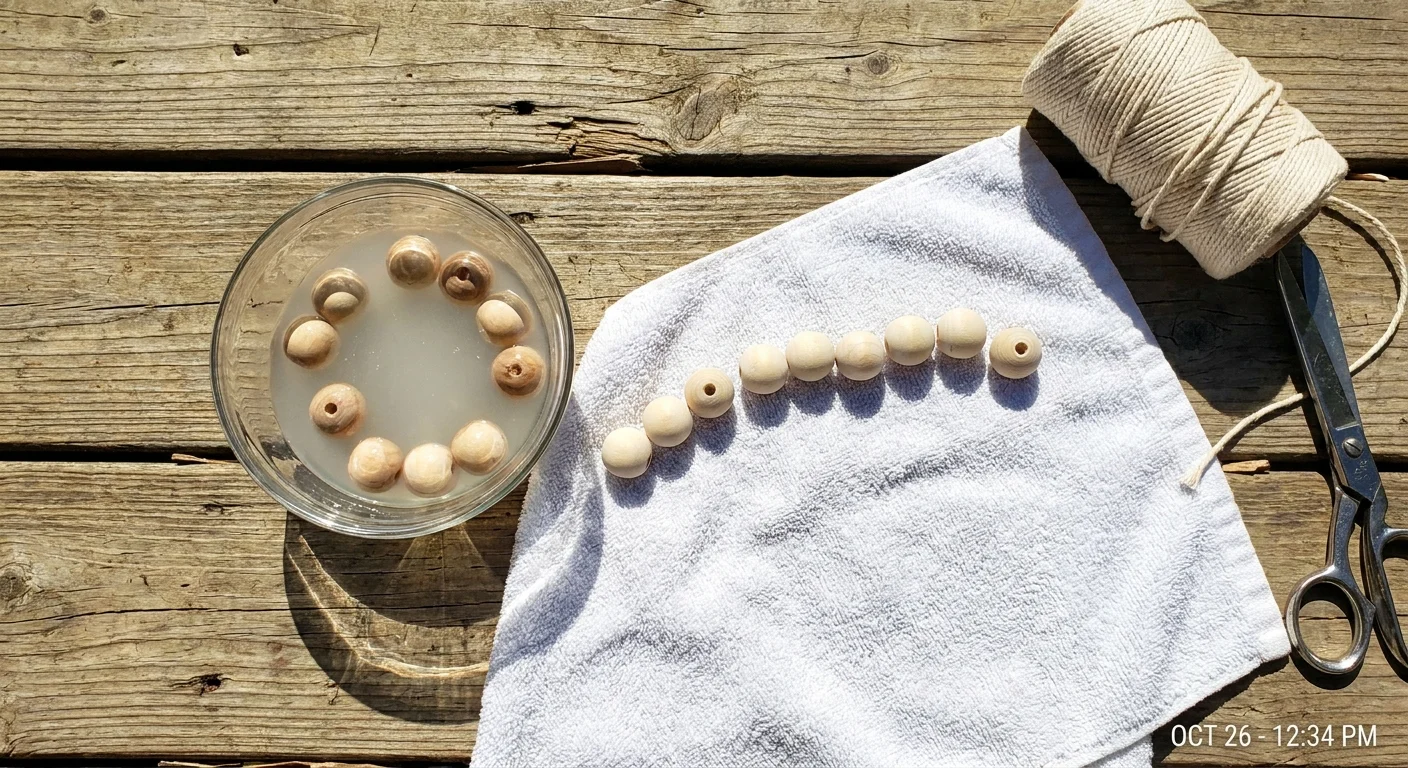
Wooden bead garlands command premium prices, yet you can assemble them for pennies. Source packages of raw wooden beads and natural cotton twine. To achieve a sun-bleached driftwood finish, submerge the beads in a mixture of one part bleach to three parts water for ten minutes in a well-ventilated space. Rinse thoroughly and let them bake in direct sunlight until dry. Thread the beads onto your twine, tying decorative tassels at each end. This stringing process is highly meditative and easily adapted for children.
4. Antiqued Framed Botanical Art
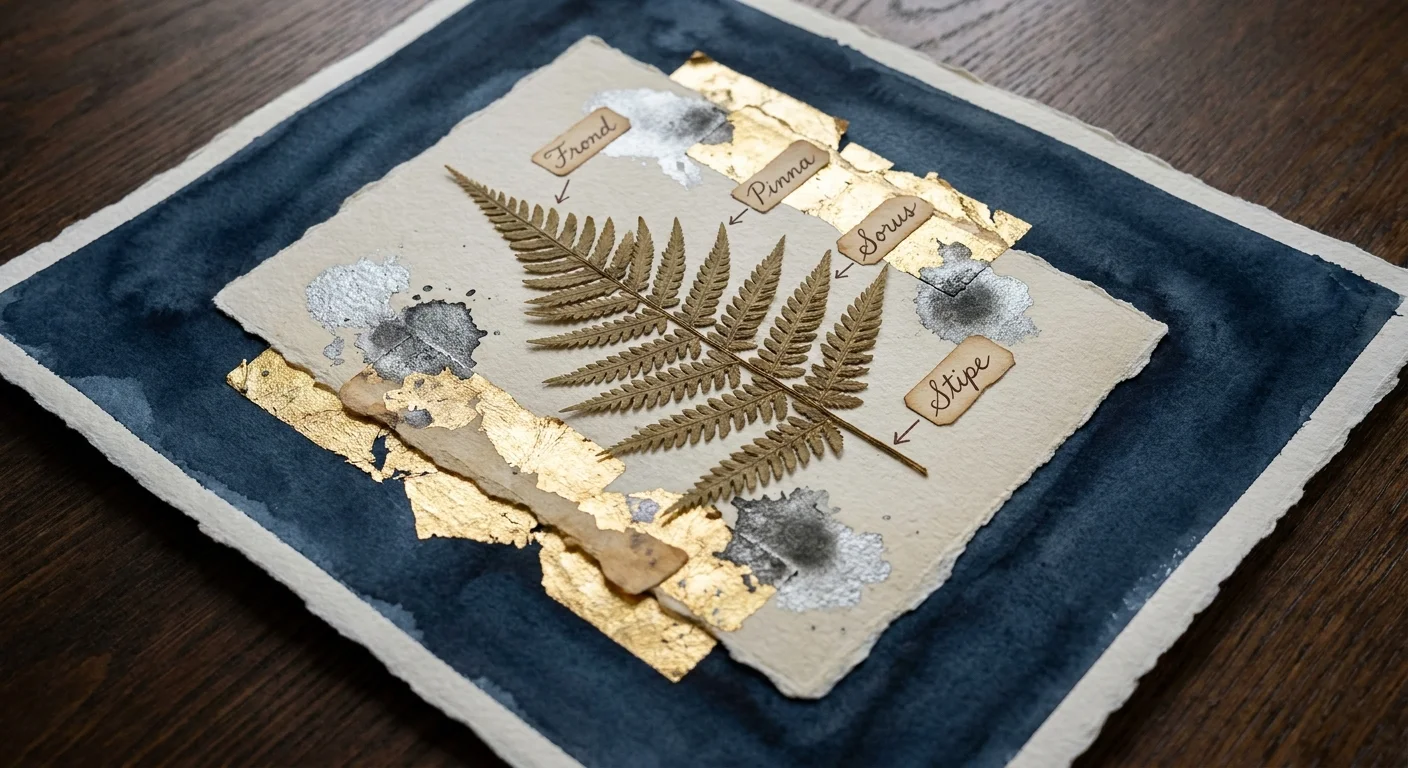
A dry-brushing technique completely transforms cheap plastic picture frames. Coat the frames in a matte black primer, waiting thirty minutes to dry. Barely dip a dry brush into bronze acrylic paint, wiping most pigment off before lightly skimming the raised details. This highlights molded textures and mimics the patina of aged brass. Replace stock imagery with pressed local foliage or vintage botanical prints. Check out resources from the American Craft Council for excellent techniques on properly preserving natural botanicals for display.
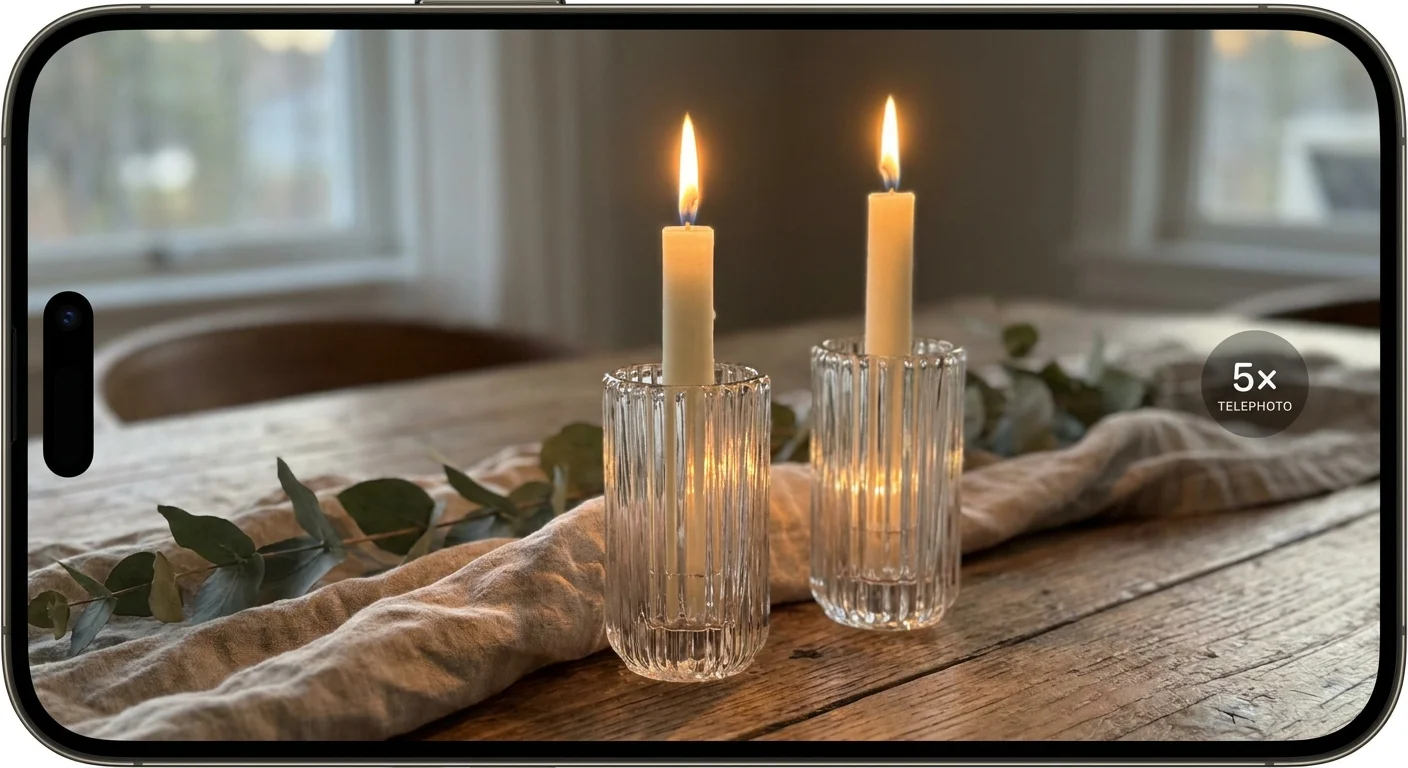
5. Fluted Glass Taper Candle Holders
Create architectural candle holders by stacking and bonding ordinary glass taper holders and prep bowls. Wash glass components with rubbing alcohol to eliminate oils. Apply a thin bead of clear glass adhesive to the rims and stack the pieces securely. For a fluted appearance, glue wooden dowels vertically around the exterior of a cylindrical vase, trimming them flush. Paint the entire assembly with matte terracotta spray paint. The industrial glass adhesive requires forty-eight hours to cure; tape the structure together with painters tape to prevent shifting.
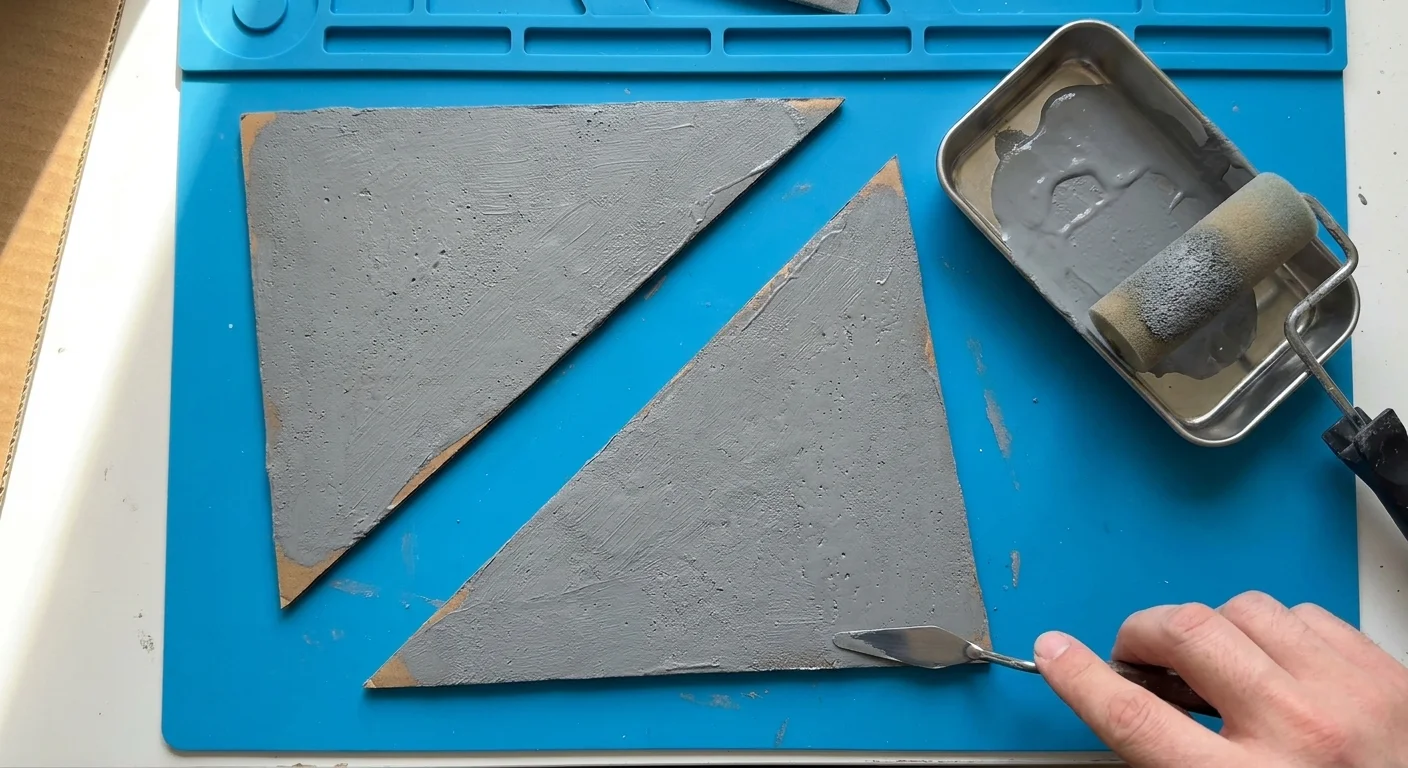
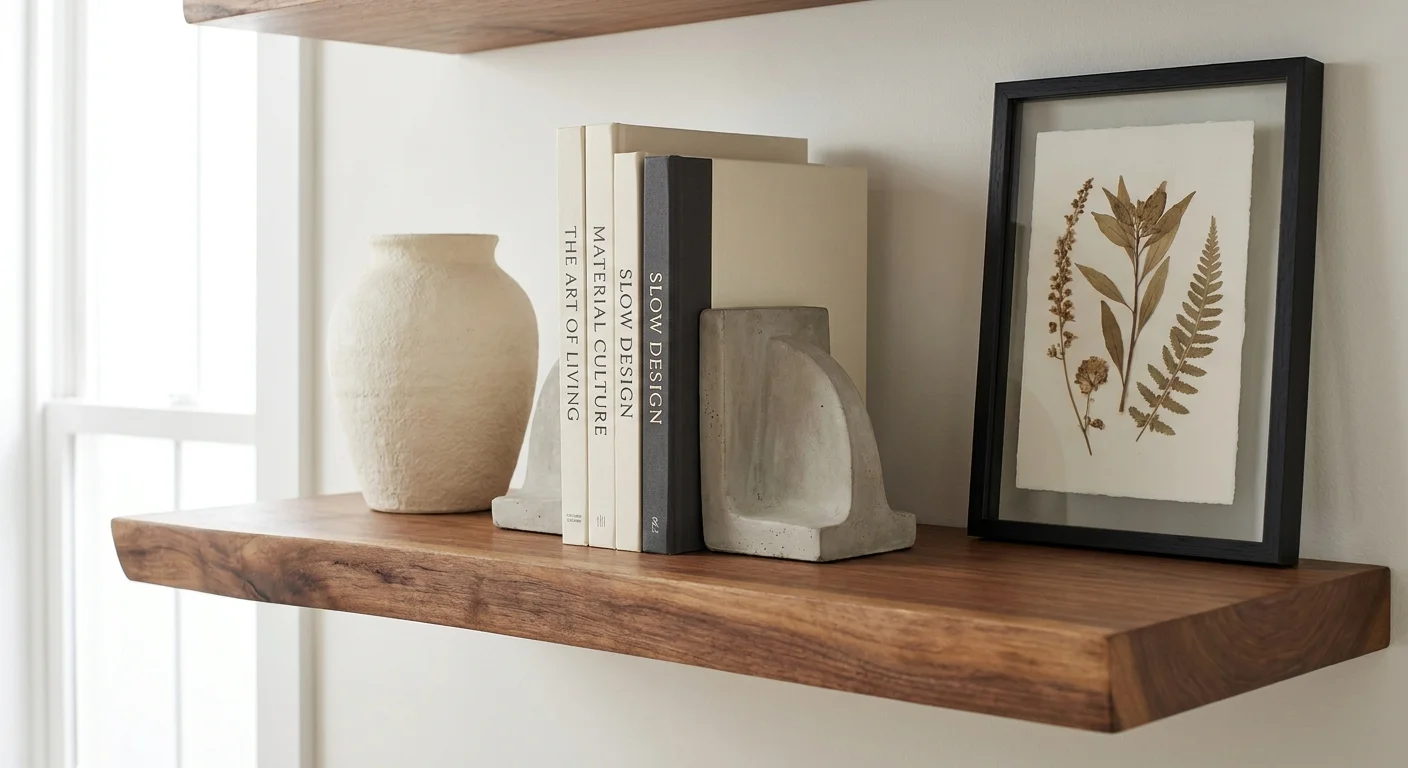
6. Faux Concrete Geometric Bookends
Hollow geometric decor pieces make fantastic molds for faux concrete casting. Coat the plastic pieces in a specialized concrete-finish spray paint, or mix fine play sand into a medium gray acrylic paint. Dab the sandy mixture heavily over the item, leaving uneven patches to mimic poured concrete. To give hollow items weight for holding books, drill a small hole in the base, fill the cavity with playground sand, and seal it shut with hot glue. This trick instantly elevates a lightweight toy into a heavy-duty library accessory.
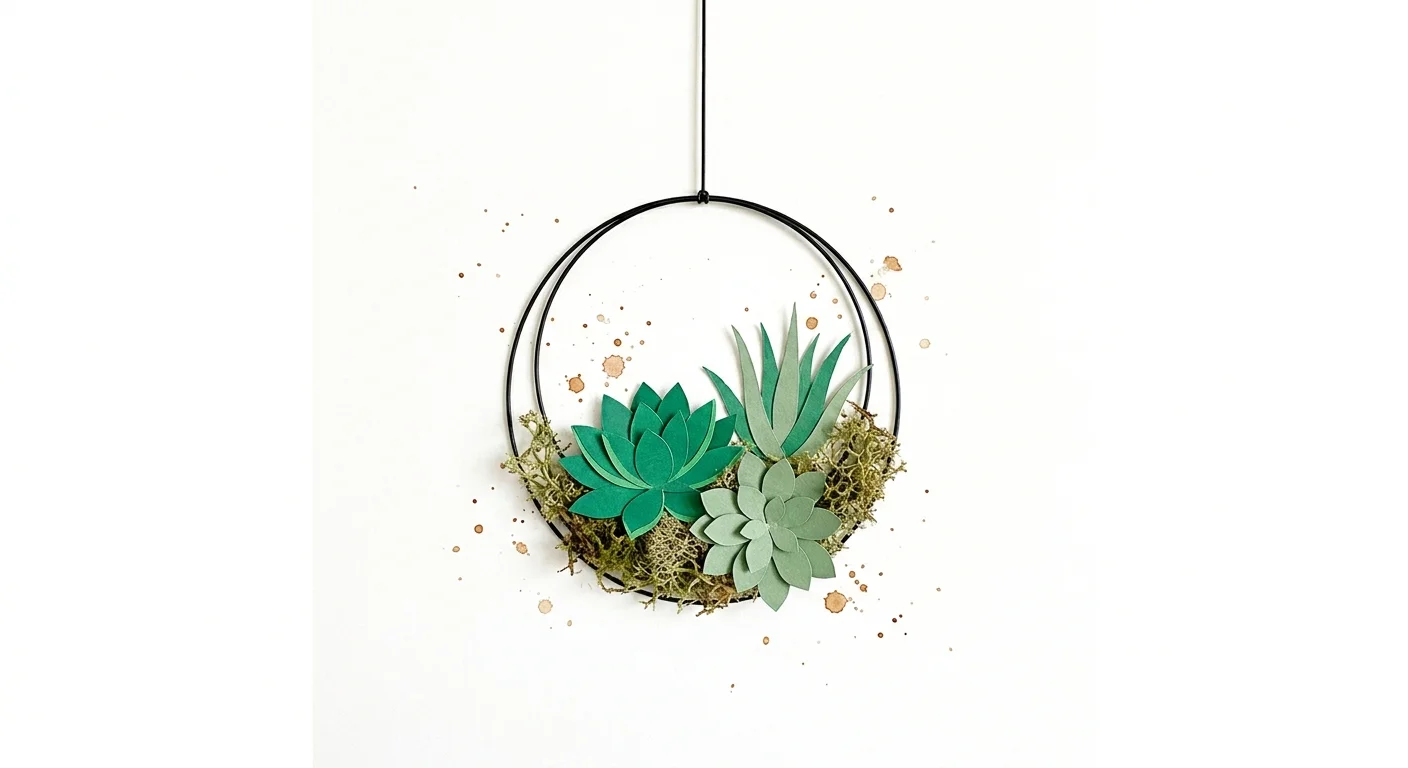
7. Upcycled Wire Hanging Terrariums
Wire fruit baskets can be easily reconfigured into hanging terrariums for air plants. Using heavy-duty wire snips, remove the handles and invert the baskets to form a cage-like dome. Spray paint the wire structure in an antique copper finish. Wire a piece of natural driftwood to the inside center, creating a bed for a low-maintenance tillandsia plant. Hanging these terrariums near a bright window introduces a lush, organic element to your room. Air plants require merely a weekly misting, making this a spectacular piece of living art.
Styling, Gifting, and Display Strategies
Integrating new budget crafts requires strategic placement. Group faux ceramic vases and antique mirror trays in clusters of three, varying heights to create visual triangles on mantels. Mixing authentic premium items alongside upcycled dollar store crafts forces the eye to interpret the entire grouping as high-end. Handmade rope baskets serve beautifully as gift vessels; stuff them with baked goods for an impressive presentation. When storing items, wrap painted pieces in soft cotton cloths to prevent abrasive scratching. Avoid wrapping them in plastic bubble wrap, which traps moisture and degrades water-based paints.
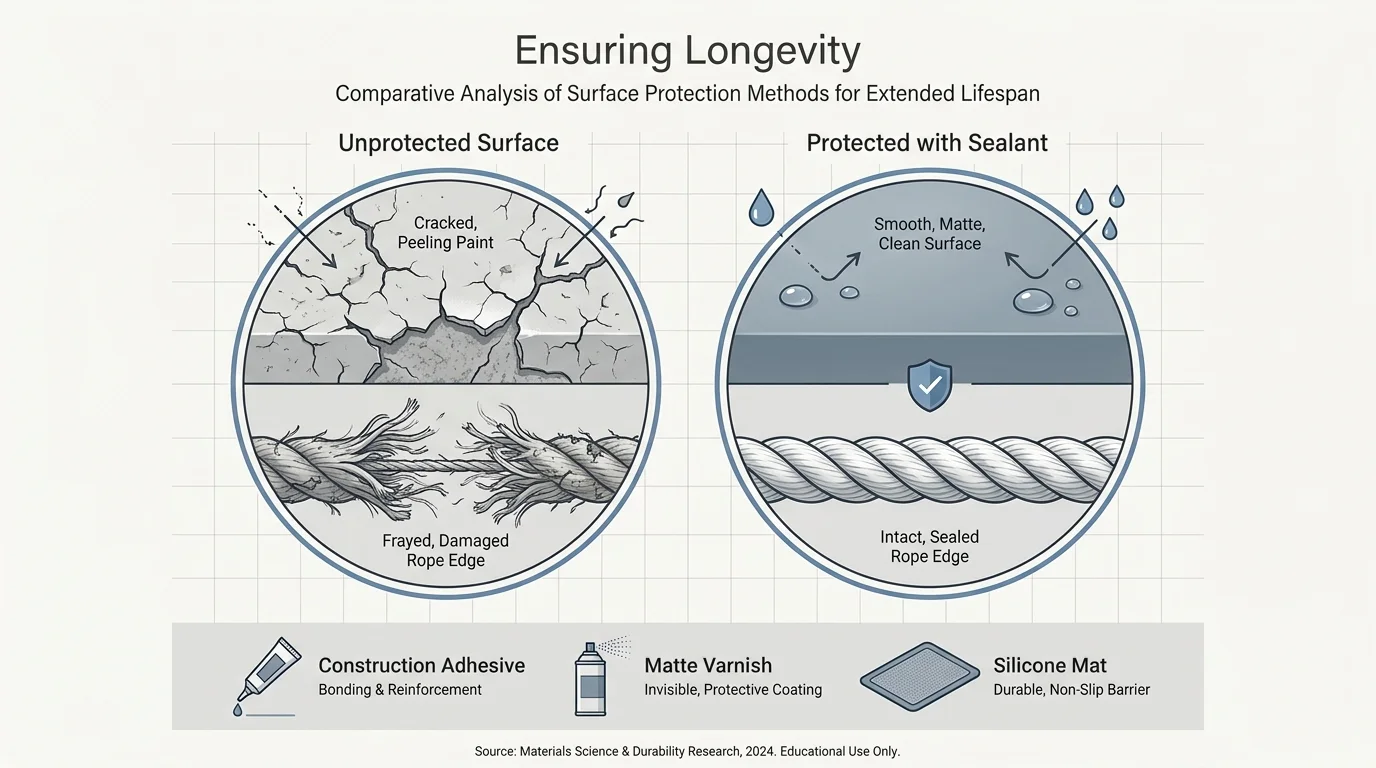
Protecting Finishes and Ensuring Longevity
Water-based acrylics and faux finishes require a dedicated protective topcoat to withstand daily dusting. Apply two thin coats of non-yellowing polycrylic sealer over painted ceramics, waiting two hours between applications. The Woodworkers Guild of America offers fantastic insights into matching sealers with porous surfaces. For items exposed to direct sunlight, utilize a UV-resistant clear spray to prevent colors from bleaching or turning brittle. Keep foundational paints accessible for rapid touch-ups. Maintain a small journal of paint mixing ratios to match custom colors flawlessly during repairs.
Frequently Asked Questions
How much does it realistically cost to build these projects?
Most individual projects total less than five dollars in raw materials, assuming you already possess basic crafting supplies. Purchasing premium adhesives requires a higher initial outlay, but these bulk supplies stretch across dozens of future builds, significantly reducing your cost per item over time.
What is the total time commitment required for completion?
Active construction typically requires less than forty-five minutes per item. However, you must factor in extensive curing phases. Baking soda paints and heavy adhesives demand up to twenty-four hours of undisturbed resting time. Prep projects on a Friday evening, allowing them to cure overnight for Saturday styling.
Can I complete these crafts if I lack specialized tools?
Every piece detailed in this guide utilizes foundational techniques requiring no power tools. Substitute heavy-duty craft scissors for wire snips, or use strong double-sided mounting tape if you lack a hot glue gun. Thriving maker communities like Upcycle That routinely demonstrate how household items serve as excellent substitutes for specialized putty knives.
How can I scale these projects for larger spaces?
Scaling these concepts relies on massing and repetition. Purchase large, cheap plastic floor planters and apply the same baking soda technique to create massive, lightweight statement pieces. To scale botanical art, purchase poster-sized frames from discount bins and utilize oversized palm fronds to fill cavernous wall spaces with bold impact.
Your Next Creative Challenge
Mastering these seven decorations equips you with a versatile arsenal of texturing and upcycling techniques. Once you understand how baking soda alters paint viscosity, no discount aisle remains safe from your creative vision. Your next challenge involves bridging the gap between indoor decor and exterior styling. Take the faux concrete technique and apply it to mismatched plastic garden pots, creating a unified planter collection for your porch. Push the boundaries of these materials, experiment with bolder pigment combinations, and continue proving that elevated interior design relies on imagination rather than expenditure.