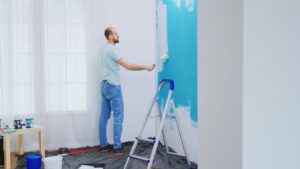
Professional painters are very aware of the fact that time means money, so they constantly try to use their trade secrets to finish their job much faster, smarter, and neater.
Plus, they also try to do all of these without sacrificing the quality of the painting or making costly mistakes. That’s why you might be tempted to say that nothing compares to a professional painter, and in a certain sense, that’s very true.
But what if you’d have access to some P.P.T. (Precious Professional Tips)? Would you still think you’ll never be able to do the job yourself?
Because we’ve actually gathered a couple of tips from several pro painters, and what we’ve been able to find will definitely change your beliefs! Here are 15 of the most important rules that professional painters taught us:
Sand away the flaws
If you want to apply that ideal smooth coat of paint to your walls, ceilings, and woodwork, then you have to initiate from a perfectly smooth surface.
One professional explained to us that “sander” is a much more fitting job title for this job than “painter”, as sometimes you have to spend a lot of time pushing sandpaper.
Sanding with a good abrasive paper will help you level out the unwanted spackling compound, but also the drywall joint compound patches, but it’s also great for flattening the ridges around your nail holes, and for feathering out repairs to blend everything in the surrounding surface.
Sanding is also good when it comes to removing burrs and difficult spots in painted wood trim, like baseboard moldings or even window/door casings.
Plus, roughing up a glossy painted surface with some fine-grit sandpaper will let the new paint coat adhere much more smoothly. You can use a sanding pole, but make sure it’s fitted with 220-grit sandpaper.
You can sand with it the walls vertically, starting from the baseboard and going all the way up to the ceiling. Make sure you overlap each stroke slightly because otherwise, you might miss a spot.
Then, start sanding horizontally along the top of the baseboard molding, but also along the tops of the walls. And don’t forget the ceiling! You have to make sure you don’t apply too much pressure, or otherwise, you might damage the wall.
Besides, sandpaper might load up and clog, if you press down way too hard. Also, if you want to sand decorative woodwork, just use a sanding sponge, because it’s more efficient when it comes to getting into crevices, and it will easily conform to contours.
Press the tape with a putty knife
Painter’s tape is probably the most indispensable part of any paint job, especially when you have to mask off wood trim. But nothing compares to a particular moment that seems to be inspired by a thriller when you peel off the tape and discover that the paint has actually bled through the tape and spread it all over the trim.
Trust me, as a painter, you don’t want to live that. So you must do everything to avoid this situation, otherwise, you’ll have to scrape off the errant paint.
But it can all be avoided by simply adhering the tape to the trim right before you start the job. When you apply the tape to the trim, make sure you run a putty knife over it.
It will guarantee a proper seal, so to speak, and it will stop ANY paint bleeds. Also, make sure you use true painter’s tape, not just masking tape. It seems that masking tape leaves behind some sort of sticky residue that’s very hard to clean off.
Besides, the paint might cause the tape to buckle and wrinkle, which will allow the paint to seep beneath it. Whereas painter’s tape can be easily left for days, and still peel off smoothly and cleanly.
Cover the furniture
When you decide on painting a room, you don’t have to bother to move all the furniture out of the room. I know this might seem like a surprise, but there’s a much better option than that, and I’m pretty sure your spine will be thankful if you try!
You can push all the furniture to the center of the room, and then gently cover it with plastic sheets, which you’ll later tape at the bottom.
This way, you’ll be sure you have your furniture 100% protected from all the mess that comes with painting drips and splatters, but also from the sanding dust.
Use tinted primer
Did you know that before starting their job, painting pros take their time filling all the holes and patching cracks with joint compounds? Because otherwise, if they paint right over the patched areas, the compound will instantly suck the moisture out of the paint, and you’ll end up with a flat, dull look, which it’s professionally known as “flashing”.
The problem is that those spots will definitely look completely different from the rest of the wall. So in order to avoid this from happening, it’s highly important to start with a primer (yes, for your walls).
But here’s another catch: it seems that pros never use white primer straight from the can. As a matter of fact, they tint the primer with a little bit of gray paint, or with the color of the chosen finish paint.
Apparently, the tinted primer is much better when it comes to concealing patched areas or covering up the old color. This way, the finish paint coat will definitely look more vibrant, and it might even require fewer coats.
It seems that this is even more important when it comes to painting over red and orange, which might need three or more topcoats if you don’t use a tinted primer.
Choose the best supplies
Pro tip No. 1: never cheap out on paint and brushes. Pro tip No. 2: Cheap brushes are ALWAYS false economy. If you were to ask a professional, it seems that the best advice would be to get THE BEST brushes out there, take proper care of them, clean them thoroughly after each use, and you will have them for a lifetime.
A $3 plastic brush will only make it look as if you just smeared paint on the wall with a rake. Besides, the bristles will definitely end up in the paint. That’s why we’d advise you to buy Wooster or Purdy paintbrushes, which might cost a bit more than the usual ones, but they’ll last way longer and will help you perform a great job.
Also, a quality 2-and-a-half-inch wide angled sash brush is also a great all-around brush. It’s more versatile and you can easily wash and reuse it until you notice its bristles wear down to a nub.
And if we’re still on the matter of shopping, it’s also worth mentioning that you should get the best paint out there. It will go on much easier, the coverage will be remarkable, and it will definitely last longer.
Besides, you will also be able to wash off all the grubby fingerprints, without taking off the color. The whole painting job will be much easier, and it will look amazing in the end.
Eliminate brush and lap marks with some paint extender
Do you know how you can tell if a room has been painted by a beginner DIYer, not a professional? It’s easy: you have to check if there are noticeable lap marks in the finished paint coat.
The key to a finish that doesn’t have noticeable lap marks, nor brush strokes is to mix a paint extender, also known as paint conditioner (like Floetrol) into the paint. It seems that a paint conditioner does these two things:
- it halts the paint’s drying time, which will give you more time to paint over on freshly-painted areas without getting ugly lap marks, which might happen if you apply fresh paint to already-dried paint.
- it will level out the paint, which will automatically eliminate all brushstrokes. Professionals usually use extenders when they paint drywall, woodwork, cabinets, but also doors. Make sure you read the can’s label, to understand exactly how much paint extender you need to add to your paint. Usually, it’s 8 ounces of extender per 1 gallon of paint.
Scrape a ridge in your textured ceilings
When you paint the top of the wall and your room has a textured ceiling, it’s close to impossible not to get some pointers on the ceiling bumps.
Professionals usually have a simple solution for that: they run the tip of a slotted screwdriver around the ceiling, easily scraping off a bit of the texture.
This way, they get this tiny ridge in the ceiling, which the tip of the paint bristle will automatically glide into, anyway. It’s a great piece of advice, as you’ll be able to cut in around the ceiling without being afraid to get paint onto the ceiling. Besides, you will never even notice there’s a missing texture.
Scrape the windows (don’t tape)
When you start painting the windows, don’t trouble yourself by tapping around the window frame and grill. It might take you too much time, and the paint might end up on the glass anyway.
Instead, you can do what a professional would do: while you paint the window, make a little paint lap onto the glass. Don’t worry, it will soon dry, and when it happens, you’ll easily scrape it off with a razor scraper.
All you have to do is make sure not to slice through all the paint bond that’s between the wood and the glass. Because moisture might get in there and seep into the wood, and it will eventually rot.
Box paint for a better and more consistent color
Did you know that when you buy more than two cans of the same color paint, they’re never the same color? This is mainly because the paint color slightly varies between the cans, which makes a tiny difference extremely obvious when you open a brand new gallon halfway through the work.
If you want to make sure you have the same color consistency from the moment you start until you finish, mix your cans of paint into a huge five-gallon bucket.
As professionals call it, you’ll have a “boxing” paint. This way, you’ll paint your rooms directly out of the bucket. Also, you might want to consider placing your bucket on a roller tray, because it will be SUPER heavy!
Finish a wall before you start another
The wide majority of DIY painters will cut in all the room corners, move to another thing, and then come back and roll the paint onto the walls. But that’s not how professionals do.
Apparently, pros get a particular seamless look by simply cutting in one wall, then continuing to roll on the paint right before the cut-in sections fully dry. It allows the brushed sections to blend together nicely.
Even more, you might want to consider covering your paint bucket, tray, or whatever container you might be using, preferably with a damp towel. It will keep the paint from drying out when you’re not using it.
Buy extra paint
It’s important to be prepared with a couple of clean buckets when you start painting, as freshly shaken paint won’t stay fresh forever! And we all know that you won’t be able to settle paint back to life only with a stir stick alone.
You’ll have to pour the paint back and forth between the two buckets until you’ve completely mixed in the solids that have remained at the bottom of the cans. That’s probably the only efficient way to make sure your paint is thoroughly mixed.
Wash roller covers
Even if it might seem a bit strange, it’s highly important to wash your brand-new paint roller covers before you start using them to spread the paint.
Pre-washing will get rid of all the loose bits of fuzz that might come off once you start painting. Simply wash them with water and a bit of liquid soap, then rapidly run your hands up and down the covers to smooth any of those loose fibers, a practice which is also known as “preconditioning”. You can immediately start using the covers, as there’s no need to wait for them to dry.
Use Canvas Drop cloths
Professional painters would never use bed sheets as drop cloths, so why should you? Thin sheets aren’t good when it comes to stopping splatters and spills from seeping through the floor.
Also, plastic sheeting is no good, either. While it’s true that plastic does contain spills, the paint will still be wet when you finish. What if you step in it, and you end up tracking it throughout the entire house?
Plus, it’s extremely slippery. Do you know what the professionals use? Canvas drop cloths. It’s true that they are a bit more expensive, but the canvas won’t be slippery, it will absorb all the splatters, and it will last a lifetime.
Besides, unless you have decided to paint a ceiling, you won’t need a jumbo-sized drop cloth to cover the entire room. A canvas cloth of no more than a couple of feet wide should be enough when it comes to protecting your floor.
Light it up
Here’s another professional painter term you have to remember: “holiday” because that’s when you might miss a spot without realizing it. You can easily miss it, especially if you’re dealing with similar colors, or even worse: a room that has bad lighting.
That’s why you need to get yourself a proper bright work light. You’ll need it to check your work as you advance or when you finish a section.
Holidays usually happen around the edges of a room, where you worked with a brush instead of a roller. However, holidays are rather easy to fix if you’re still working, but much more difficult and annoying once you cleaned everything up.
Clean all the dirty walls with the best degreaser
Paint will never stick to greasy, dirty, dusty surfaces, like kitchen walls above a stove, or mudrooms where your kids kick off their muddy boots. That’s why you have to use a degreaser to clean the surface before painting.
Degreasers, which are also known as degassers, cut through grease and grime, in order to get that paint adhesion you need. Make sure you read the label first, and follow all the needed directions, as the stuff is extremely potent. Also, don’t forget about the rubber gloves!
If you enjoyed reading this piece, you might also want to try: 11 Ingenious Storage Solutions for a Happy and Organized Home