
Upgrading your bathroom hardware offers a fast, budget-friendly way to completely transform the feel of your space without enduring a messy, weeks-long renovation. Swapping out tired builder-grade fixtures for modern alternatives instantly elevates the room, adding undeniable character and value to your home. Whether you rent a small apartment or own a spacious house, you hold the power to orchestrate a dramatic makeover over a single weekend. By strategically targeting high-impact areas like drawer pulls, towel bars, and faucets, you inject fresh personality into the design. This guide delivers everything you need to execute seven distinct hardware updates, ensuring your next home improvement project yields professional-looking results with minimal stress and maximum visual reward.
Before You Start: Planning Your Bathroom Upgrade
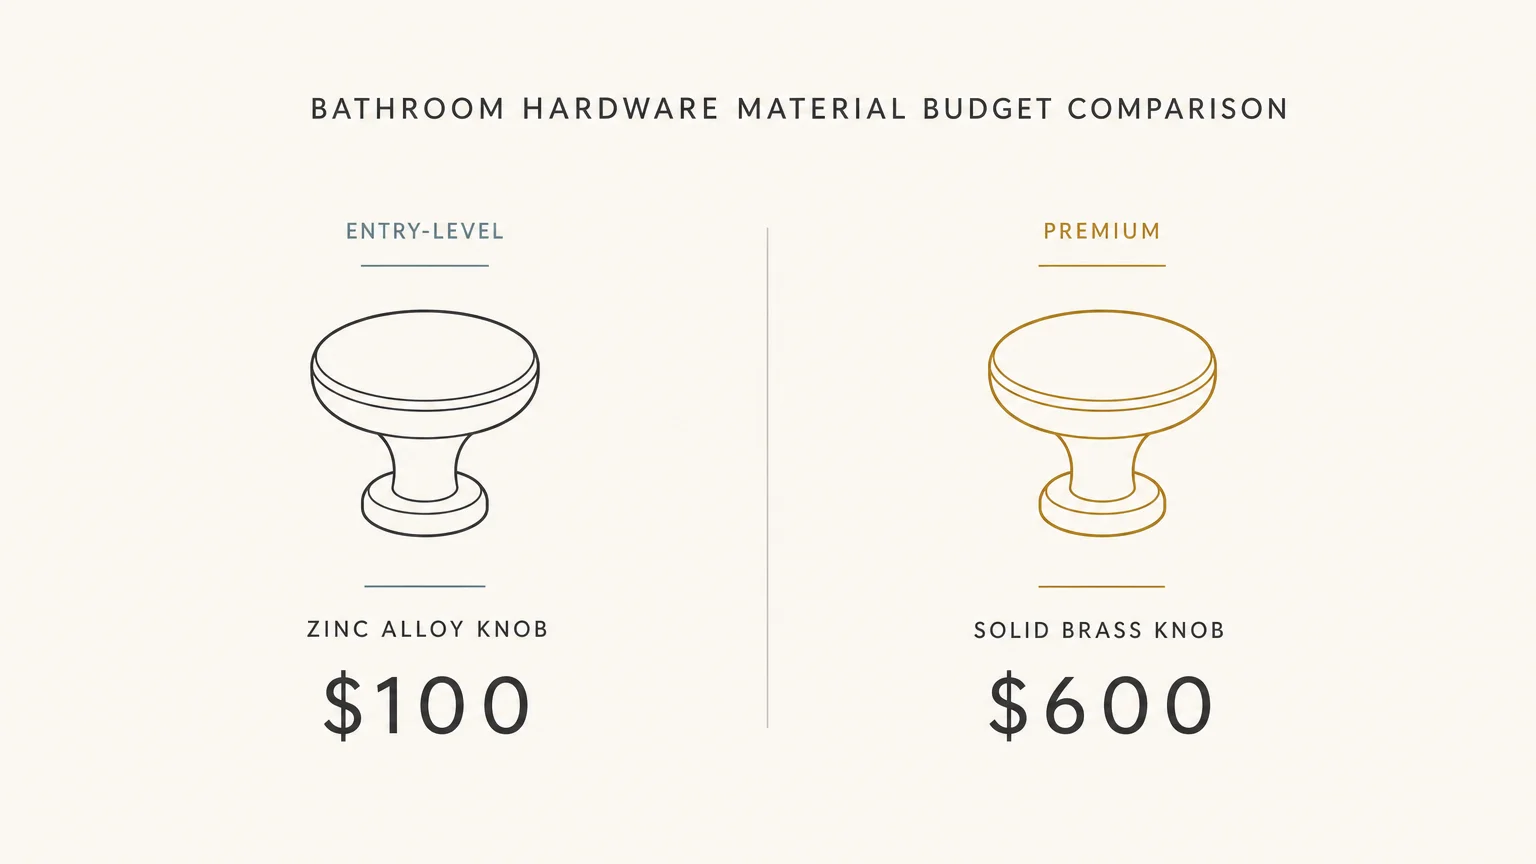
Embarking on a bathroom upgrade requires a realistic assessment of your budget, timeline, and technical comfort level. You can generally expect to spend anywhere from one hundred to six hundred dollars for a complete hardware overhaul, depending heavily on the materials and brands you select. High-end solid brass fixtures carry a premium price tag but offer lifetime durability, whereas zinc alloy alternatives provide a similar visual punch for a fraction of the cost. Carefully evaluate your financial boundaries before purchasing any materials.
Time serves as your second crucial consideration. Most homeowners can complete these seven updates comfortably within a standard two-day weekend. You need minimal specialized knowledge to succeed; if you can operate a manual screwdriver, read a tape measure, and follow basic safety protocols, you possess the necessary skills. Renters should confirm their lease agreements before altering plumbing or electrical fixtures, though keeping the original hardware securely boxed in a closet allows you to reverse the changes upon moving out.
Phase One: Preparation and Removal
Proper preparation separates a frustrating chore from a rewarding creative endeavor. Begin by gathering your essential tools—a Phillips and flathead screwdriver, a set of Allen wrenches, an adjustable crescent wrench, a tape measure, a torpedo level, and a non-contact voltage tester. Having everything within arm’s reach prevents you from frantically searching for a tool while holding a heavy mirror or balancing a wrench under the sink.
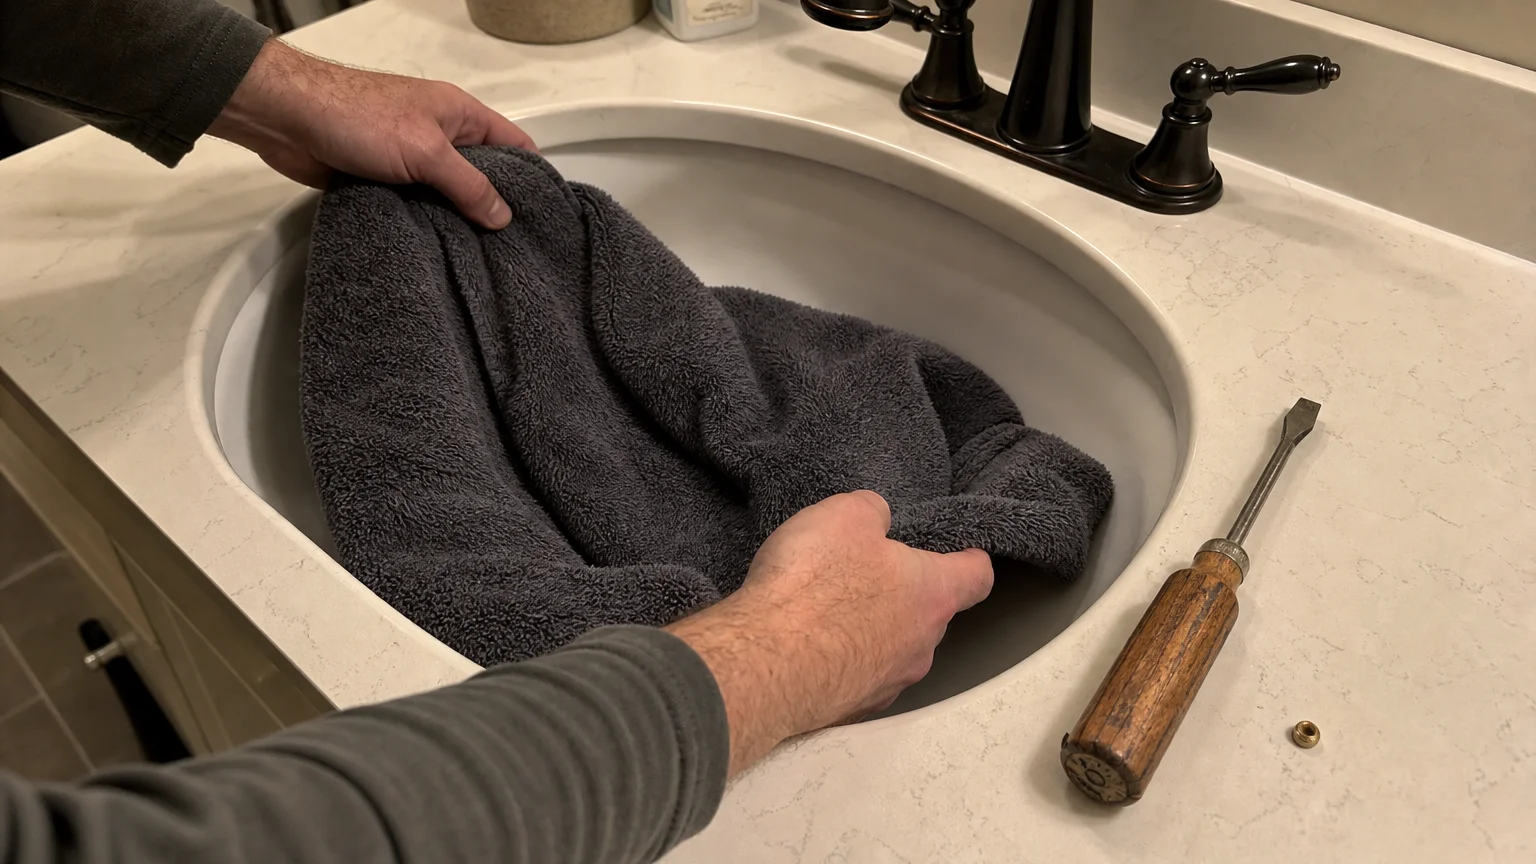
Safety dictates your next moves. Always locate the local shut-off valves beneath your sink and toilet, turning them clockwise until fully closed to stop the water supply. If your valves appear corroded or refuse to turn, you must shut off the main water supply to the house. Before unscrewing a single small component, drape a thick towel over your sink and shower drains. This simple physical barrier saves you the absolute misery of retrieving a dropped set screw from the depths of a dark plumbing trap. Carefully remove your old hardware, scraping away any residual caulk or paint ridges left behind, and patch any unwanted holes with a high-quality spackling compound before moving to the installation phase.
Phase Two: Executing the Seven High-Impact Updates
Update One: Vanity Knobs and Drawer Pulls
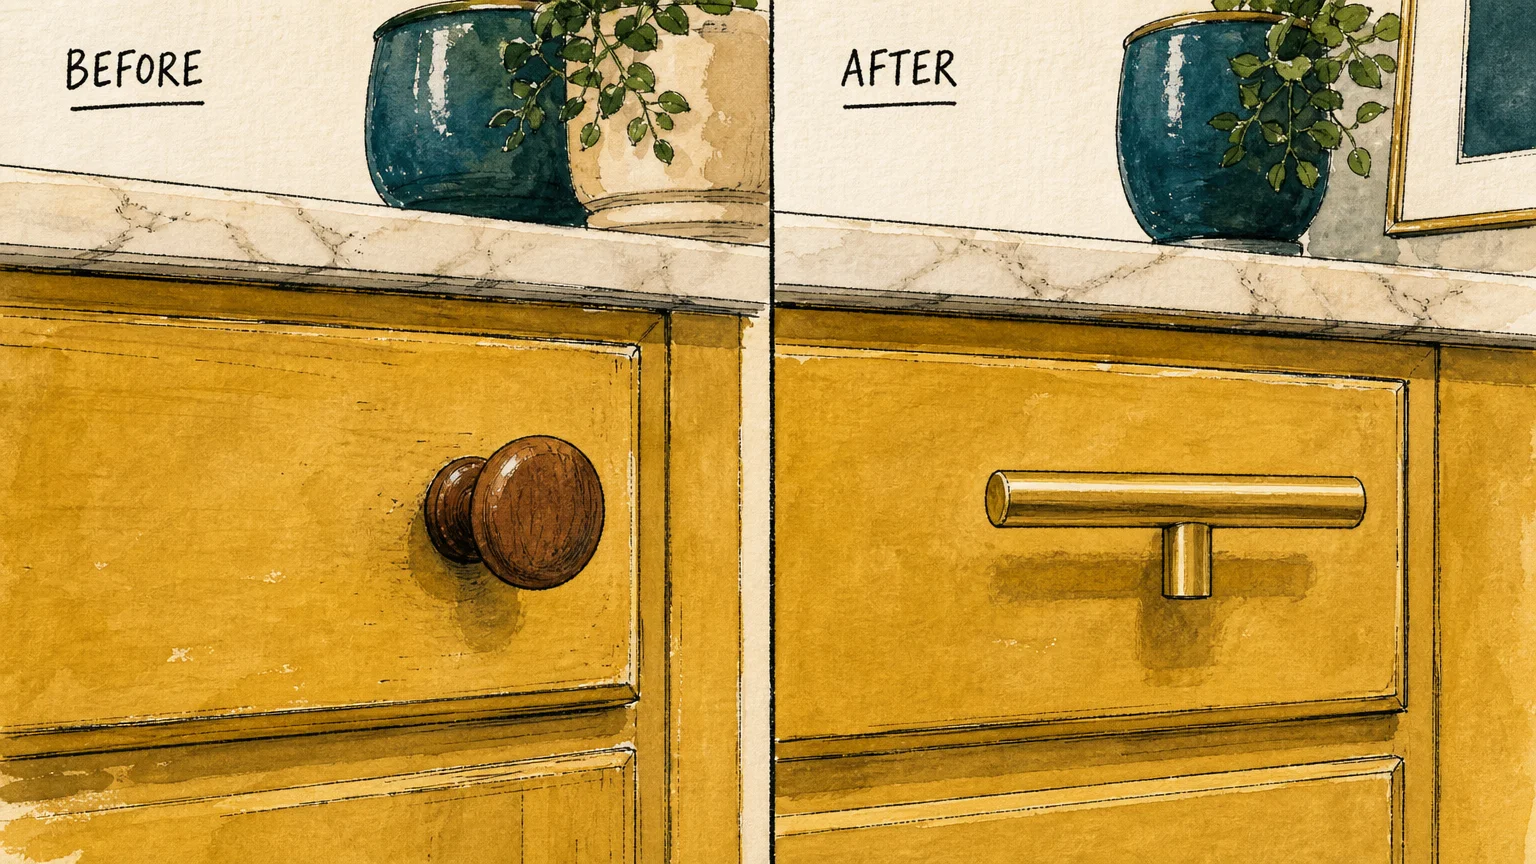
Replacing cabinet pulls provides the highest visual return for your manual labor. Builder-grade round wooden knobs often make a vanity look dated and heavy. Upgrading to sleek bar pulls or geometric knobs immediately modernizes the cabinetry. When shopping for replacements, pay strict attention to the center-to-center measurement; this dictates the distance between the two screw holes on your existing drawer fronts. If you purchase hardware with a matching measurement, installation requires nothing more than a screwdriver and five minutes of your time.
If you choose to switch from single-hole knobs to double-hole pulls, you must drill new holes. Create a reusable template out of a sturdy piece of cardboard to ensure perfect alignment across all your drawers. Measure twice, mark your drill spots lightly with a pencil, and use a standard wood drill bit to create the new openings. Secure the new pulls tightly from the back, ensuring the hardware sits completely flush against the face of the wood.
Update Two: The Main Faucet
The vanity faucet acts as the crown jewel of your bathroom design. Exploring modern bathroom design and hardware trends reveals a strong shift toward high-arc spouts and widespread handles, which create an immediate sense of luxury. Before purchasing a new faucet, look under your sink to determine your current configuration. You will likely find a single-hole, a four-inch centerset, or an eight-inch widespread layout. Purchasing a faucet that matches your existing sink deck holes eliminates the need to replace the entire vanity top.
To install the new fixture, disconnect the flexible water supply lines using your adjustable wrench. Keep a small bucket handy to catch the residual water trapped in the lines. Remove the mounting nuts securing the old faucet to the sink deck—a basin wrench proves invaluable here if your space feels cramped. Clean the surface thoroughly, drop the new faucet into the holes, and secure the mounting hardware from below. Reconnect the supply lines, hand-tightening them before giving them one final quarter-turn with your wrench to prevent accidental overtightening and stripped threads.
Update Three: Showerheads and Tub Controls
A crusty, low-pressure showerhead ruins both the aesthetic and the functional experience of your bathroom. Modern upgrades deliver spa-like water pressure while adhering to contemporary water-efficient plumbing fixtures standards, saving you money on your monthly utility bills. Opting for a large rain showerhead or a versatile dual-head system dramatically alters the room’s atmosphere.
Unscrew the old showerhead by gripping the connector nut with a wrench. If mineral buildup makes removal difficult, wrap a plastic bag filled with white vinegar around the fixture, secure it with a rubber band, and let it soak for an hour to dissolve the calcium. Once removed, clean the shower arm threads thoroughly. Wrap standard plumber’s Teflon tape clockwise around the threads three times; wrapping clockwise ensures the tape tightens rather than unravels when you screw on the new head. Thread the new fixture on by hand, finishing with a wrench only if necessary to stop a drip.
Update Four: Towel Bars and Robe Hooks
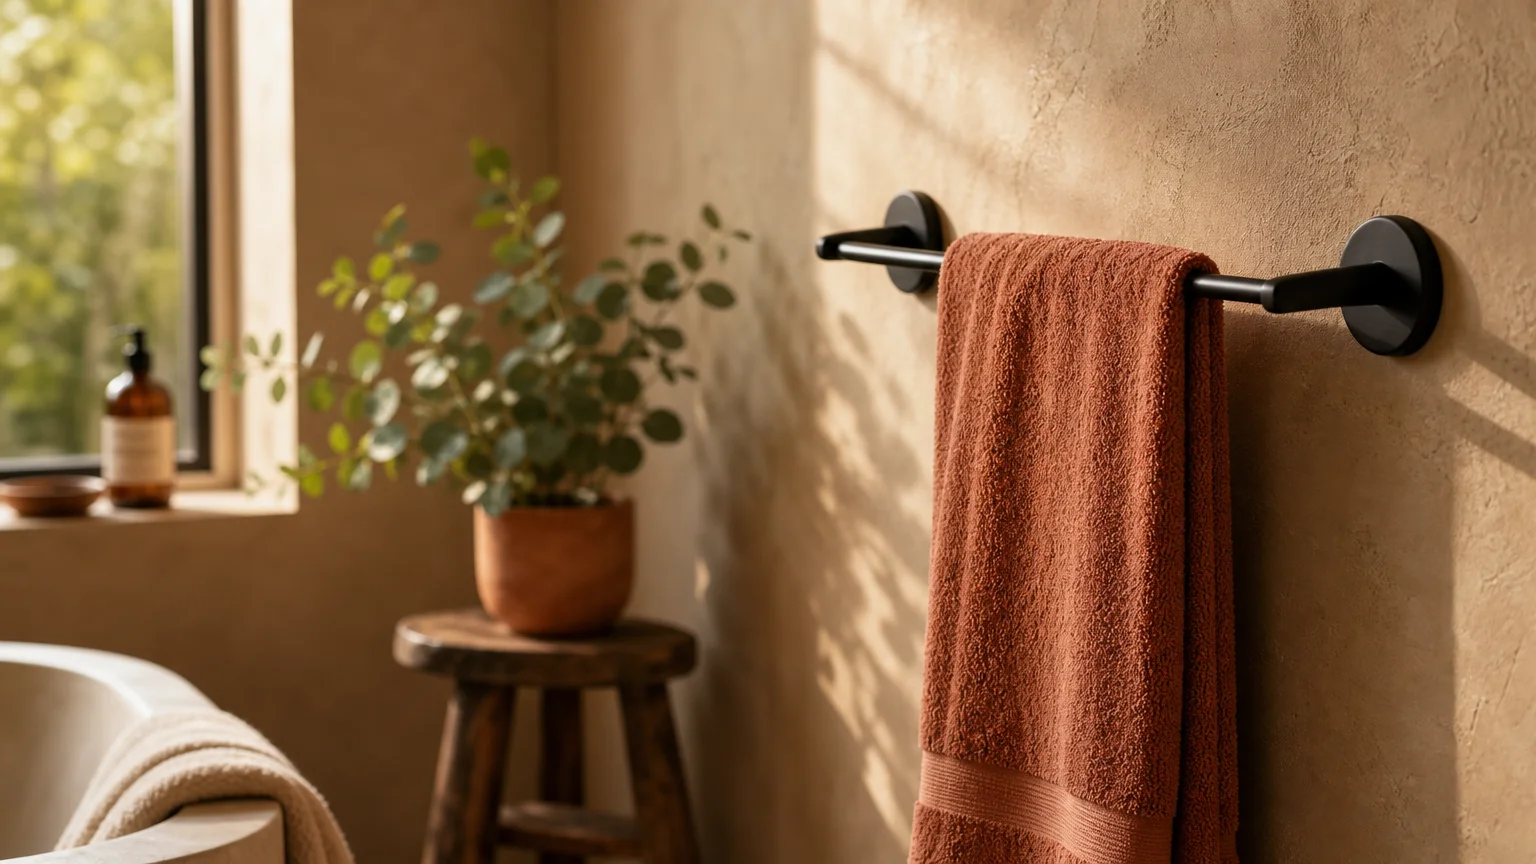
Do not underestimate the visual clutter caused by drooping, mismatched towel bars. Upgrading your wall accessories to match your new vanity hardware creates a cohesive, highly intentional look. Robe hooks currently dominate contemporary design, as they take up less wall real estate and effortlessly hold heavy, damp towels without the careful folding required by traditional bars.
Optimal placement dictates hanging towel bars roughly forty-eight inches from the floor, while robe hooks can sit slightly higher at sixty inches. Always attempt to anchor these heavy-load items directly into wooden wall studs. If stud placement does not align with your design vision, abandon the cheap plastic anchors included in the packaging; instead, invest in heavy-duty toggle bolts. Toggle bolts deploy metal wings behind the drywall, guaranteeing your new towel ring will never rip out of the wall under the weight of a wet bath sheet.
Update Five: The Toilet Flush Lever
The toilet flush lever remains the most frequently overlooked detail in a bathroom makeover. Leaving a cheap, white plastic lever attached to your tank breaks the visual continuity of an otherwise perfectly curated room. Swapping this piece for a solid metal lever matching your faucet finish takes less than three minutes but provides a surprisingly satisfying tactile upgrade.
Open the toilet tank and unhook the flapper chain from the lever arm. You must remember one crucial quirk of plumbing hardware: the nut securing the lever to the tank features a reverse thread. You must turn the nut clockwise to loosen it. Pull the old arm out, slide the new metal arm through the square hole, and secure the new reverse-threaded nut by turning it counter-clockwise. Reattach the flapper chain, leaving a tiny bit of slack to ensure a proper seal when closed.
Update Six: Lighting Fixtures and Sconces
Bad lighting casts harsh shadows and distorts colors, diminishing the impact of your other upgrades. Replacing an outdated, rusted vanity strip light with elegant modern sconces or a sleek linear LED bar completely changes the room’s ambiance. Before touching any wires, navigate to your main electrical panel and completely shut off the breaker supplying power to the bathroom. Test the light switch to verify the power is off, and double-check the wires with a non-contact voltage tester once you remove the fixture canopy.
Disconnect the old wires by untwisting the plastic wire nuts. Installation simply requires matching the colors: connect the black house wire to the black fixture wire, the white wire to the white wire, and the bare copper grounding wire to the green grounding screw on the mounting bracket. Secure the new canopy to the wall, install appropriately rated light bulbs, and restore the power at the breaker box. Aim for bulbs in the 3000K color temperature range; this provides a bright, flattering light that feels neither too sterile nor excessively yellow.
Update Seven: Cabinet Hinges
While cabinet hinges primarily serve a functional purpose, rusty or broken hardware betrays the age of your vanity. If your hinges sit exposed on the outside of the cabinet frame, you absolutely must upgrade them to match the finish of your new drawer pulls. Hidden European-style hinges offer a different opportunity: the chance to upgrade to soft-close mechanisms.
Soft-close hinges prevent wooden doors from slamming shut, elevating the acoustic experience of your bathroom to match the visual upgrades. Remove the doors by unscrewing the hinges from the cabinet frame first, then detach them from the doors while resting them flat on the floor. Install the new hardware, re-hang the doors, and use the built-in adjustment screws on the hinge body. Turning these screws slightly moves the door left, right, up, or down, allowing you to achieve perfectly parallel gaps between your vanity doors.
Phase Three: Finishing Touches and Styling
With the mechanical installations complete, your focus shifts to styling and visual cohesion. You do not need to restrict yourself to a single, monotonous finish across every surface. Mastering the art of blending different metallic finishes adds deep, custom character to the room. A reliable formula involves pairing a dominant matte black finish on your faucet and showerhead with warm, brushed brass accents on your vanity lighting and drawer pulls.
Pay attention to texture alongside color. Knurled drawer pulls—featuring a diamond-patterned grip—introduce an industrial, highly tactile element that contrasts beautifully against smooth porcelain sinks. Pair these hard metallic elements with soft, organic textures like plush cotton towels, woven storage baskets, and perhaps a humidity-loving houseplant on the vanity counter. These styling choices soften the rigid geometry of the hardware, resulting in a balanced, professionally designed aesthetic.
Troubleshooting and Long-Term Maintenance
Home improvement projects rarely execute flawlessly without at least one minor obstacle. The most common hurdle involves encountering stripped screw heads on old hardware. If your screwdriver spins uselessly, place a wide rubber band flat over the stripped screw head and press your screwdriver firmly into the rubber. The added friction usually provides enough grip to extract the stubborn fastener. For stubborn leaks around your newly installed showerhead or faucet connections, turn off the water, unscrew the fitting, add two more wraps of Teflon tape, and firmly re-seat the connection.
Maintaining the brilliance of your new hardware requires a gentle touch. Harsh chemical bathroom cleaners, bleach, and abrasive scrubbing pads will quickly destroy the protective factory coating on metallic finishes. For routine cleaning, stick to a solution of warm water and mild dish soap applied with a microfiber cloth. If you installed living finishes, such as unlacquered brass, embrace the natural patina that develops over time; the darkening and spotting represent a natural aging process that adds authentic charm rather than a defect requiring intense polishing. Being mindful of residential water conservation strategies also helps; swiftly fixing any minor faucet drips prevents hard water mineral etching on your new drain covers.
Frequently Asked Questions
Can I easily change a widespread faucet to a centerset configuration?
Transitioning from a widespread faucet (where the handles and spout sit in three separate, widely spaced holes) to a compact centerset faucet presents a significant challenge. The new centerset fixture will not cover the outer holes left behind in the countertop. While you can purchase metallic deck plates to mask the empty holes, this often looks like a patched mistake rather than an intentional design. Your best strategy remains purchasing a new faucet that matches your existing hole configuration perfectly.
What is the most accurate way to measure drawer pulls?
You must measure drawer pulls from the center of the first screw hole to the center of the second screw hole—not end to end. Remove the existing handle from the drawer and measure the distance between the actual holes drilled into the wood. Standard measurements usually fall at three inches, three-and-three-quarter inches, or four inches. Taking a photo of your tape measure held against the drawer holes before heading to the hardware store prevents frustrating return trips.
Are expensive luxury hardware brands actually worth the premium price?
The price difference typically reflects the underlying base material. Premium brands construct their hardware from solid brass, which feels heavy in the hand, resists deep corrosion, and boasts incredibly durable outer plating. Budget brands rely on zinc alloys, which feel lighter and may eventually pit or flake if exposed to heavy moisture. If you are upgrading a heavily used primary bathroom, investing in solid brass pays off over a decade. For a lightly used guest bathroom, high-quality zinc alloy fixtures perform wonderfully and save your budget.
How can renters effectively upgrade their bathroom hardware?
Renters hold a surprisingly large amount of freedom regarding hardware, provided they reverse the changes before their lease expires. Focus exclusively on non-destructive updates: drawer pulls, the toilet lever, the showerhead, and towel rings screwed into existing wall anchors. Place all the original, landlord-provided hardware into a labeled zip-top bag and store it under the vanity sink. When you prepare to move out, simply spend an hour swapping the basic pieces back in, leaving the bathroom exactly as you found it.
Your Next Step Toward a Better Bathroom
Taking control of your home’s aesthetic does not always demand tearing down drywall or hiring expensive contractors. Armed with basic hand tools and a strategic vision, you possess the capability to strip away years of visual fatigue in just a few hours. Start small if you feel hesitant; swap out the vanity pulls tonight, and let that immediate success fuel your confidence to tackle the faucet and showerhead this weekend. Every turned screw and polished finish pushes your space further from builder-grade boring and closer to the customized sanctuary you truly deserve.