Transforming an overlooked corner into a dedicated reading retreat gives you a quiet escape without sacrificing valuable square footage. You can build a custom DIY book nook in a small space over a single weekend using basic tools, affordable materials, and clever design strategies. Whether you rent a compact apartment or own a home with awkward alcoves, these ten approachable projects maximize vertical space and introduce layered comfort. A tight footprint demands smart planning, so selecting the right lighting, textiles, and shelving defines the area’s success. With clear blueprints and practical material choices, you will turn dead space into your favorite destination for getting lost in a great story.
Planning Your Reading Corner
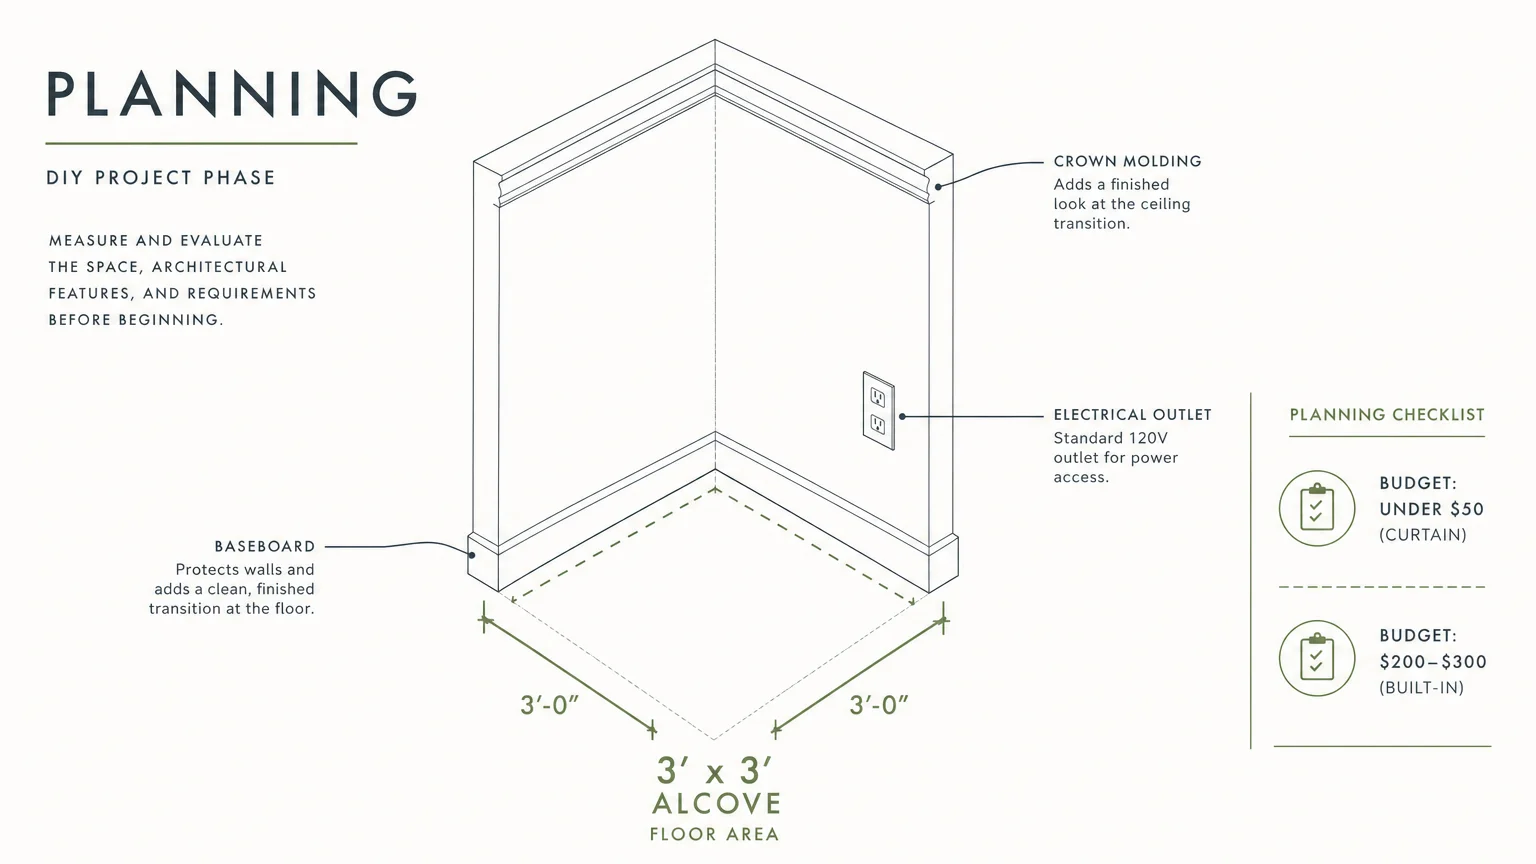
Before buying lumber or ordering fabric, you need a realistic assessment of your available space. A functional reading corner requires surprisingly little room; a three-by-three-foot alcove or an empty space at the end of a hallway provides plenty of real estate for a comfortable seat and book storage. Grab a tape measure and document the exact width, depth, and height of your chosen location. Pay special attention to existing baseboards, crown molding, and electrical outlets, as these elements dictate where you can anchor furniture and plug in lighting.
Next, determine your budget and timeline so you can select the right project. A simple tension rod curtain hideaway costs under fifty dollars and takes an afternoon to assemble. In contrast, building a custom under-stairway sanctuary with built-in wooden shelving might require a budget of two hundred to three hundred dollars and a full weekend of labor. Evaluate your DIY skill level honestly. If you have never used a circular saw, lean toward projects utilizing repurposed furniture or pre-cut lumber from your local hardware store. Establishing these boundaries early prevents mid-project frustration and keeps your renovation on track.
Phase One: Preparing the Space and Setting the Foundation
Success in any DIY home project starts with thorough preparation. Clear your chosen corner completely, removing old furniture, wall art, and window treatments. Inspect the drywall for damage. Fill any old nail holes or dents with spackling paste; once the paste dries, sand it smooth with fine-grit sandpaper. Wipe the walls down with a damp cloth to remove dust and debris. If you plan to paint the space to define it from the rest of the room, apply a high-quality primer followed by your chosen interior paint. Creating a unified color palette visually separates your nook from the surrounding room, making it feel like a distinct architectural feature.
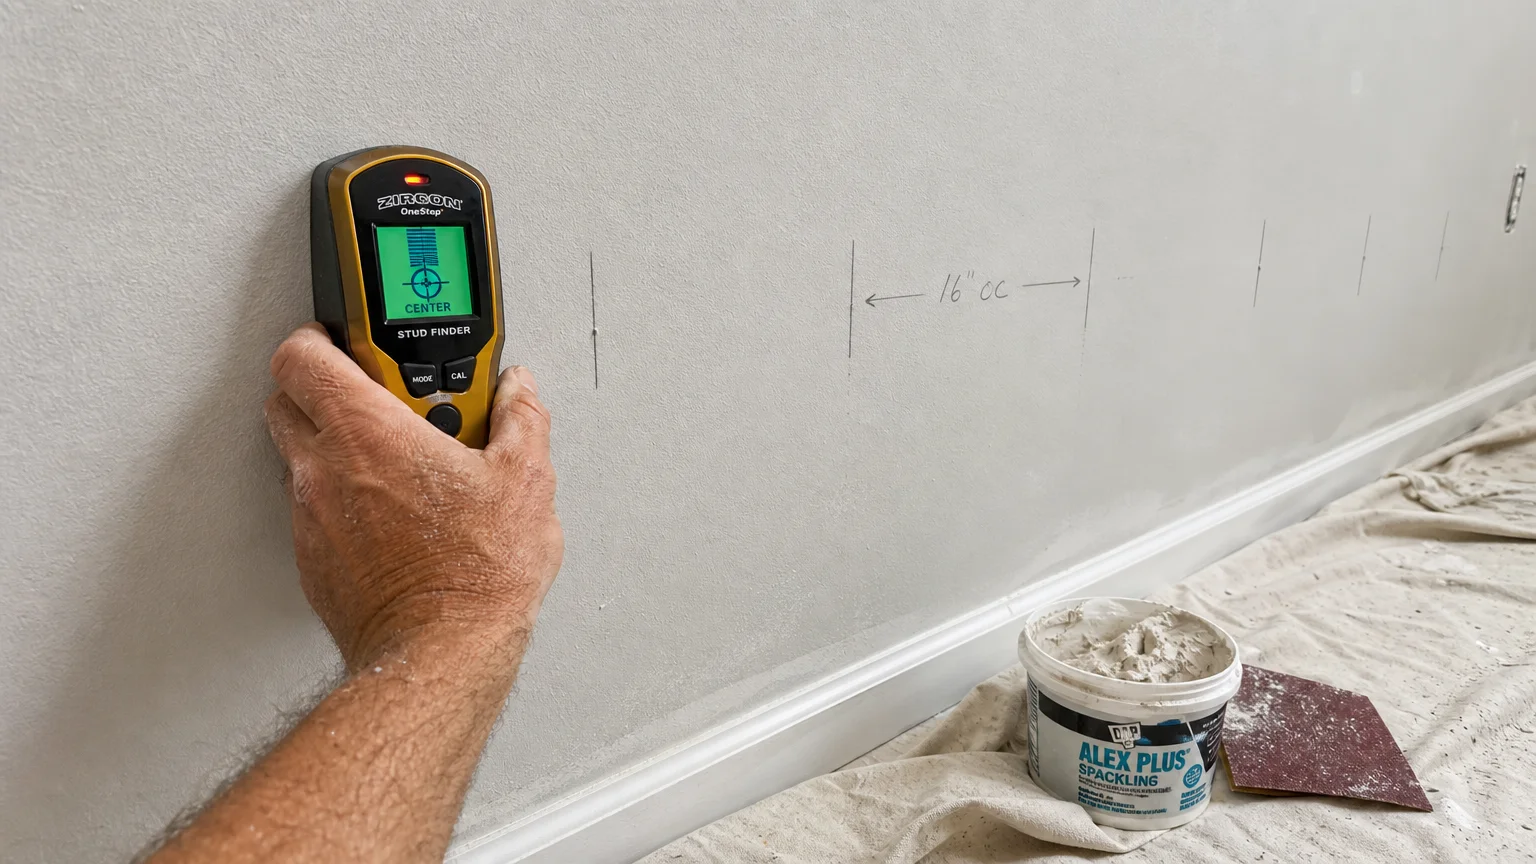
If your design requires wall-mounted shelving or suspended seating, you must locate the wall studs or ceiling joists. Use a reliable electronic stud finder to mark the edges and center of each wooden support. Standard residential framing places studs sixteen inches apart on center. Marking these locations ensures your heavy books and seating safely anchor into solid wood rather than brittle drywall. Consulting structural safety guides from established building resources like This Old House prevents costly structural damage and guarantees a secure installation.
Phase Two: 10 DIY Projects for Your Small Space Book Nook
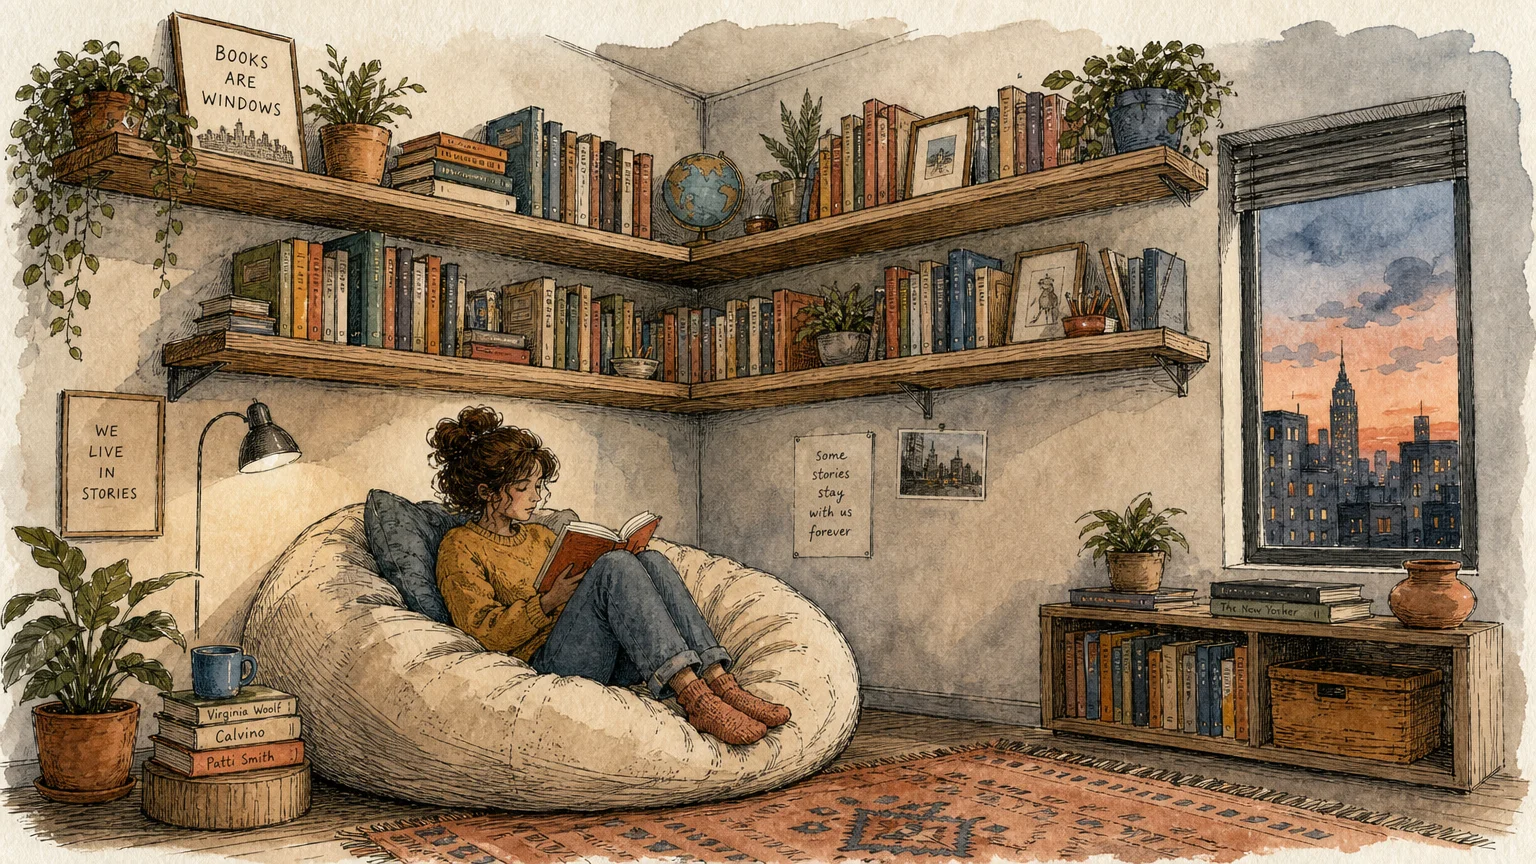
1. The Floating Corner Library
Corners naturally create a sense of enclosure, making them ideal for reading zones. Install heavy-duty floating shelves directly into the corner studs, creating an L-shaped library that wraps around the walls. You can purchase pre-made floating shelves or build your own using stained pine boards and hidden shelf brackets. Below the shelving, place an oversized, structured bean bag chair or a low-profile armchair. This approach leaves the floor plan open while surrounding you with your favorite titles.
2. Repurposed Closet Reading Cave
Transform an underutilized hall closet into a hidden retreat—a concept often referred to as a “cloffice” when used for a desk, but equally effective for a library. Remove the closet doors and uninstall the existing clothing rod. Paint the interior a moody, dark color like navy or forest green to create depth. Build a simple wooden bench spanning the width of the closet using two-by-fours and plywood. Top the bench with a custom-cut piece of three-inch, high-density upholstery foam wrapped in durable linen. Install wall-mounted shelves above the bench to hold your books.
3. Under-Stairway Story Sanctuary
The awkward, sloping space beneath a staircase frequently collects clutter. Reclaim this dead zone by building a custom nook. Because angles under stairs vary wildly, take precise measurements before cutting any materials. Install custom-cut MDF shelving along the lowest part of the slope where seating is impossible. On the taller side, slide in a plush accent chair or construct a low floor platform. Add beadboard paneling to the back wall for texture and instant architectural charm.
4. The Bay Window Bench Build
Window seats offer the dual benefit of natural reading light and hidden storage. Measure the width of your window alcove to determine the dimensions of your bench frame. Construct a basic rectangular box frame using two-by-fours, securing the joints with wood screws and a power drill. To maximize utility, attach a piece of three-quarter-inch birch plywood to the top using heavy-duty cabinet hinges; this creates a flip-top lid for storing extra blankets and bulky hardcovers out of sight. Paint the base to match your trim for a seamless, built-in appearance.
5. Suspended Canopy Chair Retreat
For a whimsical, floating sensation, hang a macrame or rattan swing chair from the ceiling. You must anchor the mounting hardware directly into a ceiling joist—never rely on drywall anchors for human weight. Once secured with heavy-duty locking carabiners and eye screws, drape a lightweight canopy fabric from the same anchor point to encompass the chair. Add a narrow, tall freestanding bookcase nearby. This setup requires minimal floor space, making it perfect for cramped studio apartments.
6. Bookshelf Room Divider Nook
If you lack a natural alcove, create one using furniture. Position a tall, sturdy, open-backed bookshelf perpendicular to a wall to section off a corner of a larger living room or bedroom. Secure the bookshelf to the wall using metal L-brackets to prevent accidental tipping. Place a comfortable armchair, a small side table, and a plush rug on the enclosed side of the bookshelf. The open back allows light to filter through while giving you a profound sense of privacy.
7. Upcycled Pallet Floor Lounger
Wooden pallets provide a highly affordable base for a bohemian-style floor seating area. Source two clean, heat-treated wooden pallets—always look for the “HT” stamp to ensure they are free from toxic chemical treatments. Sand the wood heavily to remove splinters, then paint or stain them to match your decor. Stack the pallets and secure them together with wood screws. Top the structure with a thick, quilted floor mattress and scatter an assortment of textured throw pillows against the adjacent wall.
8. The Hallway End Cap Nook
The dead space at the end of a hallway offers massive potential. Standard books only require shelves eight to ten inches deep, meaning you can easily install wall-to-wall floating shelves down to waist height without disrupting traffic flow. Below the shelves, slide in a narrow, upholstered storage ottoman or a slender wooden bench. Install a plug-in wall sconce on the side wall to provide focused reading light without requiring a hardwired electrical box.
9. Tension Rod Curtain Hideaway
Renters need non-destructive options to create cozy environments. Purchase a commercial-grade tension rod and expand it across an existing room alcove or recessed window area. Hang heavy velvet or blackout curtains from the rod. The thick fabric dampens outside noise and creates a distinct physical barrier from the rest of the room. Place a plush floor pouf, a small rolling cart for your books, and a clip-on reading light inside the draped area for an instant, damage-free retreat.
10. The Twin Mattress Daybed Nook
If you have a slightly larger recess or a spare wall in a home office, use an inexpensive twin mattress as your seating foundation. Build a simple wooden platform base using structural pine framing, elevating the mattress roughly twelve inches off the ground. Cover the mattress with a fitted daybed cover or a tightly tucked linen sheet. Arrange large, firm bolster pillows along the back wall to convert the bed into a deep, luxurious sofa. Add shallow picture ledges above the bolsters to display your current reading rotation face-out.

Phase Three: Finishing, Styling, and Personalization
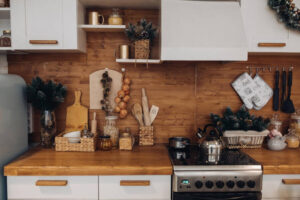
Once you finish the structural elements, styling dictates how inviting your book nook actually feels. Layering textures softens the hard edges of wooden shelves and wall angles. Introduce a high-pile area rug, a chunky knit throw blanket, and velvet accent pillows. Mixing materials—like rough wood, soft cotton, and sleek metal—gives the small space a curated, high-end aesthetic.
Lighting remains the most critical functional element for reading. Relying solely on overhead room lights causes harsh shadows and eye strain. Incorporate dedicated task lighting through plug-in wall sconces, articulating floor lamps, or clamp-on reading lights. According to the Department of Energy, residential LEDs use at least 75 percent less energy than incandescent lighting and emit very little heat, making them safe for tight, enclosed spaces. Choose LED bulbs with a warm color temperature—around 2700 Kelvin—to produce a relaxing, golden glow.
Troubleshooting and Nook Upkeep
Small spaces experience heavy physical wear simply because you constantly brush against the walls and furniture. Use washable or wipeable fabrics for your seating cushions, especially if you share your home with pets or children. If you notice your bookshelves beginning to sag in the middle, you likely have too much weight distributed across an unsupported span. Fix this by adding supplementary metal brackets to the center of the shelves or rearranging your library, keeping heavy art books near the support brackets—a technique frequently highlighted in professional interior design guidelines.
Dust accumulates quickly on books and textiles in confined areas. Maintaining good indoor air quality through regular dusting and vacuuming, as advised by university extension experts, ensures your reading retreat remains healthy and fresh. Run a handheld vacuum over your seating weekly and keep a microfiber cloth nearby to wipe down the shelf edges.
Frequently Asked Questions
How do I secure heavy books on drywall without studs?
While securing shelves to wooden studs remains the safest method, sometimes studs do not align with your design. In these cases, use heavy-duty toggle bolts rather than standard plastic drywall anchors. A plastic anchor might hold up to thirty pounds, but a high-quality toggle bolt anchors behind the drywall and can support up to one hundred pounds per pair. Always check the weight rating on the packaging, and factor in the weight of the wooden shelf itself alongside your hardcover books.
What is the best lighting for a dark corner?
Dark corners benefit most from layered lighting. Start with an ambient light source, such as a plug-in pendant light draped from a ceiling hook or a string of warm fairy lights nestled behind your books. Next, add a focused task light. An articulating wall sconce allows you to pull the light directly over your shoulder while reading and push it flat against the wall when not in use. Opt for bulbs between 400 and 800 lumens to prevent harsh glare while providing enough illumination for small print.
Can I create a cozy reading space if I am renting?
Absolutely. Renters should focus on freestanding furniture and tension-based installations. Utilize the tension rod curtain method to carve out space without using a drill. Instead of floating shelves, use a sturdy, tall bookcase secured to the wall with a small anti-tip strap—which leaves only a tiny, easily patched pinhole upon move-out. Rely on plug-in sconces instead of hardwired fixtures, and use large floor cushions layered over your landlord’s existing flooring to personalize the aesthetic.
How much does a DIY book nook typically cost?
The total cost depends heavily on your chosen materials and existing tools. A simple floor cushion corner with a thrifted side table and string lights might cost under fifty dollars. Building a custom window bench with cabinet-grade plywood, new hinges, and custom-cut upholstery foam typically ranges from two hundred to four hundred dollars. To save money, repurpose old furniture, shop for hardware at salvage yards, and purchase mis-tinted paint from the hardware store for the interior of a cloffice.
Start Building Your Reading Retreat Today
Carving out a dedicated reading nook proves that you do not need massive square footage to live beautifully. By combining clever storage solutions with plush, intentional styling, you can transform the most awkward alcove into the best seat in the house. Gather your measurements, sketch out your favorite design from this list, and head to the hardware store. You are only a few hours of work away from pouring a hot cup of tea, curling up on a custom-built bench, and diving into your next great adventure.