Is your budget tight? What do you say about DIY Christmas ornaments?
We can’t deny that there is some sort of magic when it comes to DIY Christmas ornaments. Especially if they’re approved by the one and only Martha Stewart! So what do you say if in this article I show you some DIY inspo and all the instructions you need to create your magical decorations for both the Christmas tree and your household?
I hope you’re as excited as I am to do this, so take a seat, make yourself comfortable, and gather all the tools you need to start crafting. You don’t need a degree in crafting to make these do-it-yourself projects; they’re as easy as tying a bow on a Christmas present. Just a little bit of patience and a ton of glitter. Ready to bring the winter wonderland into your home? Let’s start!
Plaid ball ornaments made of tartan
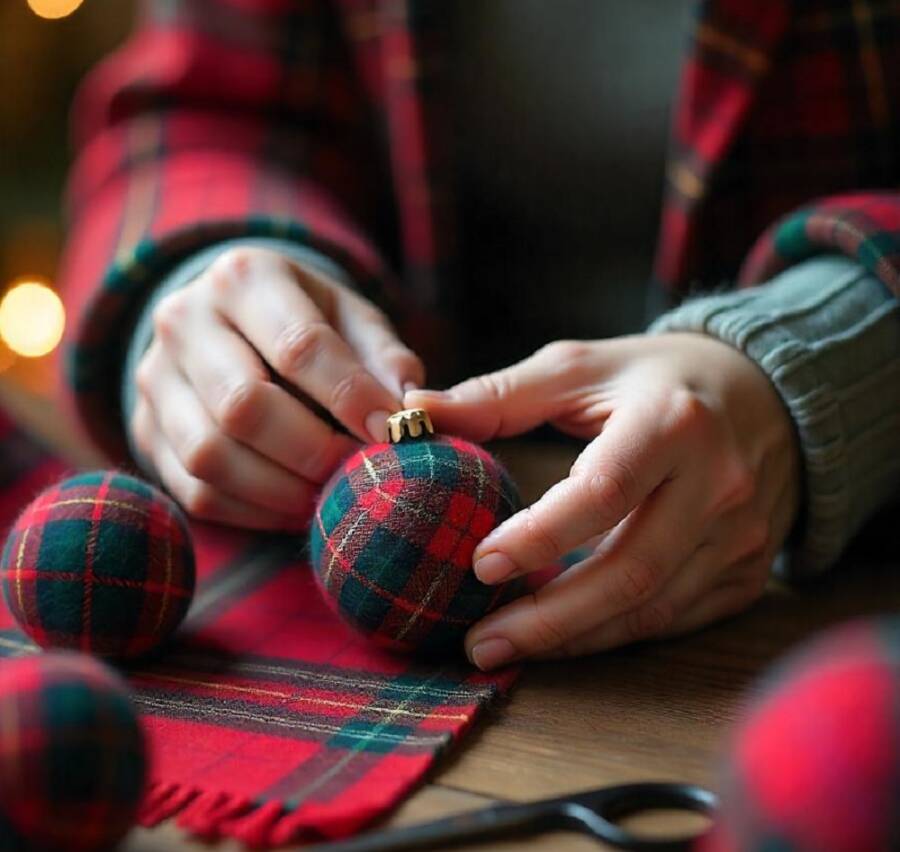
When it comes to DIY Christmas ornaments that are also super easy to do and don’t require much time as well, tartan ones are among Martha Stewart’s favorites. The ornaments can be made easily by folding and cutting ribbons into banners and finishing them with kilt pins or by winding bias strips of plaid fabric around foam balls.
To make the plaid balls, all you need is a rotary cutter, a ruler, and 1/2-inch strips of tartan fabric. Attach the end of one strip to a ball with glue. When the strip runs out, glue the end and wrap the remaining strip around the ball.
Until the ball is completely covered, keep wrapping more strips in different directions; secure with glue. Cut an 8-inch length of ribbon, then knot it after folding it over. To secure the knot beneath the pin’s head, insert a bank pin into the ball. Voilà, the ornaments are ready!
To make pennant DIY Christmas ornaments, just cut a ribbon into 8-inch lengths. After, just fold each length in half. To make a pleat, pinch the sides in the fold to form a point, then iron. Make a hole in each ribbon with a pin. It can be decorated with a safety pin if you’d like.
Salt dough ornaments
Oh, these are so cute, and they can be done with the help of kids too! All you need for these DIY Christmas ornaments is 2 cups of flour and 1 cup of salt. Mix them in 1 cup of warm (not hot!) water. Let it sit for 10 minutes on a floured chopping board.
After rolling it out to a thickness of 3/8 inch, freeze it for half an hour. Before cutting out animal shapes with cookie cutters, preheat the oven to 200 degrees Fahrenheit. Attach screw eyes to the shapes’ tops. After 30 minutes of freezing, bake for 4–6 hours. Allow them to cool.
Meanwhile, in a bottle, mix some glue and paint. Ask the kids what color they prefer for each animal. To add a touch of Christmas magic, sink them in a bit of glitter too. I recommend doing that while the paint is still wet; otherwise, it won’t stick. When you’re done painting, let them dry overnight. Then hang them on the Christmas tree!
Frosted glass ornaments
Another craft that’s super easy to do and you don’t need many materials for it except your old Christmas tree decorations and some shard glitter. All you need to do is divide each glass ornament into two or three sections with one or two strips of tape. Apply glue to one area, then, using a tray, scatter seed beads on it sparingly without covering it entirely.
Finally, scatter the glitter mixture on top. After removing the tape, give it two hours to dry.
Jingle bells on a ribbon
To add a festive touch to your front door, get a variety of tiny bells (such as silver, gold, and red ones) and string them onto two wire loops. Twist the loop ends together, form them into a cluster, and fasten them with a large bow. Use a piece of cord to hang the ornament from a doorknob. You’re missing the bells? Get your box of 300 pieces for $5.49. Trust me, once you start crafting 300 won’t be enough!
Silver/ gold seed-pod ornaments
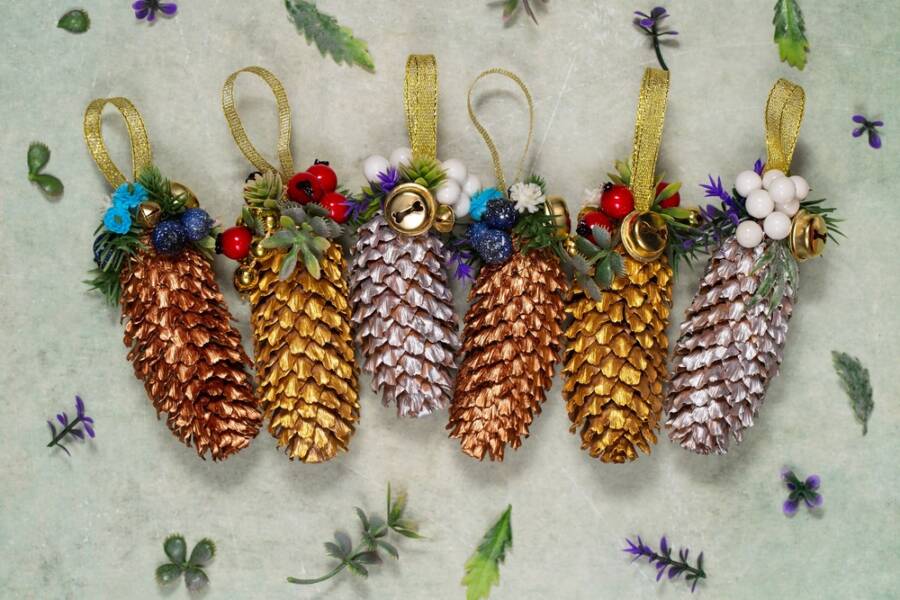
Another super-duper adorable Christmas ornament is the pinecone. But how can you give them a touch of magic, hang them around the house, or simply place them on the dinner table near the cutlery? Easy! I’ll tell you.
Apply shimmering metallic paint (gold or silver, whatever you prefer) to various natural beauties, such as sponge mushrooms, acorns, poppy pods, and pine cones, to create your forest of simple yet striking ornaments. For $7.99, you can purchase glossy acrylic paint in a variety of colors from Amazon. The tube has 4.1 oz so it will last a while.
Small Christmas wreaths
Don’t throw away that fallen foliage from your Christmas tree! Make some tiny wreaths instead. To create a festive look, simply glue sprigs of juniper, cedar, and spruce around an embroidery hoop and hang the wreaths with red ribbon.
Paper snowflakes
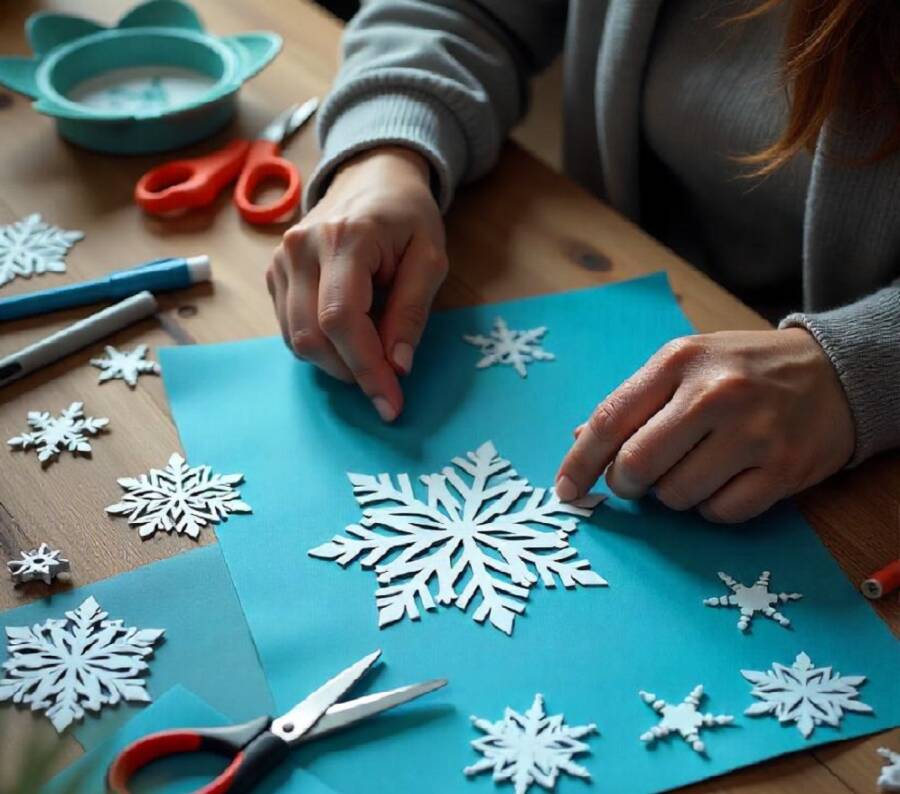
Do you remember the time when we were kids and we were taught to make tiny cutesy paper ornaments? It’s time to recreate those memories! Among the easiest DIY Christmas ornaments are the timeless paper snowflakes. All you need is a square piece of paper, sharp scissors, and a couple of templates you can find on Google to make a snowflake flurry that will transform your house into a temporary winter paradise.
Wall-mounted Christmas tree
If one tall Christmas tree isn’t enough for your home to look and feel festive, you can make one from fallen foliage and mount it on the wall. Simply use hooks to secure glossy garlands in different sizes to your wall until a “tree” forms. Like you would to a real tree, decorate it with lights, decorations, and other baubles.
Glittered reindeer
Do you have one or two reindeer figurines at home that need a change of look? Martha Stewart has a brilliant idea for them. All you have to do is glue a deer figurine, add glitter, and then spray it with fixative. For a cozy holiday scene, place the glittering animals on fake snow and some lit candles nearby. You can put it everywhere, including on the dinner table.
Quartz icicle ornament
With this imaginative twist on icicles, you can add some wintry vibe to your tree. To create these shimmering, dangling strands, all you have to do is group a couple of clear and light-pink quartz points that had been top-drilled on jewelry wire, looped each end, and fastened a metallic cord. Then just hang them in the Christmas tree!
Gum drop garland
Kids can easily participate in this Christmas decorating project, and together you can have a lot of fun. What do you have to do? First, gather some sugar-coated jelly. These are the best to work with. Attach a sewing needle to the end of a piece of string and thread on the candy, such as gum drops or any other candy that is easily punctured. For a festive look, you can showcase throughout your home, try alternating festive colors like red and green.
Related article: 8 Best Tips on How to Fix Your Christmas Lights.

