Transforming your kitchen layout eliminates frustrating bottlenecks and cuts your meal prep time in half. You deserve a workspace where grabbing the right pan, chopping vegetables, and moving between the stove and sink feels completely effortless rather than like an obstacle course. Whether you rent a compact apartment or own a spacious house, implementing smart kitchen designs transforms daily cooking from a chore into a seamless experience. The secret lies in arranging your appliances, storage, and counters to match your specific cooking habits and natural movements. By adopting these functional kitchen strategies, you can minimize unnecessary steps, reduce clutter, and build an environment that intuitively supports every meal you create.

Assessing Your Layout: Budget, Timeline, and Skill Level
Before ripping out your cabinets or purchasing new appliances, you must evaluate the reality of your home improvement project. Defining the precise scope of your functional kitchen upgrade prevents you from overspending and keeps your timeline grounded in reality. A full, down-to-the-studs kitchen renovation might demand a budget exceeding thirty thousand dollars and require weeks of professional contractor time; however, focusing purely on layout and functional design adjustments keeps costs incredibly manageable. If you decide to tackle this as a hands-on homeowner, you maintain complete control over the budget and the specific materials you choose.
Taking a practical, do-it-yourself approach to reorganizing your work zones, upgrading your cabinet hardware, and retrofitting internal storage solutions allows you to complete the project over two or three dedicated weekends. You can accomplish these high-impact tasks for under a thousand dollars. Assess your carpentry and plumbing skill level honestly before deciding to knock down structural walls or reroute major water lines. Changing a kitchen layout often involves shifting heavy appliances, leveling intricate cabinet boxes, and carefully measuring clearances. Start with realistic expectations, secure the right tools, and prepare yourself for a highly rewarding process that radically improves your daily routine.
6 Kitchen Designs That Make Cooking Easier
The core philosophy behind highly functional kitchens centers entirely on flow, accessibility, and logical placement. Instead of treating your kitchen as a random collection of cabinets, view it as an active workshop. Let us explore six specific design approaches that streamline your meal preparation, reduce physical strain, and maximize your available square footage.
1. The High-Efficiency Galley Layout
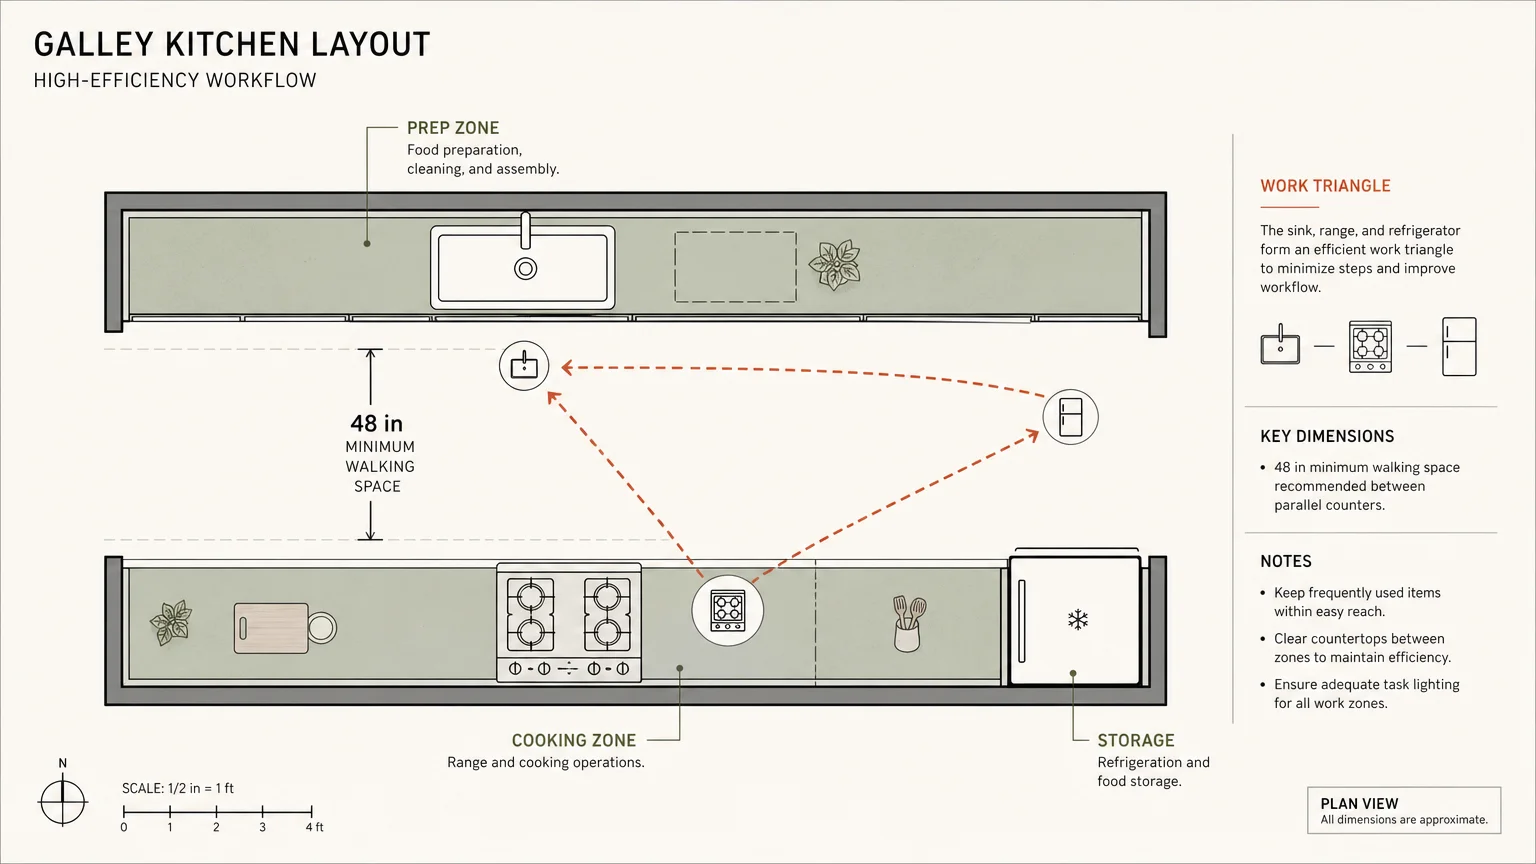
Originally modeled after the incredibly compact kitchens found on naval ships, the galley layout features two parallel runs of cabinets directly facing each other. This specific design creates the ultimate, high-efficiency workspace for a single cook. Because your primary sink, cooking stove, and main refrigerator sit just a few short steps apart, you completely eliminate wasted motion. You can effortlessly pivot from washing fresh produce on one side to immediately dropping those ingredients into a hot skillet on the opposite counter.
When planning a galley design in your own home, you must leave a minimum of forty-eight inches of walking space between the two facing counters to prevent uncomfortable traffic jams. If you have a larger family or frequently host gatherings, consider removing the upper cabinets on one side and opening that half of the galley directly to an adjacent dining area. This brilliant modification preserves your tight, efficient cooking zone while allowing family members and guests to interact with you safely out of your primary operational path.
2. The L-Shaped Kitchen with an Island Anchor
The highly popular L-shaped layout utilizes two adjacent, perpendicular walls to house your primary cooking appliances and heavy storage, naturally forming a wide-open void in the center of the room. By intentionally introducing a substantial central island into this open space, you create a distinct, physical barrier between the active working kitchen and the casual social areas of your home. This setup naturally directs foot traffic around your cooking space rather than directly through it.
You should absolutely designate your new island as your primary preparation zone. Installing a thick butcher block top or a highly durable quartz surface directly across from the stove allows you to spread out your cutting boards, chop massive amounts of vegetables, and transfer them efficiently. For further insights on spacing these large architectural elements correctly, you can review established spacing guidelines for residential kitchens to ensure your walkways remain consistently clear and comfortable for multiple people.
3. The U-Shaped Workspace for Maximum Storage
If the physical footprint of your home easily accommodates it, a U-shaped kitchen layout wraps around three adjoining walls to completely surround you with continuous countertops and abundant cabinetry. This specific layout excels for passionate home chefs who own an extensive collection of specialized cooking gadgets, large stand mixers, and oversized roasting pans that demand maximum storage capacity. You essentially step into a dedicated cooking cockpit where everything you could possibly need sits within arm’s reach.
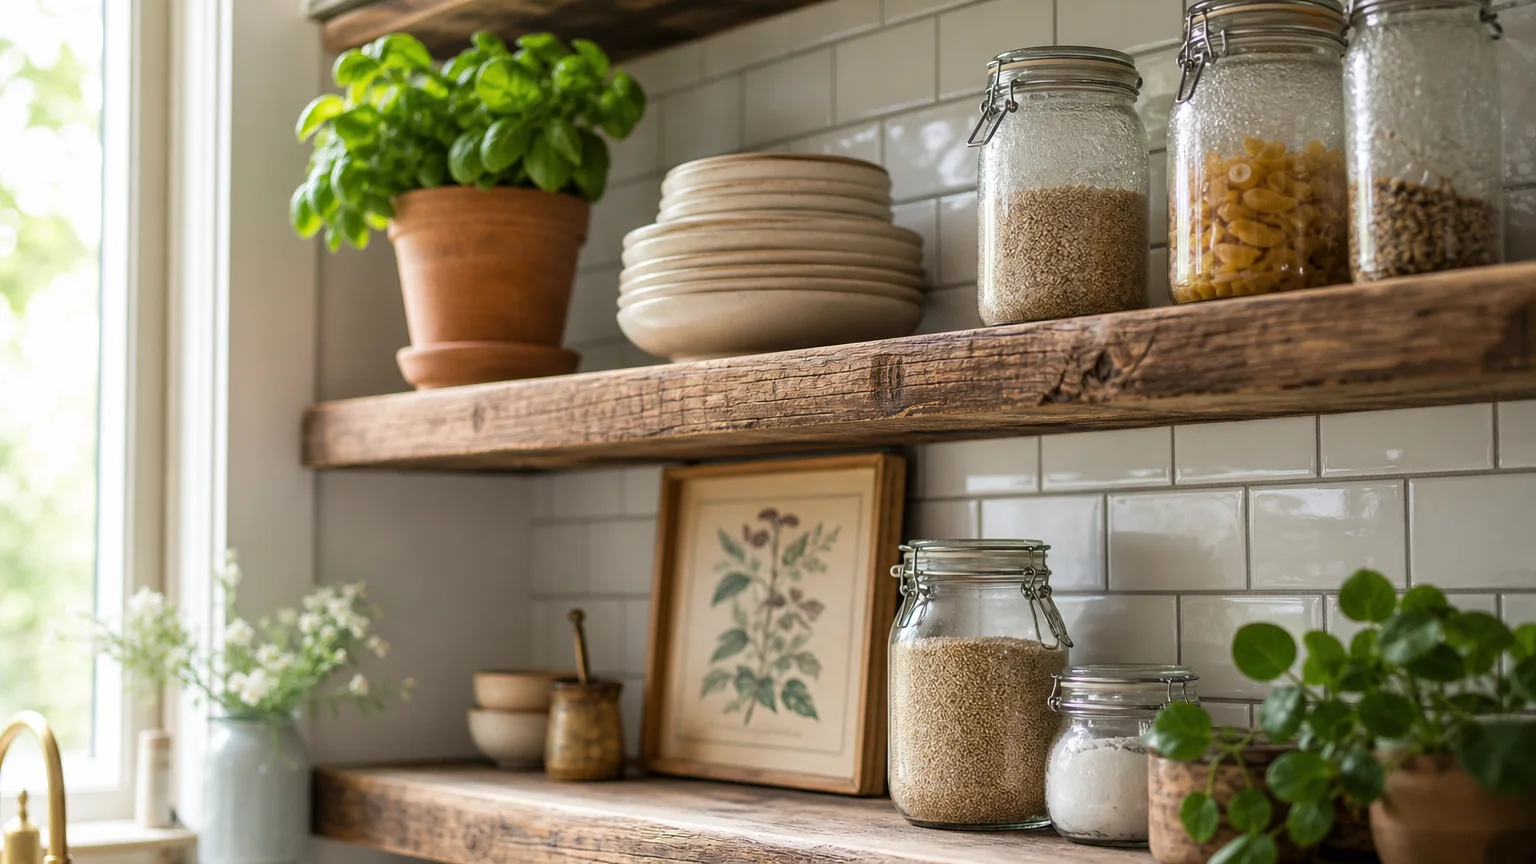
To prevent a dense U-shaped kitchen from feeling dark and claustrophobic, install minimalist open shelving on the upper sections of at least one wall instead of heavy, closed cabinet boxes. You must also strategically place your primary refrigerator at the absolute outer edge of the “U” formation. This deliberate placement ensures that your family members can quickly grab a snack or pour a cold beverage without physically crossing into your designated cooking territory and disrupting your workflow.
4. The Zone-Based Cooking and Prep Strategy
Moving far beyond the traditional kitchen work triangle, modern functional kitchens rely heavily on a highly specific zone-based design philosophy. This advanced method divides your overall space into distinct physical areas dedicated exclusively to food preparation, active cooking, baking, washing, and dry storage. Setting up distinct zones dictates that you store your tools and ingredients exactly where you actually intend to use them, rather than wherever they happen to fit.
Store your heavy wooden cutting boards, sharp chef knives, and large mixing bowls directly in the prep zone located near the primary sink. Keep your silicone spatulas, finishing oils, and everyday spices in the active cooking zone located immediately adjacent to the stove. This hyper-organized, logical approach drastically reduces the agonizing amount of time you spend pacing back and forth across the room to fetch a single forgotten ingredient or a misplaced serving utensil.
5. The Workstation Sink and Continuous Counter Approach
Frustrating interruptions in your countertop surface disrupt your preparation flow and severely limit your usable workspace. Maximizing your continuous, uninterrupted counter space—especially the critical area located directly between your sink and your stove—provides ample room to spread out multiple ingredients for complex recipes. Pairing this layout concept with a modern workstation sink completely revolutionizes how you physically interact with your kitchen environment.
Workstation sinks feature cleverly engineered internal ledges that support sliding, heavy-duty accessories like custom cutting boards, deep steel colanders, and rollout drying racks. By intentionally completing messy preparation tasks directly over the open sink basin, you effectively contain the moisture and keep your primary countertops absolutely spotless. Sweeping vegetable peelings and scraps right into the garbage disposal located beneath your sliding cutting board saves massive amounts of daily cleanup time.
6. The Ergonomic Lower-Drawer and Accessible Pantry Concept
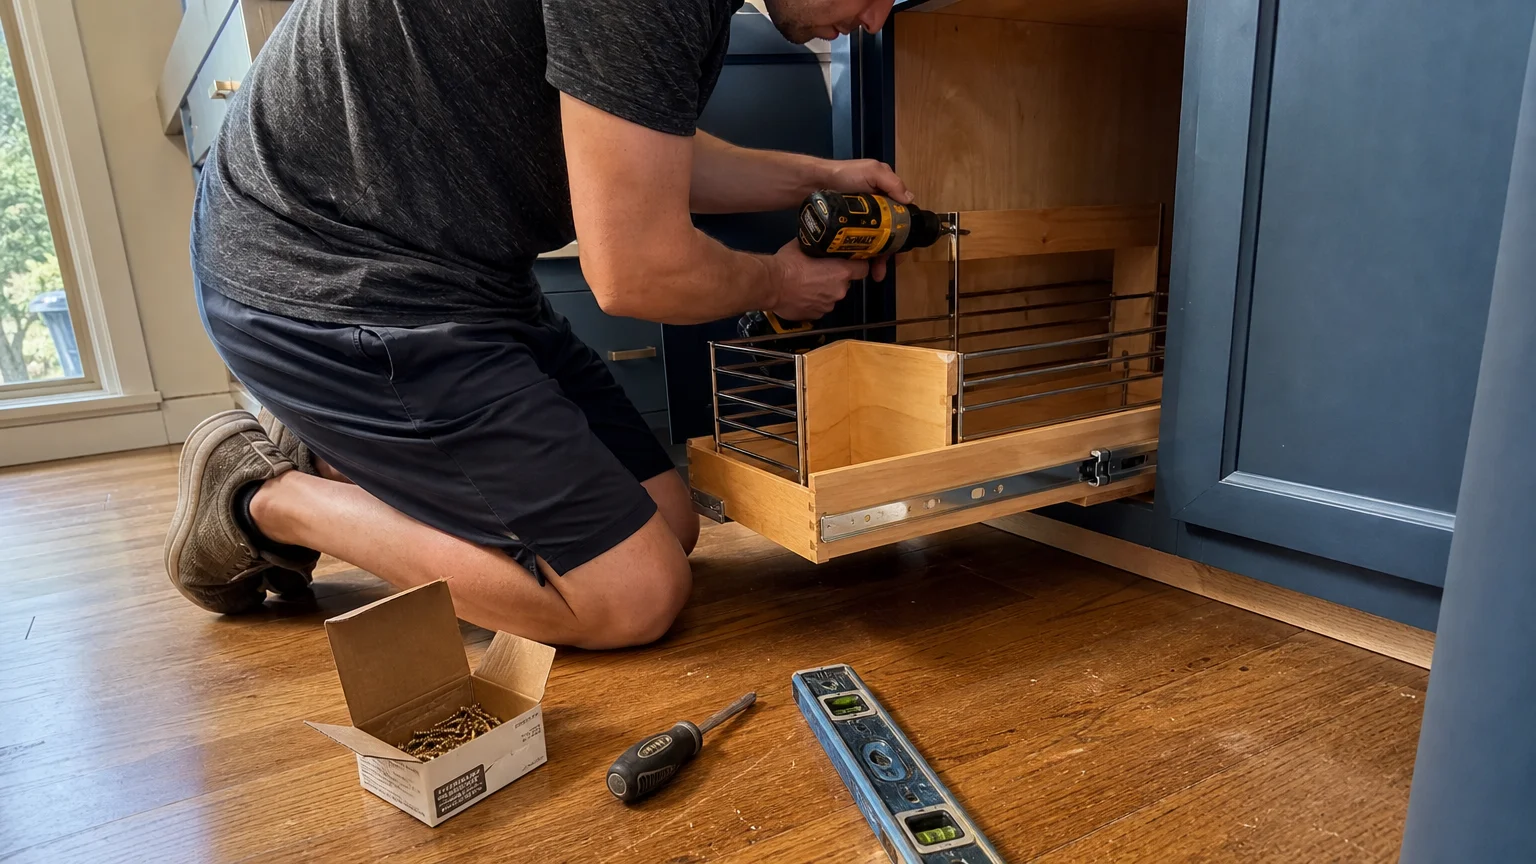
Traditional base cabinets featuring fixed, immovable wooden shelves force you to crouch down uncomfortably, reach blindly into dark corners, and shuffle heavy pots around simply to find one specific frying pan. Replacing these frustrating base cabinets with deep, heavy-duty sliding drawers introduces profound ergonomic benefits into your daily cooking routine. Deep drawers allow you to utilize every single inch of internal storage space effortlessly.
With this upgraded design, you simply pull the large drawer out to easily view your entire collection of heavy cast iron skillets and baking sheets from above. Apply this exact same accessibility principle directly to your pantry by installing sturdy pull-out sliding shelves or purchasing a dedicated, tall pantry pull-out unit. Eliminating the constant need to dig endlessly through deep, unlit pantry shelves saves your knees and makes gathering ingredients a remarkably smooth, frustration-free process.
Executing Your Kitchen Redesign: From Prep to Finish
Taking your current kitchen from its disorganized state to a highly functional, streamlined masterpiece requires a methodical, patient approach. Haphazardly tearing out cabinets leads to costly mistakes and extended periods without a working stove. Follow these three distinct project phases to ensure your major upgrade stays exactly on track, remains within budget, and ultimately yields professional-quality results.
Phase One: Preparation and Safe Teardown
Start your project by completely emptying every single kitchen cabinet and ruthlessly sorting your items to determine exactly how much functional storage you truly require. If your specific redesign involves physically removing old, outdated cabinets or lifting heavy stone countertops, immediately shut off the main water supply valves and completely disconnect the electrical power to your kitchen at the main breaker box before touching any fixtures. Wear heavy-duty leather work gloves, wrap-around safety glasses, and a proper respirator during demolition to protect your lungs and eyes from hazardous drywall dust and sharp tile debris. Map out your completely new layout directly on the subfloor using bright painter’s tape to accurately visualize the exact footprint of your updated workstations and appliances before you make any permanent structural changes.
Phase Two: Cabinet Execution and Installation
Begin your actual physical installation by establishing a perfectly level, continuous baseline horizontally across your walls, keeping in mind that almost all residential kitchen floors slope slightly over time. Install your lightweight upper cabinets first to completely avoid having to reach awkwardly over your newly installed base units, which prevents unnecessary back strain and potential damage to the lower boxes. Use heavy-duty, adjustable cabinet jacks or enlist a highly reliable helper to firmly hold the heavy boxes in place while you secure them directly into the solid wooden wall studs using specialized, washer-head cabinet screws. When you finally transition to installing your base cabinets, utilize small wooden shims to carefully correct any uneven floor spots, ensuring your expensive future countertops will ultimately rest on a completely flat, structurally sound foundation.
Phase Three: Finishing Details and Quality Checks
The final crucial phase involves permanently securing your chosen countertops, carefully hooking up the sink plumbing, and meticulously installing the decorative cabinet hardware. Take your time slowly aligning the new cabinet doors and precisely adjusting the metal hinges so every single piece opens smoothly and closes with exact precision. Apply a continuous, high-quality bead of clear silicone sealant around your sink basin and along the bottom edges of your tile backsplash to permanently prevent insidious water damage. For technical advice on positioning large, energy-consuming appliances safely within your new layout, thoroughly consult the detailed resources from the federal energy standards documentation, which can greatly help you maximize your appliance efficiency and dramatically extend the overall lifespan of your heavy kitchen equipment.
Styling and Personalizing Your Functional Space
Pursuing maximum functionality should never require you to sacrifice the visual appeal or warmth of your home. Once you establish a highly strategic layout that makes everyday cooking significantly easier, you must actively inject your unique personality into the space through deliberate color choices, rich textures, and thoughtful material selections. Layering different aesthetic finishes adds necessary visual depth and inviting warmth to the room, preventing your highly efficient new workspace from feeling overly sterile or resembling a cold commercial prep kitchen.
Consider pairing crisp, painted upper cabinets with richly stained, natural wood base cabinets to visually ground the room and add organic texture. Install solid, high-quality hardware that genuinely feels comfortable in your hands, such as wide, brushed brass pulls that you can easily grab and grip even when your hands are wet or lightly covered in baking flour. Incorporate bright, LED task lighting directly under your upper cabinets to beautifully illuminate your newly established prep zones while highlighting your backsplash. For further creative inspiration regarding striking material combinations, browse professional architectural features on kitchen styling to see exactly how seasoned experts balance rugged daily utility with absolutely stunning visual aesthetics.

Troubleshooting Pitfalls and Maintaining Your Kitchen
The single most common pitfall in residential kitchen design involves mistakenly spacing your primary work areas entirely too far apart. If you inadvertently place your refrigerator twelve feet away from your primary chopping counter, you will completely exhaust yourself simply fetching basic ingredients for a standard dinner. Try to keep the total walking distance between your main stove, your sink, and your refrigerator solidly under twenty-six feet to maintain an optimal, comfortable workflow. Additionally, absolutely ensure your dishwasher sits immediately adjacent to your main sink so you can quickly rinse and load dirty plates without dripping messy water completely across your freshly cleaned floor.
Maintaining the high efficiency of your brand-new layout requires strict daily discipline regarding countertop clutter. Because a genuinely functional kitchen design relies so heavily on clear, continuous counter space, you must fiercely resist the common urge to permanently store small appliances like heavy toasters and bulky blenders directly on your main prep surfaces. Stash them safely away in your accessible lower sliding drawers or your customized pantry unit. According to university extension guidelines on household organization, designating specific, permanent homes for every single kitchen item dramatically decreases the overall time you spend cleaning up after executing a complex, multi-course meal.
Frequently Asked Questions About Kitchen Design
How much space do I need between kitchen counters and an island?
You need an absolute bare minimum of thirty-six inches of clear floor space between your fixed perimeter counters and your freestanding island to allow for standard, comfortable walking traffic. However, if you want to successfully create a highly functional space that easily accommodates multiple people working and moving simultaneously, you should aim for forty-two to forty-eight inches of physical clearance. This generous spacing safely allows you to fully open a hot oven door or a loaded dishwasher while someone else comfortably walks behind you without causing a dangerous collision.
What is the most cost-effective way to update my kitchen design?
If completely reconfiguring your physical cabinetry heavily exceeds your current renovation budget, you should focus strictly on internal storage upgrades and strategic zone reorganization. Installing aftermarket, heavy-duty sliding drawers inside your existing base cabinets and adding specialized organizers for your scattered spices and heavy pans will drastically improve your daily efficiency for just a few hundred dollars. Simply taking the time to completely rearrange where you store your everyday utensils to perfectly align with your newly established prep, cook, and wash zones costs absolutely nothing but will completely revolutionize your entire cooking experience.
How can I implement these layouts in a rental property?
Renters can absolutely still achieve highly functional, organized kitchens without making any permanent structural changes or violating their lease agreements. You can invest in a heavy-duty, freestanding mobile kitchen cart featuring a solid butcher block top to serve as a portable island and a dedicated primary prep zone. Utilize clever over-the-door pantry organizers and expandable tension rods positioned neatly under the sink to brilliantly maximize your hidden storage capacity. You can also deploy thick, non-slip wooden cutting boards directly over half of your sink basin to instantly create the continuous, flat counter space necessary for extensive, comfortable meal preparation.
Where should I place my primary appliances for the best workflow?
You should place your main sink dead center in your primary work area, as you will invariably spend the vast majority of your active kitchen time standing directly in front of it washing fresh produce and cleaning up dishes. Locate your dishwasher right next to the sink to quickly contain wet, dripping messes. Position your heavy stove on an adjacent wall or nearby counter space, ensuring you leave plenty of uninterrupted, heat-resistant landing space on both sides for setting down screaming hot pans. Finally, place your large refrigerator near the primary entrance of the kitchen so passing family members can quickly access cold drinks without ever crossing through your active, hot cooking zone.
Take Action on Your New Kitchen Design
Creating a highly intentional kitchen that actively works alongside you rather than constantly fighting against you dramatically improves the overall quality of your daily life at home. You now possess the strategic blueprints necessary to critically evaluate your current space, effectively optimize your hidden storage, and construct a thoughtful layout perfectly tuned to your personal cooking style. Start small this coming weekend by fully reorganizing your primary prep zone, or dive right into planning a massive structural transformation using these six proven layout concepts. Grab your tape measure, outline your ideal work zones on the floor, and confidently build the effortlessly functional kitchen you truly deserve.